


Do you want to learn how to create an addon domain on HarmonWeb?
In this blog post, I’ll guide you step-by-step on how to add more domains to your existing HarmonWeb hosting account. Adding additional domains, also known as addon domains, is a simple process that doesn’t require accessing your cPanel. You can do it with just a few clicks in your client area.
At HarmonWeb, we offer various hosting packages that allow you to host multiple domains on a single account. For example, our starter package permits you to host up to 2 domains, which includes your primary domain and one addon domain, making it a total of 2 domains on one account.
Now, let’s get started with adding an addon domain! But before that, let me explain what an addon domain actually is.
An addon domain is like having a separate website with its own unique domain name, but it shares the same hosting account as your primary domain. It’s an excellent way to manage multiple websites without the need for separate hosting accounts.
So, let’s dive in and see how you can easily add an addon domain to your HarmonWeb hosting account right from your client area.
What Is An Addon Domain?
An addon domain is like having a brand-new website that you can set up right from your control panel. It’s a fully functional website with its own unique domain name, just like your main website. The great thing is, you can host multiple websites under one hosting account using addon domains.
Here’s how it works: When you create an addon domain, it’s like setting up a whole new website with its own separate folder on your hosting account. This means you can have different websites with different domain names, all managed conveniently from the same control panel.
Just like your main website, you can create email addresses and forwarders for your addon domain too. It’s just as powerful and flexible as your primary domain, making it a breeze to manage multiple websites without any extra hassle.
With addon domains, you have the freedom to expand your online presence without the need for separate hosting accounts. It’s a fantastic way to manage all your websites efficiently and keep everything in one place.
How To Add An Addon Domain To Existing Hosting Account On HarmonWeb
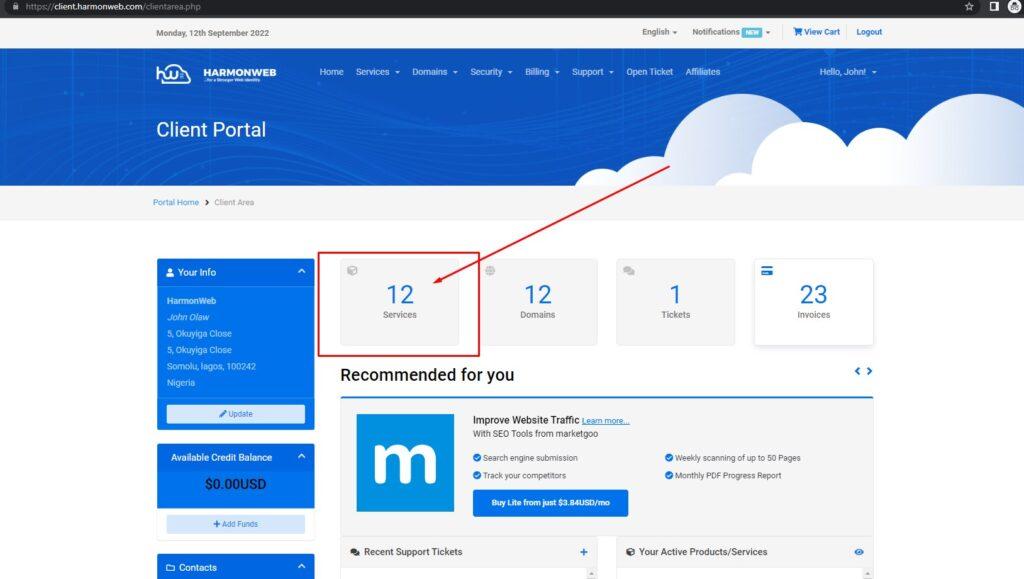
First, you need to login to your HarmonWeb client area then click on the services box as seen in the image below.
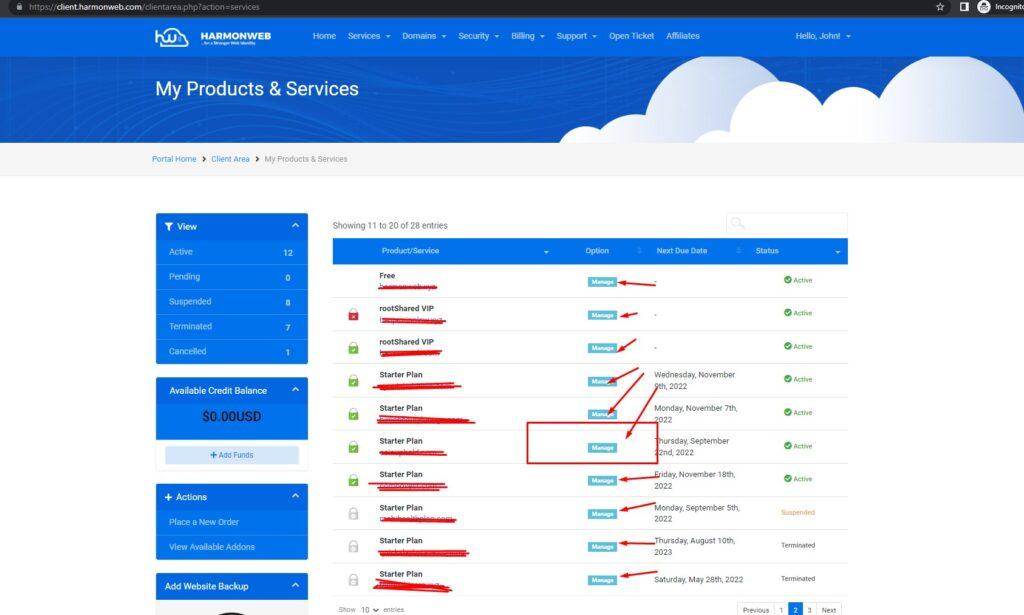
After clicking on this, you will see the list of your existing hosting services such as shared hosting, WordPress hosting, email hosting, VPS, and more. You will need to click the manage button that is right in front of the particular hosting account you want to add the addon domain, you can use the search box on the page to search the host primary domain if you have many services in your account.
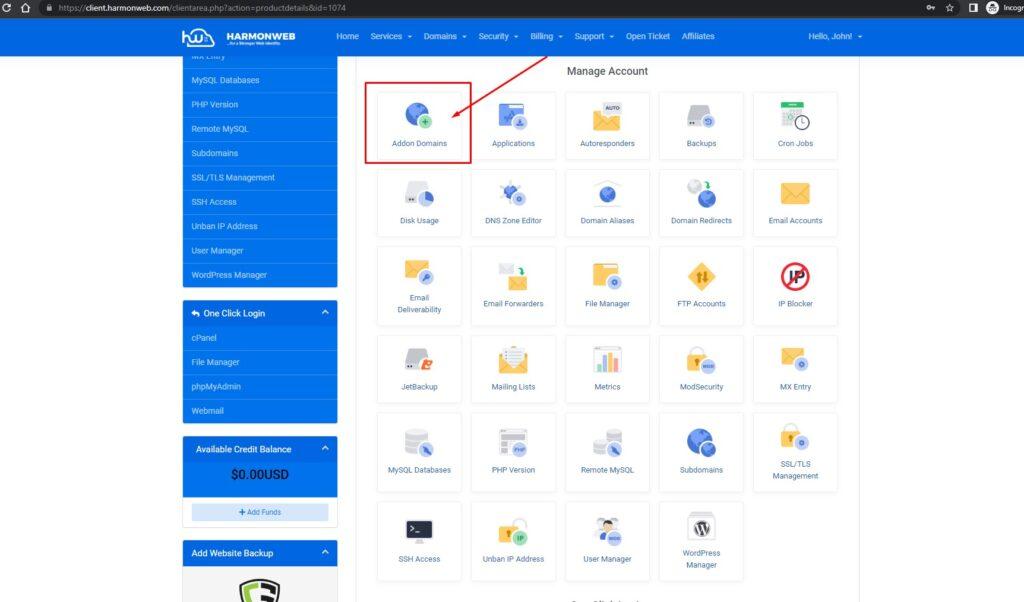
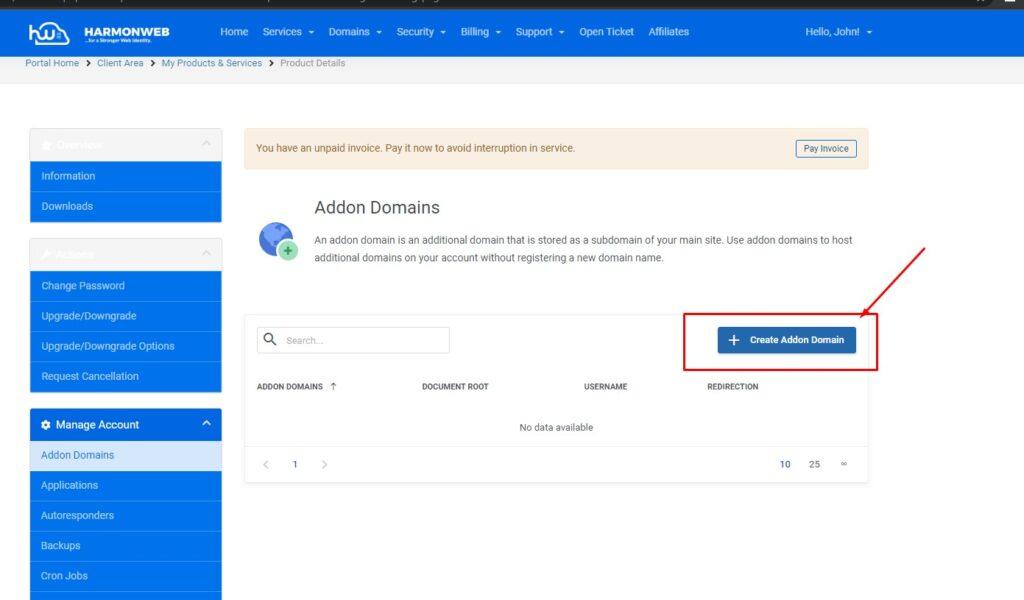
After this, the next this is to Scroll down on the next page you will be taken to, when you scroll down, you will see the list of tools to manage your hosting account including creating custom emails, managing redirection, file manager, WordPress manager and many more. Click on the Addon Domains
Once you click the addon domain, you will be taken to the next page where you will create the addon domain. You just need to click on the Create Addon Domain button on this page.
Once you click the button, a pop-up will show asking you to input the domain fields.
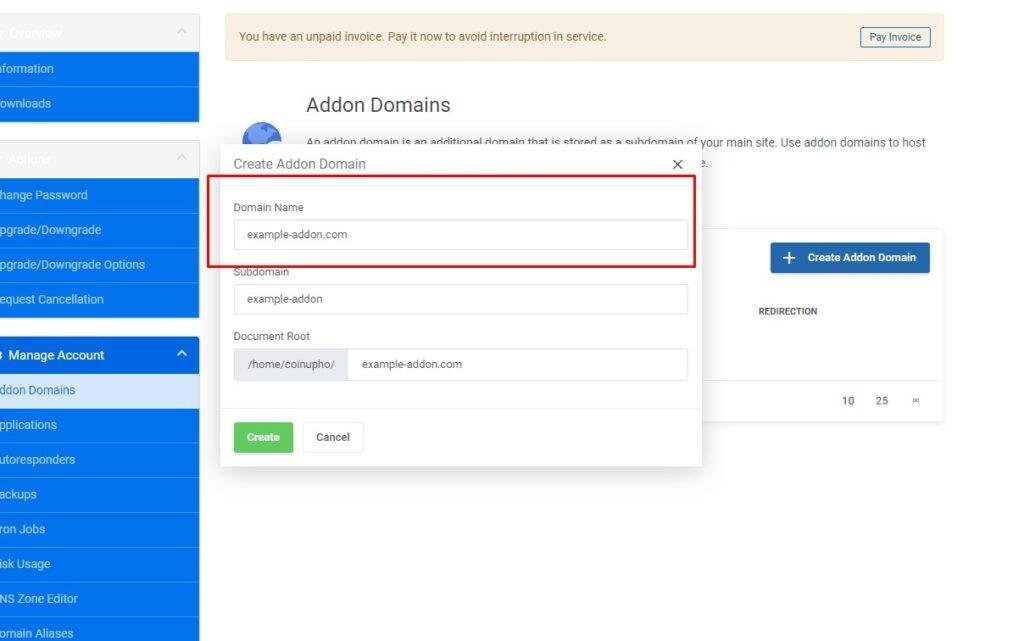
You only need to input the Domain Name box, and the subdomain and document root will auto-fill. The Document root is the folder name where your addon domain website files will be hosted.
How to create an addon domain with cPanel
First, you need to log into your cPanel. You can do that directly or through the Harmon Web client area.
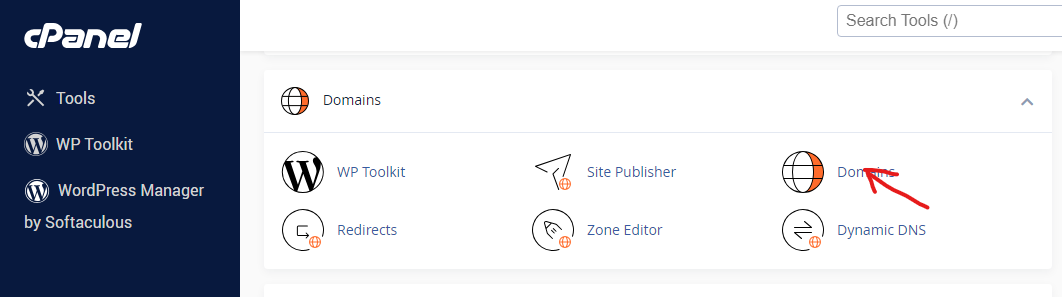
Once you are in the cPanel terminal, scroll down to the Domains section and click on Domains.

On the Domains page, click on Create A New Domain.

In the Create a New Domain section, enter the domain name you want to use in the Domain textbox.
If you want the addon domain to share the same directory as your main domain, you go ahead and select the Share document root (/home/yourusername/public_html) with “maindomain.com” option. If not, you deselect the option and specify the directory where you want the new domain files to stay.

When you are done, you go ahead and click on the Submit button.
You have successfully created your addon domain using your cPanel.
Once this is done you’ll also need to add the correct DNS records. You can do this at a later time if you wish but please note that any Addon domains will not connect or work until DNS records have been added.
What does that DNS mean, it means that you need to make sure that the addon domain points to our name server. our default name server is dns1.harmonweb.net and dns2.harmonweb.net. In some cases, you will be given a different name server depending on the server you a placed on. Your name server is also stated on the welcome email of your hosting account when you purchase a hosting service with us, you can also reach out to our team via live chat to confirm what is your hosting account name server.
If you liked this article, then please subscribe to our YouTube Channel for more WordPress video tutorials. You can also find us on Facebook.
[…] select the domain you want to create the domain for. You will have multiple domains if you had an addon domain to the hosting account, but in the case of no addon domain, then you will have only the domain you […]
[…] you have created an addon domain, to delete it, you have to log into your HarmonWeb client […]
[…] addon domain is a completely separate domain and site that has its own unique directory, content, and domain […]