


Do you want to Setup a Custom Domain Name on Blogger?
Connecting a custom domain to your Blogger.com blog is a great way to give your blog a more professional look and feel. It also allows you to use a personalised URL for your blog, rather than the default URL provided by Blogger.
The process of connecting a custom domain to your blog is relatively simple and can be completed in a few easy steps. This guide will walk you through the process of purchasing a domain, configuring your domain settings, and connecting your custom domain to your Blogger.com blog.
By the end of this article, you’ll have a fully functional custom domain for your blog that looks and feels more professional.
Table of Contents
5 Steps On How To Setup Custom Domain Name on Blogger
Connecting a custom domain to your Blogger.com blog is a simple process that can be completed in a few easy steps.
- Purchase a custom domain
- Configure your domain
- Set up a custom domain in Blogger
- Verify your domain
- Update your Blogger settings
1. Purchase a custom domain
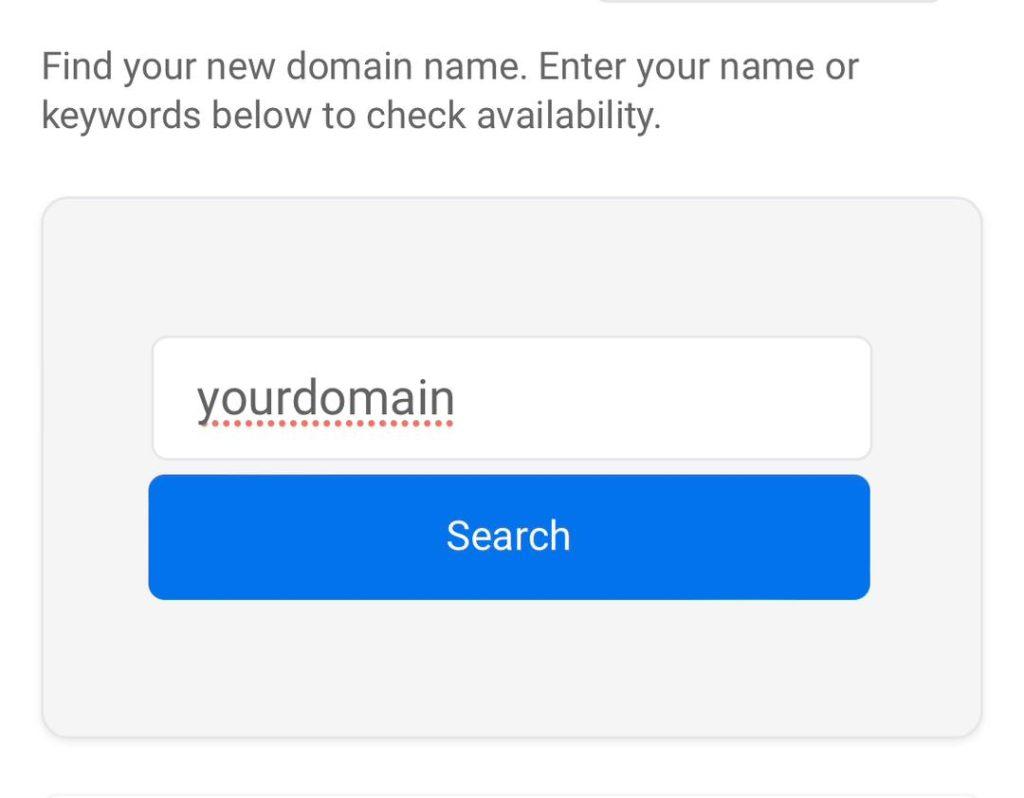
The first step in connecting a custom domain to your Blogger.com blog is to purchase a domain. You can purchase a domain from a variety of domain registrars such as Harmonweb, Bluehost or Namecheap. The cost of a domain can vary depending on the registrar and the extension you choose (e.g. .com, .org, .net).
Once you have purchased your domain, make note of the domain name and the name servers that are provided to you by the registrar.
2. Configure your domain
Once you have your domain, you will typically need to update the DNS settings for your domain. This can be done by logging into your account with the domain registrar and updating the name servers to the ones provided by Blogger.com.
The exact process of doing this will vary depending on the registrar you purchased your domain from, but most registrars will have a control panel where you can manage your domain’s settings. Look for an option to update the DNS settings or name servers for your domain.
You will need to enter the Blogger name servers, which will be provided by Blogger once you have set up a custom domain. Blogger uses Google’s name servers, which are typically:
ns1.google.com
ns2.google.com
ns3.google.com
ns4.google.com
It’s important to note that it may take up to 24 hours for the DNS changes to propagate and take effect.
3. Set up a custom domain in Blogger
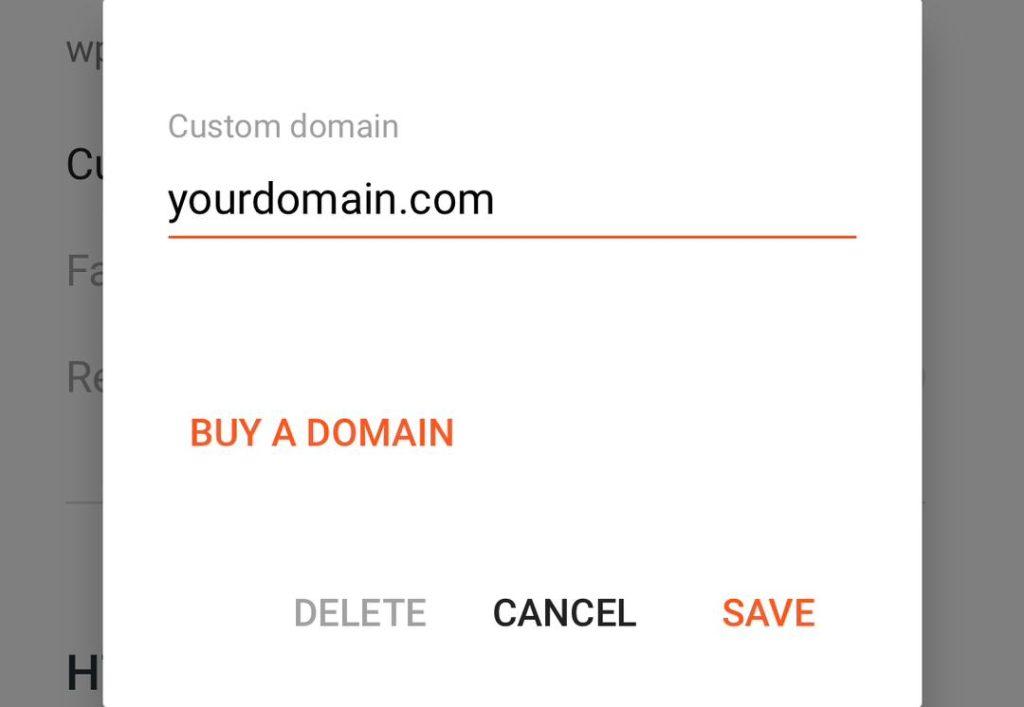
Next, log in to your Blogger account and go to the settings for your blog. In the settings, you will find an option to add a custom domain. Enter the domain name you purchased and click on the “Save” button.
4. Verify your domain
Blogger will then ask you to verify that you own the domain. This can be done by adding a CNAME or TXT record provided by Blogger to the DNS settings of your domain. Once you have added the record, click on the “Verify” button in Blogger to complete the process.
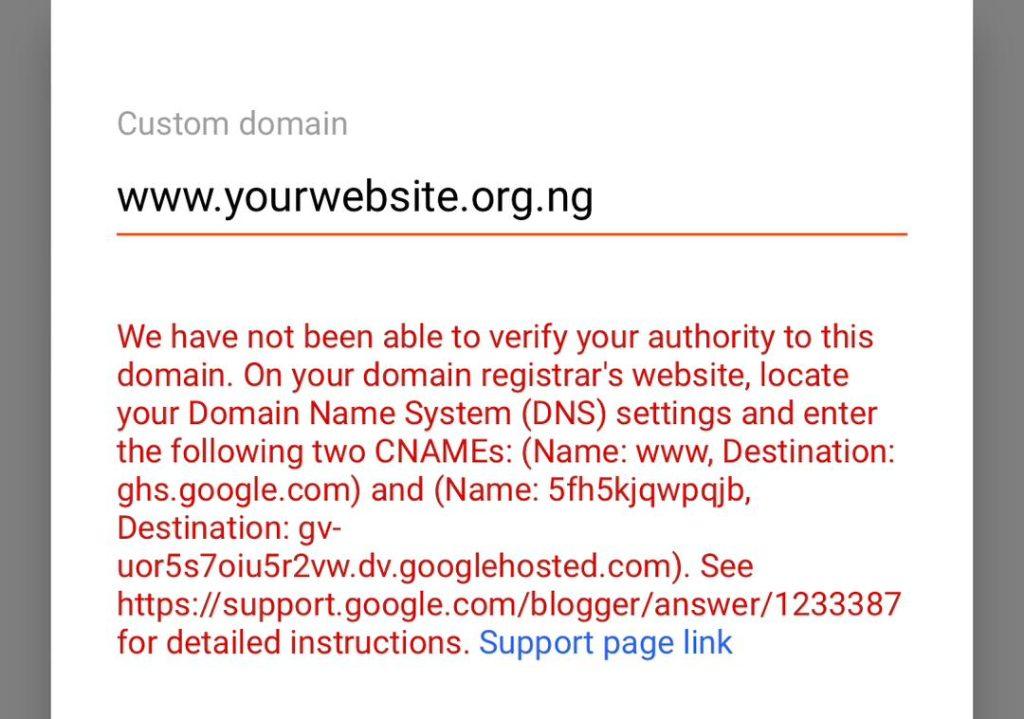
Most times, if you purchase domain on Domain registrar providers like Harmonweb, You will asked to submit the CNAME by Creating a Support Ticket.
5. Update your Blogger settings
Go back to the settings for your blog and select the option to use your custom domain. This will update the URL for your blog to the custom domain and make it accessible via the new URL.
And that’s it! Your custom domain is now connected to your Blogger.com blog. Keep in mind that it may take some time for the changes to propagate and your custom domain to be fully functional.
Please note that the steps may vary slightly depending on the domain registrar you choose. It is always recommended to check the domain registrar’s help center for more detailed instructions.
It’s also worth nothing because Blogger allows you to use a custom domain with your blog, it does not provide web hosting services. This means that you will need to use a third-party web hosting service if you want to host your blog on your own domain.
Additionally, using a custom domain with Blogger does not give you access to some of the advanced features that may be available on other blogging platforms. For example, you cannot use your own domain name with the dynamic views.
If you liked this article, then please subscribe to our YouTube Channel for WordPress video tutorials. You can also find us on Facebook.