Cloudflare is a powerful platform that can significantly improve the performance and security of your website. By connecting your website to Cloudflare, you can take advantage of their global network, caching capabilities, and security features.
In this article, we will guide you through the process of setting up and connecting your website to Cloudflare.

Table of Contents
How to Setup/Connect Your Website to Cloudfare(Video)
6 Steps on How to Setup/Connect Your Website to Cloudfare
Step 1: Sign Up for a Cloudflare Account
The first step is to sign up for a Cloudflare account. Visit the Cloudfare website and click on the “Sign Up” button.
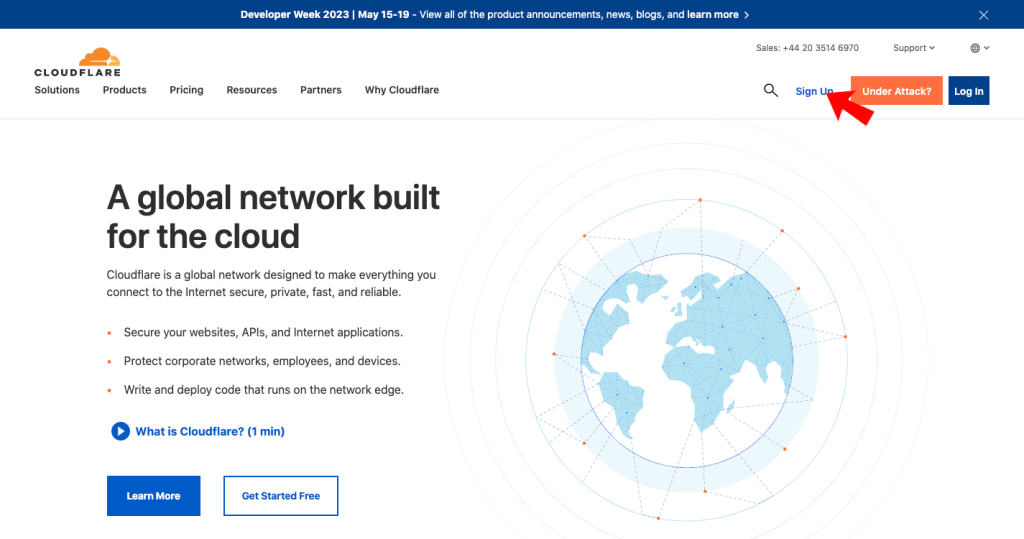
Fill in the required information and follow the instructions to create your account. Once you’ve successfully signed up, you’ll be ready to add your website to Cloudflare.
Step 2: Adding Your Website to Cloudflare
After logging in to your Cloudflare account, click on the “Add a Site” button. Enter your website’s domain name and click on the “Add Site” button.

Cloudflare will scan your domain’s DNS records and provide you with a list of DNS records to confirm. Review the records and click on the “Continue” button to proceed.
Step 3: Configuring DNS Settings for Your Website
Next, you’ll need to configure your DNS settings to ensure that your website works seamlessly with Cloudflare. Cloudflare will automatically import your existing DNS records, but you may need to make some adjustments.
Take a close look at your DNS records and make any necessary changes. Once you’re done, click on the “Continue” button.
Step 4: Verifying DNS Changes and Activating Cloudflare Services
Cloudflare will verify the DNS changes you made to confirm that your website is ready to be connected. You can simply change the nameservers in your domain settings. It may take a few minutes or hours for the verification process to complete.
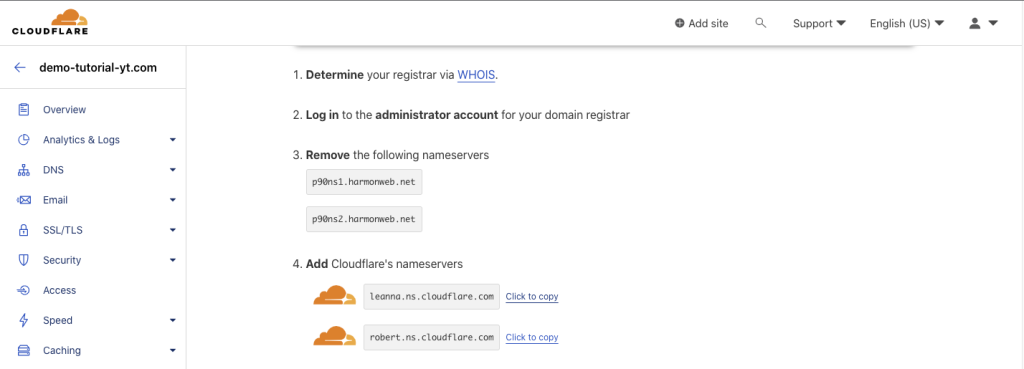
Once the verification is successful, Cloudflare will display a message confirming that your website is active on their network.
Step 5: Fine-tuning Cloudflare Settings for Optimal Performance
Now that your website is connected to Cloudflare, you can fine-tune various settings to optimize its performance.

Cloudflare provides a range of performance-enhancing features, such as caching, minification, and image optimization. Explore the Cloudflare dashboard and adjust the settings according to your website’s needs.
Step 6: Enabling SSL/TLS Encryption for Your Website
SSL/TLS encryption is crucial for securing your website and building trust with your visitors. Cloudflare offers free SSL certificates and makes it easy to enable HTTPS for your website. In the Cloudflare dashboard, go to the “SSL/TLS” section and choose the desired SSL/TLS encryption mode.
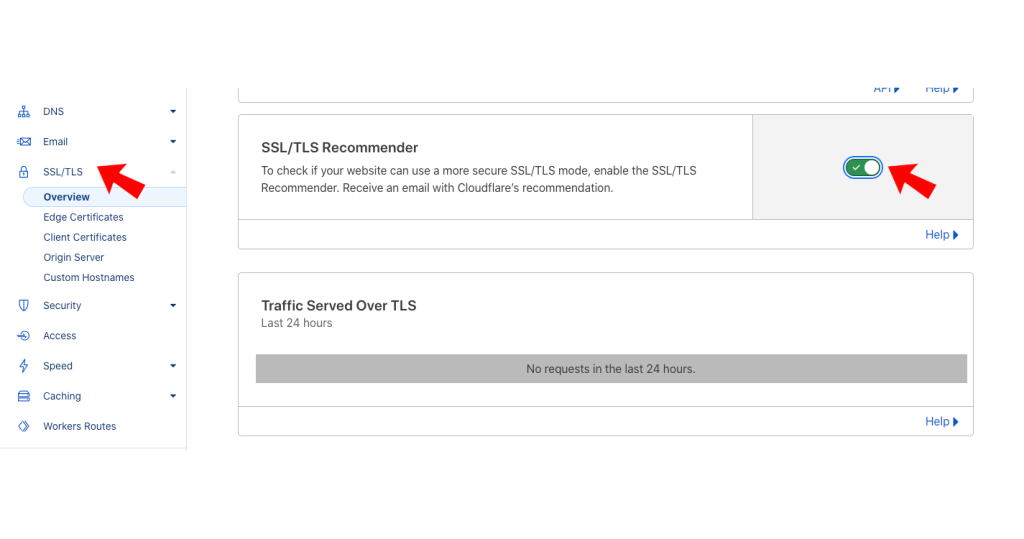
Cloudflare will handle the certificate issuance and installation process for you.
After completing the setup process, it’s essential to test and monitor your website’s performance with Cloudflare. Use tools like Pagespeed Insights to measure the speed and performance of your website. Additionally, Cloudflare provides detailed analytics and monitoring features to help you keep track of your website’s performance and security.
If you liked this article, then please subscribe to our YouTube Channel for more WordPress video tutorials. You can also find us on Facebook and Twitter.