In the tutorial, I will show you how to disable directory browsing in cPanel.
Directory browsing can leave important information on your website open to everyone’s access and may leave your site open to malicious attacks from hackers who may find and exploit weaknesses in your server, plugins or theme.
Disabling directory browsing is very useful to keep visitors and users from accessing and browsing files in your directory.
Let’s get started.
How To Disable Directory Browsing In cPanel
- Log into your cPanel.
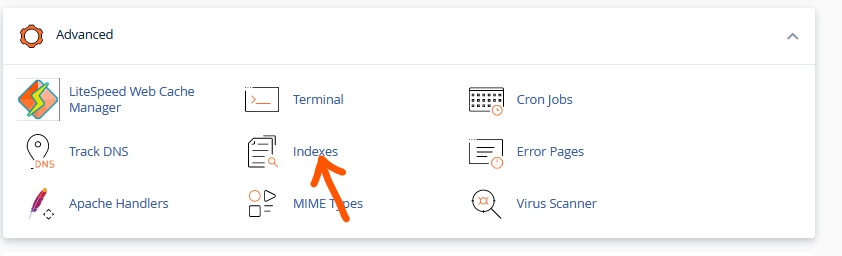
- Scroll down to the Advanced section and select Indexes.
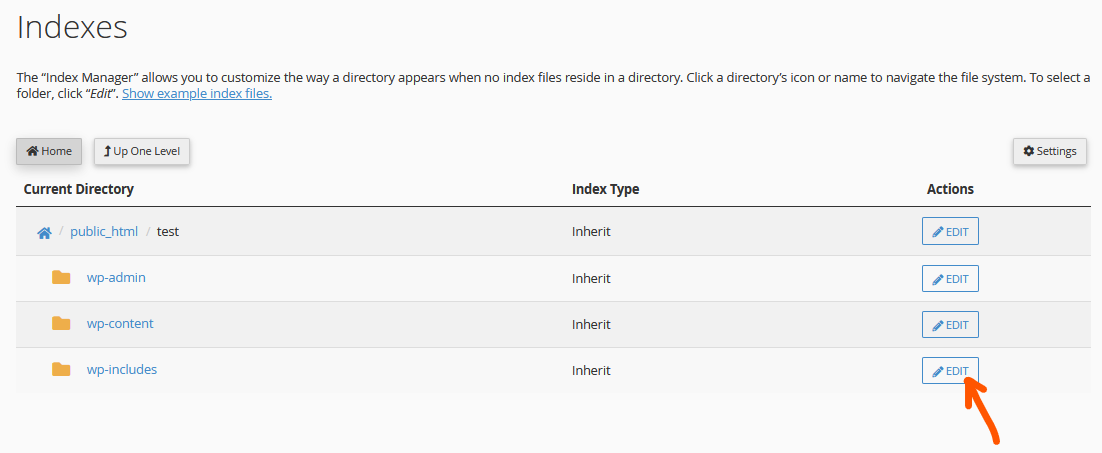
- On the next page, you will see the directory structure of your website. Scroll down and click on the public_html folder.
- In the public_html folder, go to wp_includes and click on the Edit button.
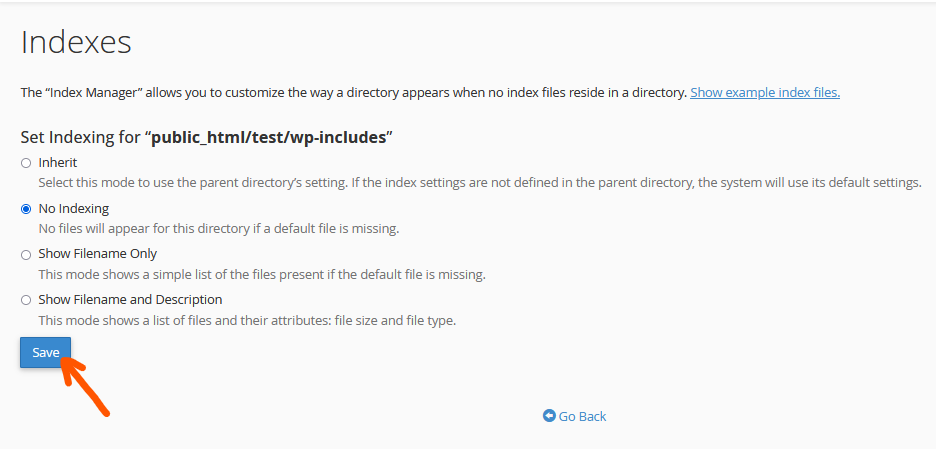
- Select the No Indexing option and click on Save to save your option.
When you have successfully saved, you will now successfully disable directory browsing in cPanel.
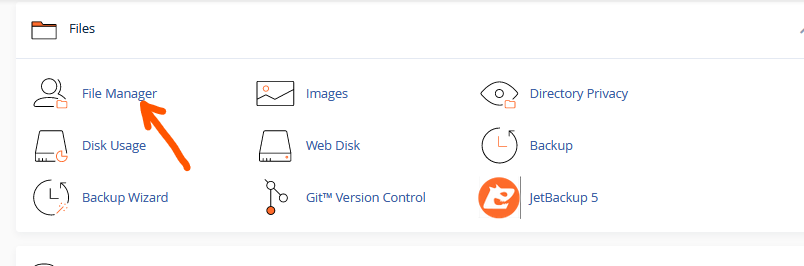
How To Disable Directory Browsing In File Manager
- In the cPanel, go to the Files section and select File Manager.
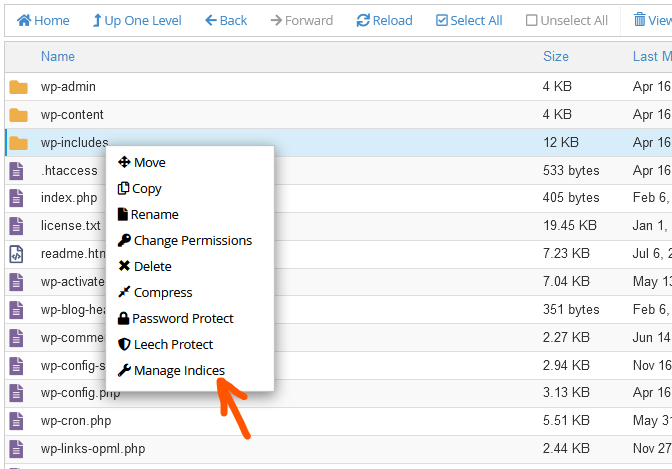
- In the File Manager, locate and open the public_html folder.
- In the public_html folder, go to wp-includes. Right-click on wp-includes and on the drop-down menu that appears, select Manage Indices.
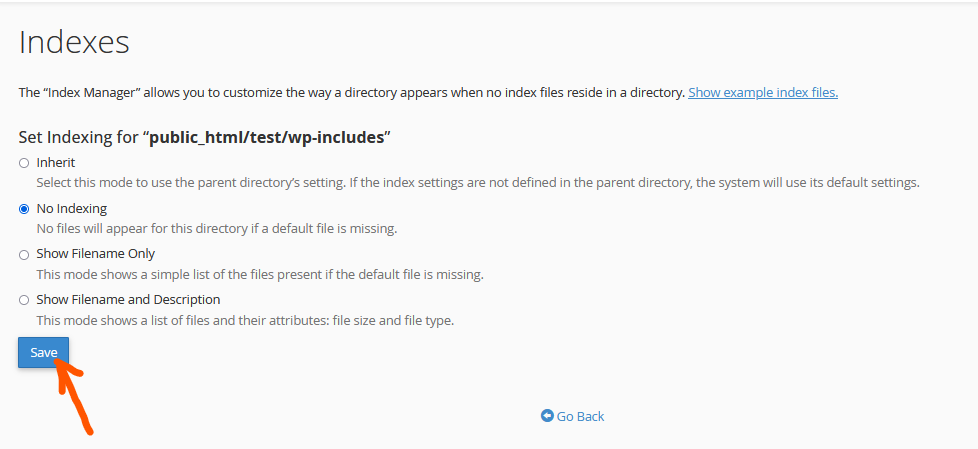
- You will be taken back to the Indexes page. Select No Indexing and save.
To check if the directory browsing has been disabled, simply search yourdomain.com/wp-includes, if you get a 403 error on the screen, it means the operation was successful.
If you have any questions on how to disable directory browsing in cPanel, you can leave them in the comment section. I would love to hear from you.