In this tutorial, I will show you how to setup leech protection in cPanel.
What is leech protection?
Unauthorised visitors usually get access to the usernames and passwords that users post publicly on your website. The practice was called leeching.
cPanel offers leech protection that limits the number of times your website users can access a secure area within a two-hour period. Using the leech protection, you can limit users to four logins over a two-hour period. Once users exceed the login limit, you get an email notification, the user is redirected to another URL, or their account is disabled.
Let’s get started.
How To Setup Leech Protection In cPanel
- Log into your cPanel.
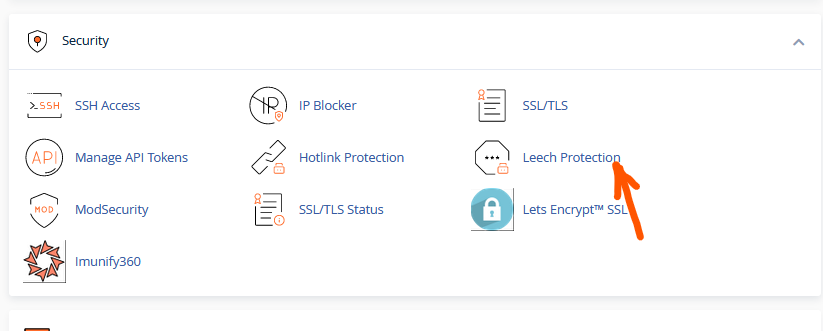
- Scroll down to the Security section and select Leech Protection.
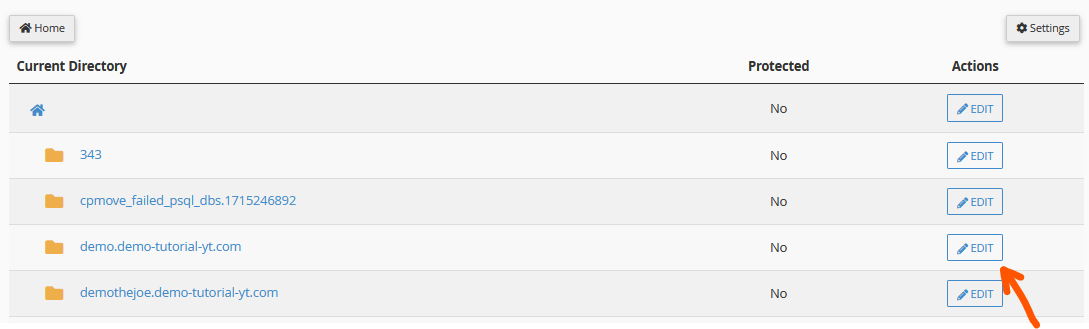
- Select the directory you want to set up the Leech Protection for and click on Edit.
- Under Set up Leech Protection, enter the number of logins that each user is allowed to have in a two-hour period.
- Set the URL the user will be redirected to if they exceed their login limit.
- Check the Send Email Alert To checkbox and enter the email address to get the email when the user exceeds their login limit.
- Check the Disable Compromised Accounts checkbox to disable accounts that have been compromised.
- Then click Enable.
Following the steps above, you can setup leech protection in cPanel. If you have any question, I will love to hear from you.