

What is Nodejs?
Node.js is an open-source server side runtime environment built on Chrome’s V8 JavaScript engine. It provides an event driven, non-blocking (asynchronous) I/O and cross-platform runtime environment for building highly scalable server-side application using JavaScript.
Node.js can be used to build different types of applications such as: command line application, web application, real-time chat application, REST API server etc. However, it is mainly used to build network programs like web servers, similar to PHP, Java, or ASP.NET.
Some popular websites using Nodejs are:
- Netflix
- Ebay
- Paypal
- Trello
- Uber & Lots more.
How to setup Nodejs on cpanel
If you already have a hosting plan, you can login to cpanel using your cpanel credentials. But if you’re yet to buy, you can purchase a shared hosting plan from Harmonweb.
To set up a Node.js application using cPanel, use the fprocedures below.
Step 1: Create the application
- Login to your cpanel – Learn how to login to your cpanel here
- In the SOFTWARE section of the cPanel home screen, click Setup Node.js App.
3. Click CREATE APPLICATION to start the application setup.
4. Fill in all the fields.
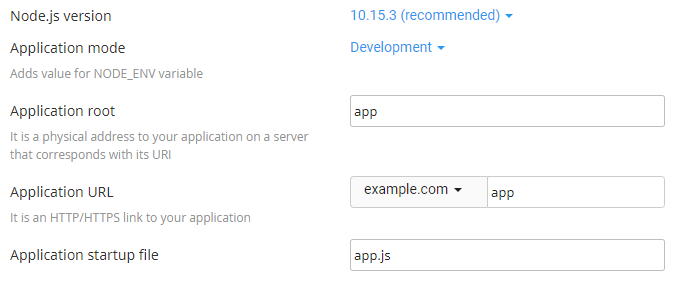
- Node.js version – select your perferred version from the drop down list
- Application mode – choose Development or Production from the list. Development may be chosen initially and changed to production later.
- Application root – the file system location for application files. The entry will be appended to /home/username to form the complete path to the application files in the cPanel home directory.
- Application URL – the address of the application on the Internet
- Application startup file – the initial file that will be processed when launching the application
5. When the form is complete, click the CREATE Button.
6. The application should start automatically. To view a test page for the application, click OPEN
Now you have successfully installed Nodejs on your server. If you got to this step, Grab a coffee and take a deep breath because you are only few steps away to your nodejs journey.
Now lets create a package.json file and install npm to enhance the application enviroment. To do so, follow the next two steps.
Step 3: Create package.json file
To create the package.json file, follow these steps below:
- In the files section of cpanel main page, locate file manager and open.
- In the left hand column of File Manager, click the text of the application root folder.
- Click +File icon to create a new file.
- In the New File dialog box, type the filename package.json, and then click Create New File.
- Right click on the package.json file and select edit.
- Type the following json code on the etxt editor screen and click Save Changes to save the file:
{
  "name": "app",
  "version": "1.0.0",
  "description": "My App",
  "main": "app.js",
  "scripts": {
    "test": "echo \"Error: no test specified\" && exit 1"
  },
  "author": "",
  "license": "ISC"
}
Step 3: Installing npm
To make use of these tools (or packages) in Node. js, we need to be able to install and manage them in a useful way. This is where npm, the Node package manager, comes in. It installs the packages you want to use and provides a useful interface to work with them.
Follow the steps below to install npm.
- In the SOFTWARE section of the cPanel home screen, click Setup Node.js App
- In the Actions column of the Web Applications list, click the pencil icon to edit the application
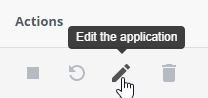
3. Click Run NPM Install button.
4. The NPM installation runs and displays a success indicator when complete.
Congratulations you just created a nodejs application, created a package.json file and installed npm on your cpanel.Let us know where you are facing problems in the comment section.


Thanks , I have recently been looking for information approximately this subject for ages and yours is the best I’ve found out so far. However, what in regards to the conclusion? Are you sure in regards to the supply?