Do you want to learn how to use WebP images in WordPress?
WebP is a modern image format developed by Google that provides superior image quality with smaller file sizes compared to traditional image formats such as JPEG and PNG. WebP images are becoming increasingly popular among web developers and designers due to their smaller file size and improved image quality. WebP images are supported by most modern web browsers, including Chrome, Firefox, and Edge.
In this article, we will explore how to use WebP images in WordPress to enhance the performance of your website.

What is WebP?
WebP is an image format developed by Google that uses both lossy and lossless compression to reduce the file size of images. It is designed to provide smaller file sizes and faster loading times for web images while maintaining good image quality.
WebP achieves this by using a variety of compression techniques, including predictive coding, spatial prediction, and entropy coding. It also supports alpha channel transparency, animation, and ICC profile metadata.
WebP is supported by a variety of web browsers, including Google Chrome, Microsoft Edge, Opera, and Firefox, as well as by some image editing software. It can be used to convert existing image files to the WebP format, which can result in significant reductions in file size without noticeable degradation in image quality.
How to Use WebP Images in WordPress
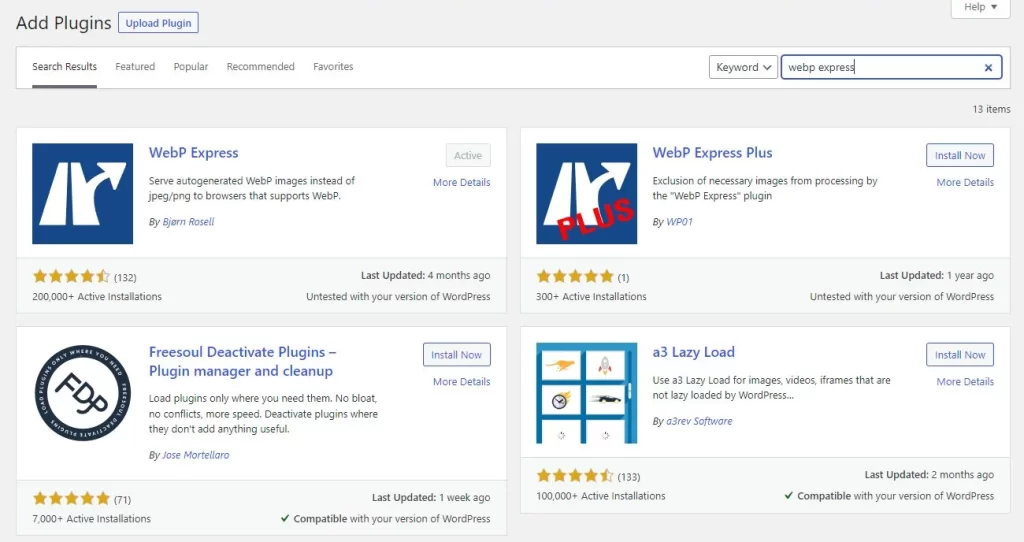
The easiest way is to use a plugin such as WebP Express. This plugin will automatically convert your existing images to WebP format and serve them to compatible browsers.
To get started, Go to the WordPress dashboard and click on “Plugins” on the left-hand side. Click on “Add New” and search for “WebP Express” in the search bar. Click “Install Now” and then “Activate” once the installation is complete.

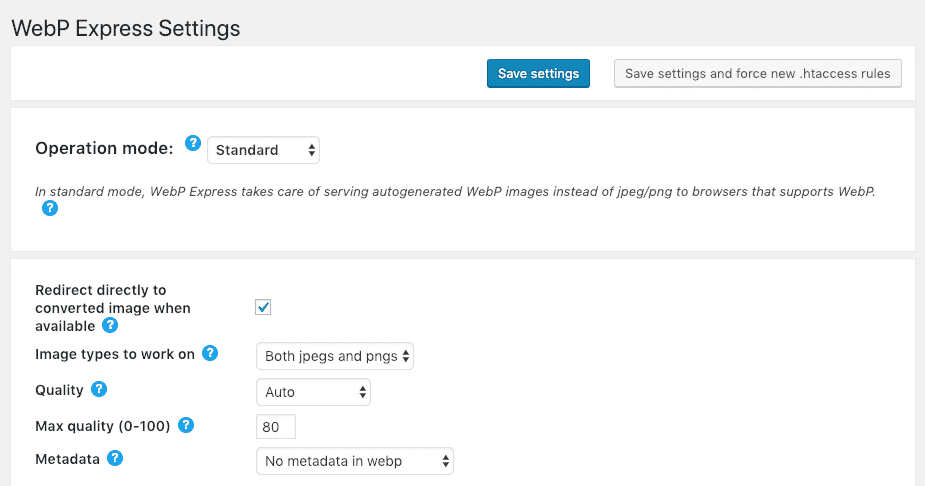
Upon Activation, go to “Settings” and click on “WebP Express” to access the plugin’s settings.

Under the “General” tab, choose whether you want to serve WebP images to all visitors or only to those who can support it. Under the “Advanced” tab, choose which image sizes you want to convert to WebP and whether you want to keep the original images as well. Once you’re done, you can Save your changes.

Using WebP images in WordPress is a great way to improve your website’s performance and reduce its file size. By following these steps, you should be able to install and configure the WebP Express plugin for image optimization in WordPress.
If you liked this article, then please subscribe to our YouTube Channel for WordPress video tutorials. You can also find us on Facebook.


