In this tutorial, I will show you how to create custom error page in cPanel.
When a user of your website experience error like a 400 (Not Found) error to 500 (Internal server error) error, the user will be taken to the default error page. Using the cPanel, you can create a custom error page using Error Pages.
Let’s get started.
How To Create Custom Error Page In cPanel
- Log into your cPanel.
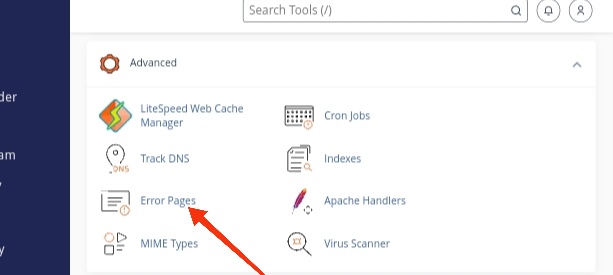
- Scroll down to the Advanced section and click Error Pages.

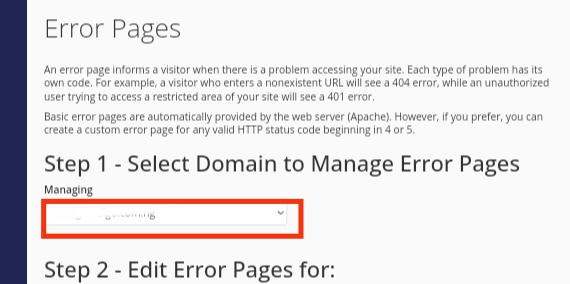
- Select the domain that you want to create the custom error page for from the Managing drop-down option.

- Select the error from the list of Common Error Codes.
- You will be taken to the editor page. You can enter HTML code here, or insert premade tags if you want. Here’s the list of available tags:
- Referring URL – Lists the URL you came from.
- Visitor’s IP Address – Lists the IP address of your site visitor.
- Requested URL – Shows the URL you are attempting to access.
- Server Name – Shows the name of the server.
- Visitor’s Browser – Lists the visitor’s browser type.
- Redirect Status Code – This will display the error message code, such as 500, or 404, etc.
- Click the Save button at the bottom.
Setup Your .htaccess File
- Enter File Manager, and edit the .htaccess file to include the rule for the errors you created. Below is the file formatting to use:
ErrorDocument 400 /400.shtml
ErrorDocument 401 /401.shtml
ErrorDocument 403 /403.shtml
ErrorDocument 404 /404.shtml
ErrorDocument 500 /500.shtml- Save the . htaccess file.
You have successfully created a custom error page in cPanel. If you have any questions, you can leave it in the comment section. I will love to hear from you.


