Although cPanel is excellent for managing websites, apps, and email accounts hosted on data center servers, many people prefer to host online services at their home or business. Unfortunately, many residential and business ISPs do not provide dedicated IP addresses, which means you cannot connect to services hosted on their networks using a domain name.
Dynamic DNS, which automatically updates domain records when IP addresses change, is the solution. With our new Dynamic DNS tool, creating dynamic domains in cPanel is a breeze. We’ll explain how dynamic DNS works and show you how to set up a domain in minutes in this article.
What is Dynamic DNS?
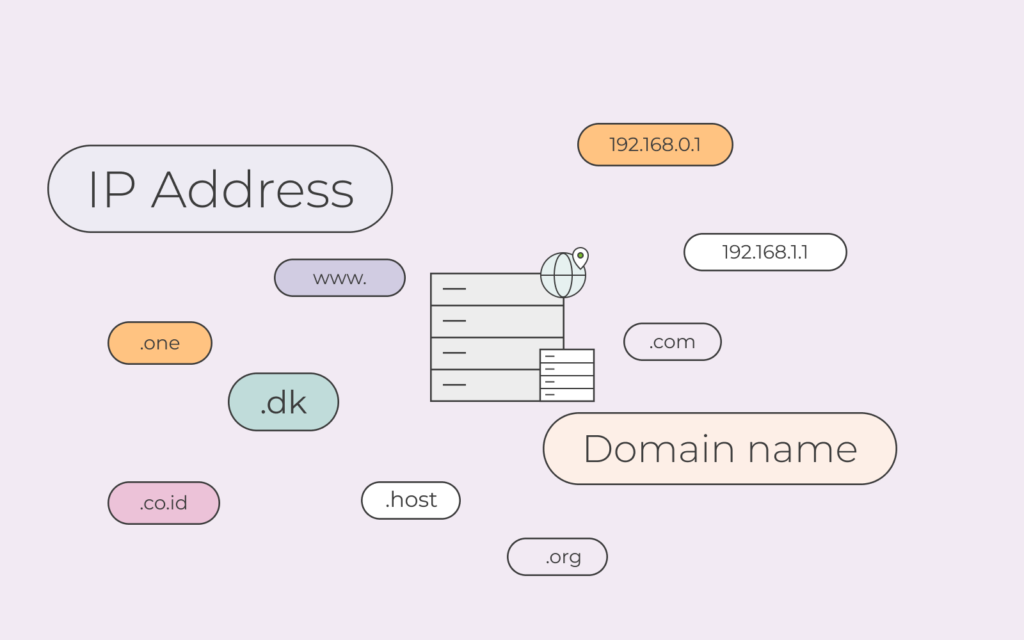
Dynamic DNS is a system that automatically updates DNS (Domain Name System) records. When you enter a URL into a web browser, it requests that a DNS server convert the domain name into an IP address, which is a unique number that identifies devices on the internet. To determine the IP address associated with a domain, the server examines DNS records stored in zone files.
When an IP address changes, as it does on most home and business networks, the records become quickly out of date. The connection is lost because the server sends the incorrect address.
Dynamic DNS allows devices such as network routers to notify servers when their IP address changes. The device connects to a unique web address, authenticates, and transmits the new IP address. cPanel updates the zone records, and the next time someone attempts to connect, they are given the correct IP address.
Creating DDNS Domains with cPanel
For many years, cPanel has supported dynamic DNS domains. Previously, we recommended the cPanel Dynamic DNS Tools script, which runs on a server on your network and can update zone records automatically.
The script is still useful for users of older cPanel versions, but the Dynamic DNS interface introduced in cPanel version 94 simplifies the process by integrating with routers and firewalls without the need for a third-party script.
Managing dynamic domains consists of two steps:
- Create the domain using the Dynamic DNS interface in cPanel.
- Using the information provided by cPanel, configure your network’s router or firewall.
Create a New DDNS Domain in cPanel
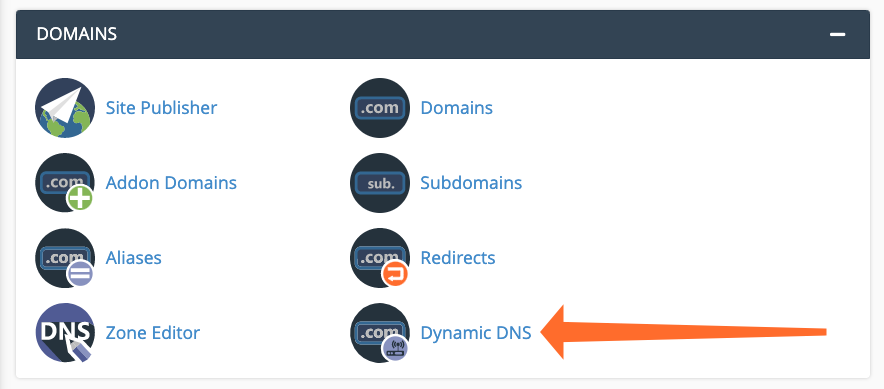
First, we’ll configure the domain. Log in to your cPanel account and navigate to Dynamic DNS, which is located in the DNS section of the main page.
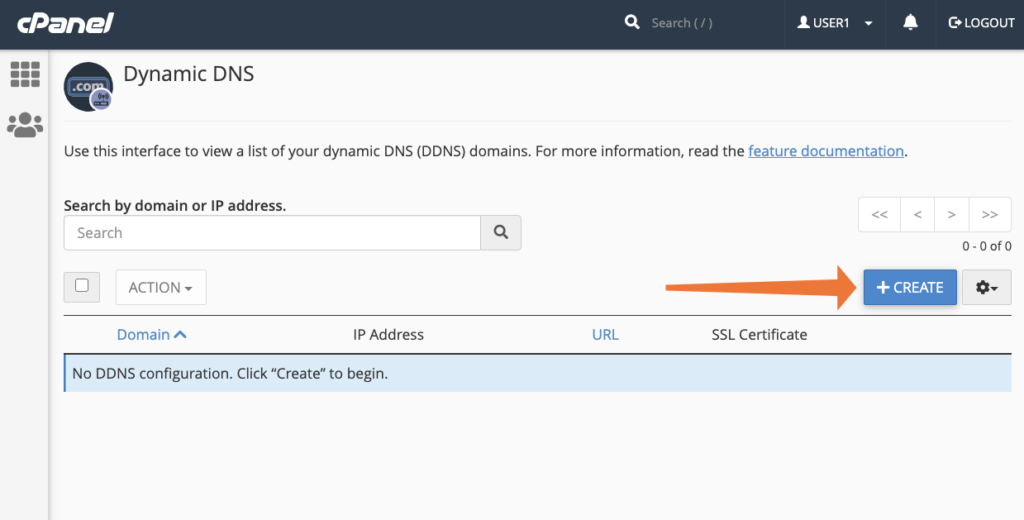
Click the Create button.
Enter a new subdomain for a domain that is managed through your cPanel account. If you want to host a file server on a business or home network, for example, you could use “files” as the subdomain.
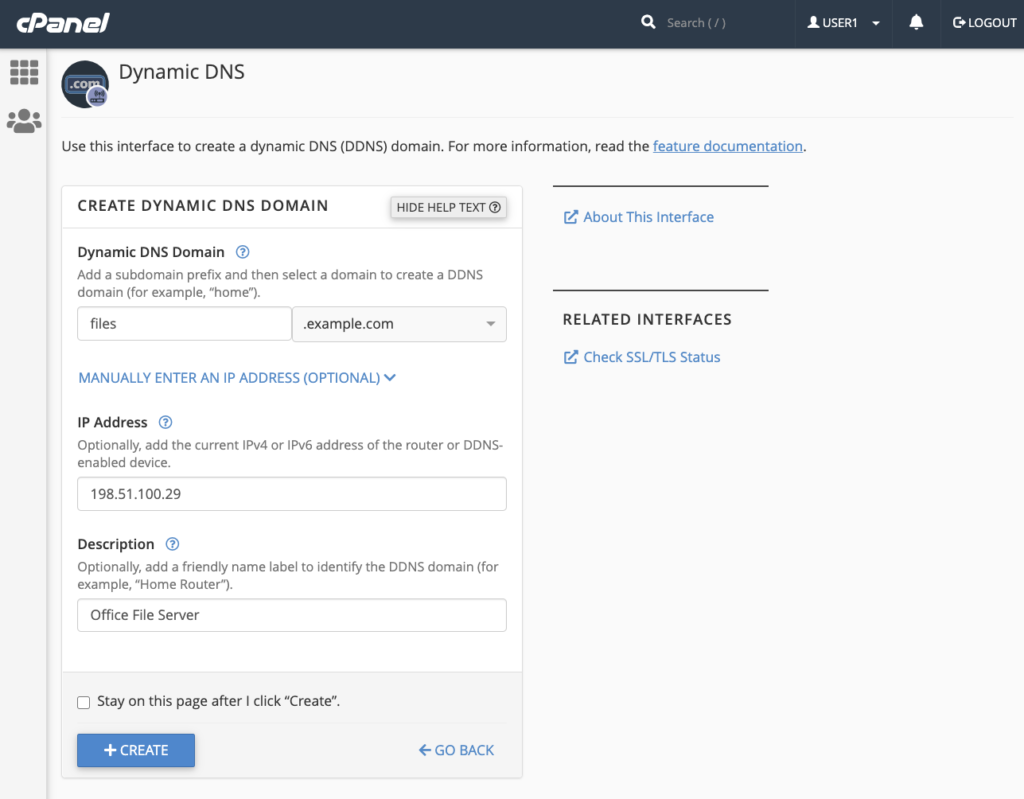
You can also specify the current IP address of the network or device to which your domain will point, though this will be automatically updated once dynamic DNS is activated. Finally, you can give the domain a name to help you remember what you’re using it for, such as “Office File Server.” When you click the Create button on this page, cPanel creates the subdomain and generates a unique URL known as a webcall.
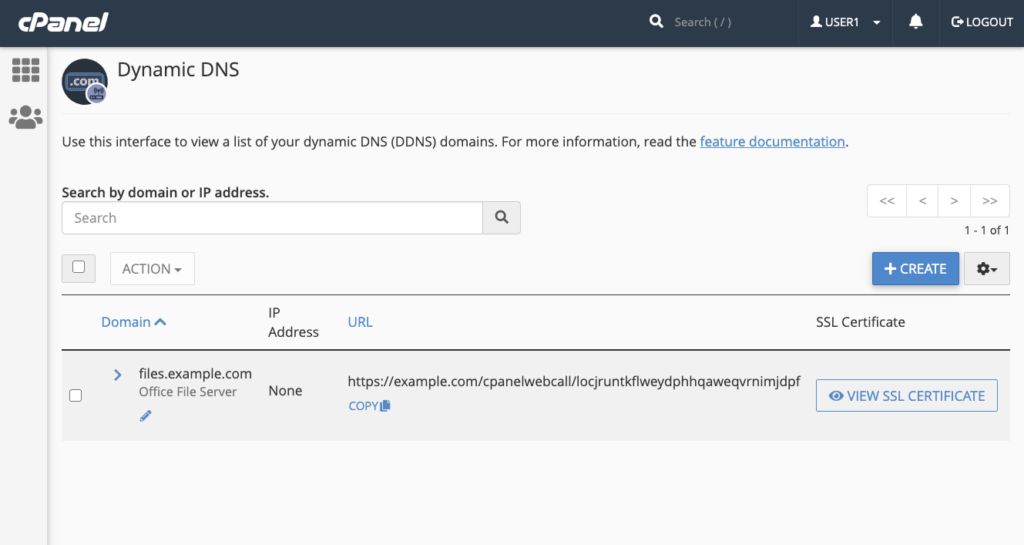
The webcall address is used by a router or server to notify cPanel that its IP address has changed. When cPanel receives a valid message at this URL, it updates the zone records for the domain.
Configure Your Router for Dynamic DNS
We can’t provide specific instructions because each router, firewall, and DDNS client has its own process for configuring custom DDNS domains.
In most cases, you will be required to:
- Identify your device’s DDNS configuration interface.
- Select Custom DDNS provider or similar.
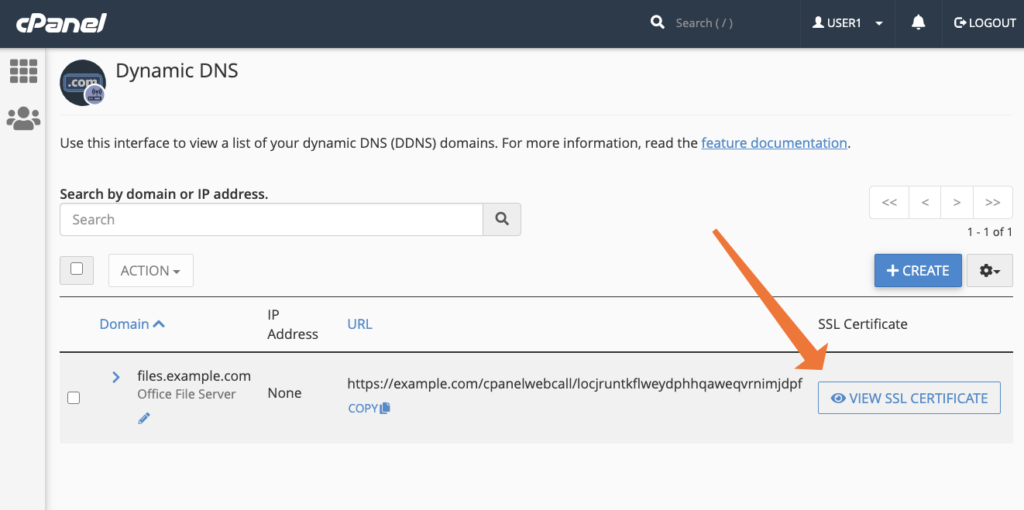
You may also be asked to provide an SSL certificate so that the device can connect via an encrypted channel. By clicking the View SSL Certificate button, you can view and copy the SSL certificate for your domain. We strongly advise using SSL to avoid sending your username and password unencrypted.
Consult the documentation for your device and its software if you’re having problems. Some of the most popular open-source router and firewall software documentation includes:
Once configured, your device will use the webcall URL to contact cPanel whenever its dynamic IP address changes, ensuring that the service hosted on your network can always be reached at the domain name you specify.