Keeping your application always up to date is essential to improve its security and avoid unnecessary risks. This maintenance does not only involve updating WordPress core, templates, or plugins, there are other aspects that you must also take into account. So today I am going to tell you about one of them, I am going to explain how to update PHP in WordPress.
Table of Contents
Do I have to update PHP in WordPress?
As with any other software, the most widely used programming language, PHP, also requires updating and using recent versions.
Keep in mind that outdated versions of PHP can cause incompatibilities with new versions of your plugins or templates, as well as with the WordPress core itself. These types of incompatibilities can cause errors in the functioning of your site, but also more “serious” problems such as the WordPress white screen, which leaves your site completely inoperative.
And not only are errors derived from version incompatibilities, but updating PHP in WordPress is necessary to maintain the security of your site and, in addition, improve the performance of your application.
Security
When a software update is released, in this case, PHP, security patches are usually incorporated that correct vulnerabilities or errors that can put your website at risk.
Also, at the same time that new versions are released, others become obsolete and are no longer supported, such as PHP 5.6, PHP 7.1, and PHP 7.2. In the case of PHP 7.3, support has ended in December 2020, although security maintenance continued until December 2021.
So much so that WordPress already recommends the use of a version of PHP equal to or greater than 7.4. Therefore, if you use an older one, it is best to update.
Performance
In addition to security patches, the new versions of PHP incorporate functionalities and features in this programming language that improves the speed and favor the performance of your web page.
And considering that Google takes into account the speed and loading times of your site when it comes to positioning it in the SERPs, don’t you think that’s more than enough reason to update PHP in WordPress?
Tell me what you prefer: A WordPress from 2021 or one from 2015?
How to know the version of PHP that my WordPress has?
Before updating PHP in WordPress, the first thing is to know what version of PHP I have installed.
This is very simple and you can do it directly through the WordPress administration panel.
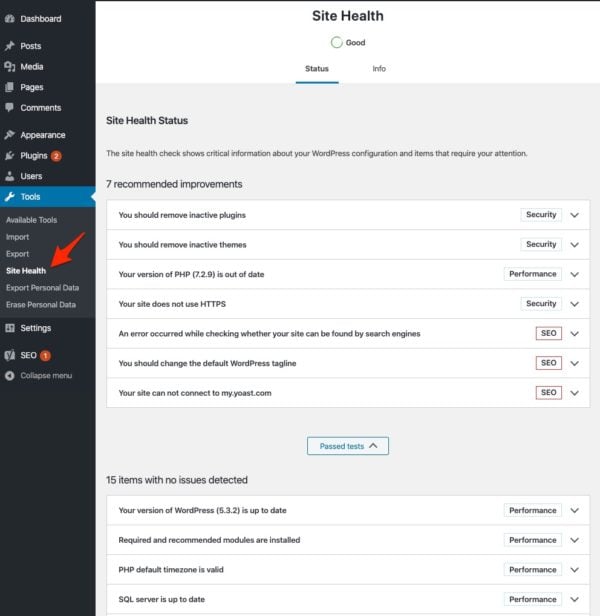
- Access the WordPress backend and, in the side menu, click on “Tools” – “Site Health”.
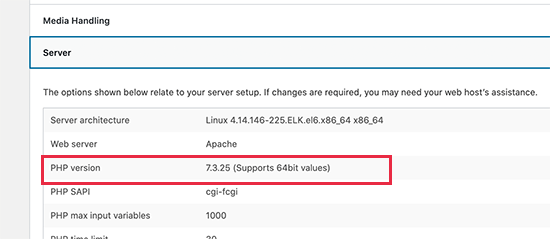
- Go to the “Information” tab and open the “Server” section. There you will see all the information related to your service (PHP version, type of server, etc.).
Can’t find the “Site Health” tool in WordPress? That means that in addition to updating the PHP version, you also need to update WordPress.
This tool was already incorporated with the WordPress 6.0 release, so it’s time to bring your application up to date.
In any case, here is an alternative to knowing the PHP version of your WordPress.
- Open a text editor such as Sublime or Notepad on your PC and type the following lines of code. Save the file with the name info.php.<?phpphpinfo();?>
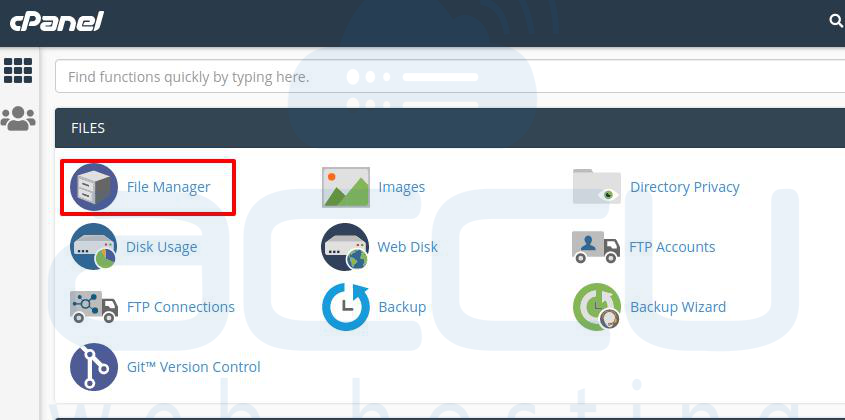
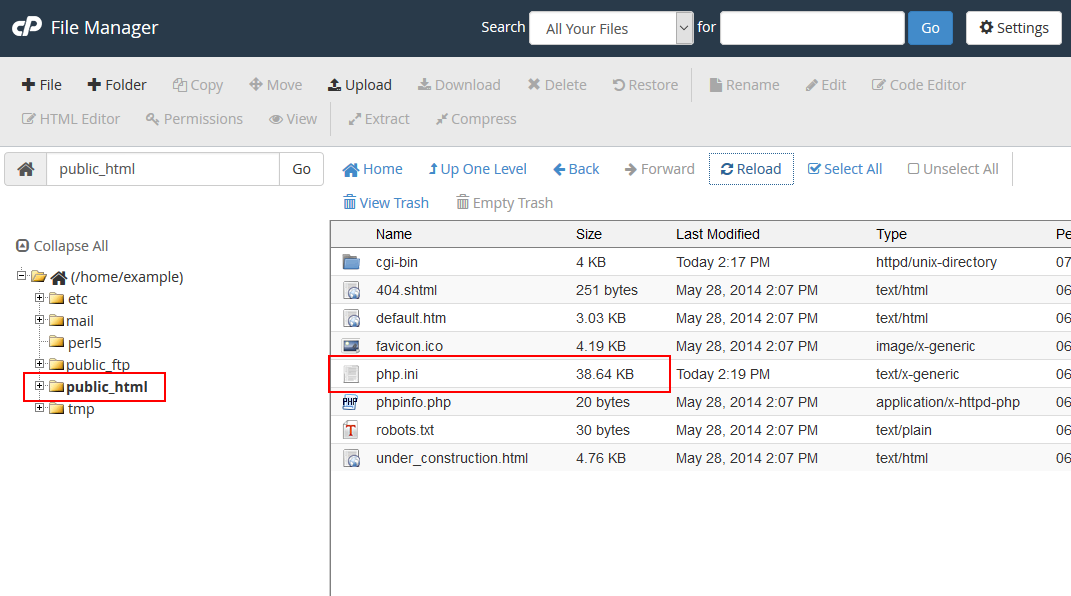
- Access the control panel of your hosting and open the cPanel file manager.
- Go to the public_html of your WordPress and upload the file we just created.
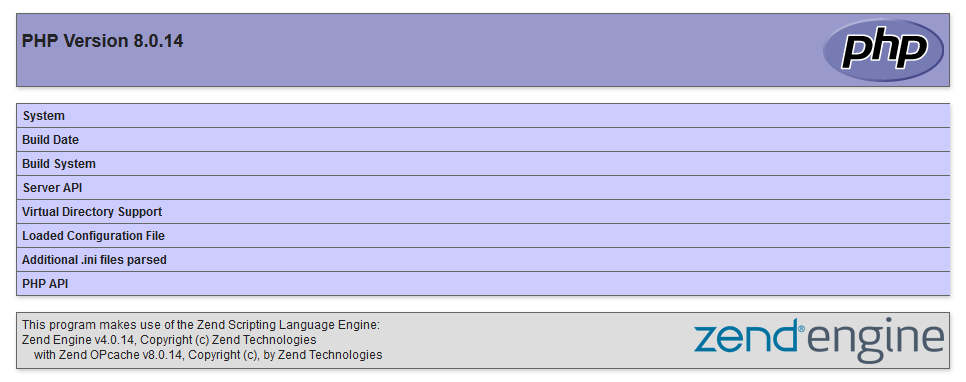
- Finally run this file. Open your browser, type your domain and add “info.php” to the end of the URL, and press “Enter”. Automatically, a window like the one shown below will open.

Important: Once you check which version of PHP WordPress is working with, go back to the public_html of your hosting and delete the file you just uploaded.
How to update PHP in WordPress
If you got here it is because you want to update PHP in WordPress, so let’s get down to business. You will see that it is very fast!
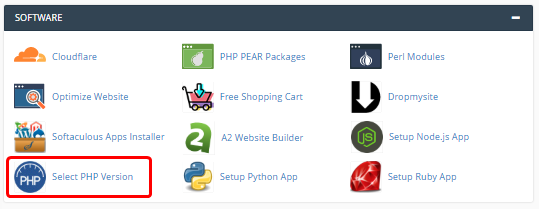
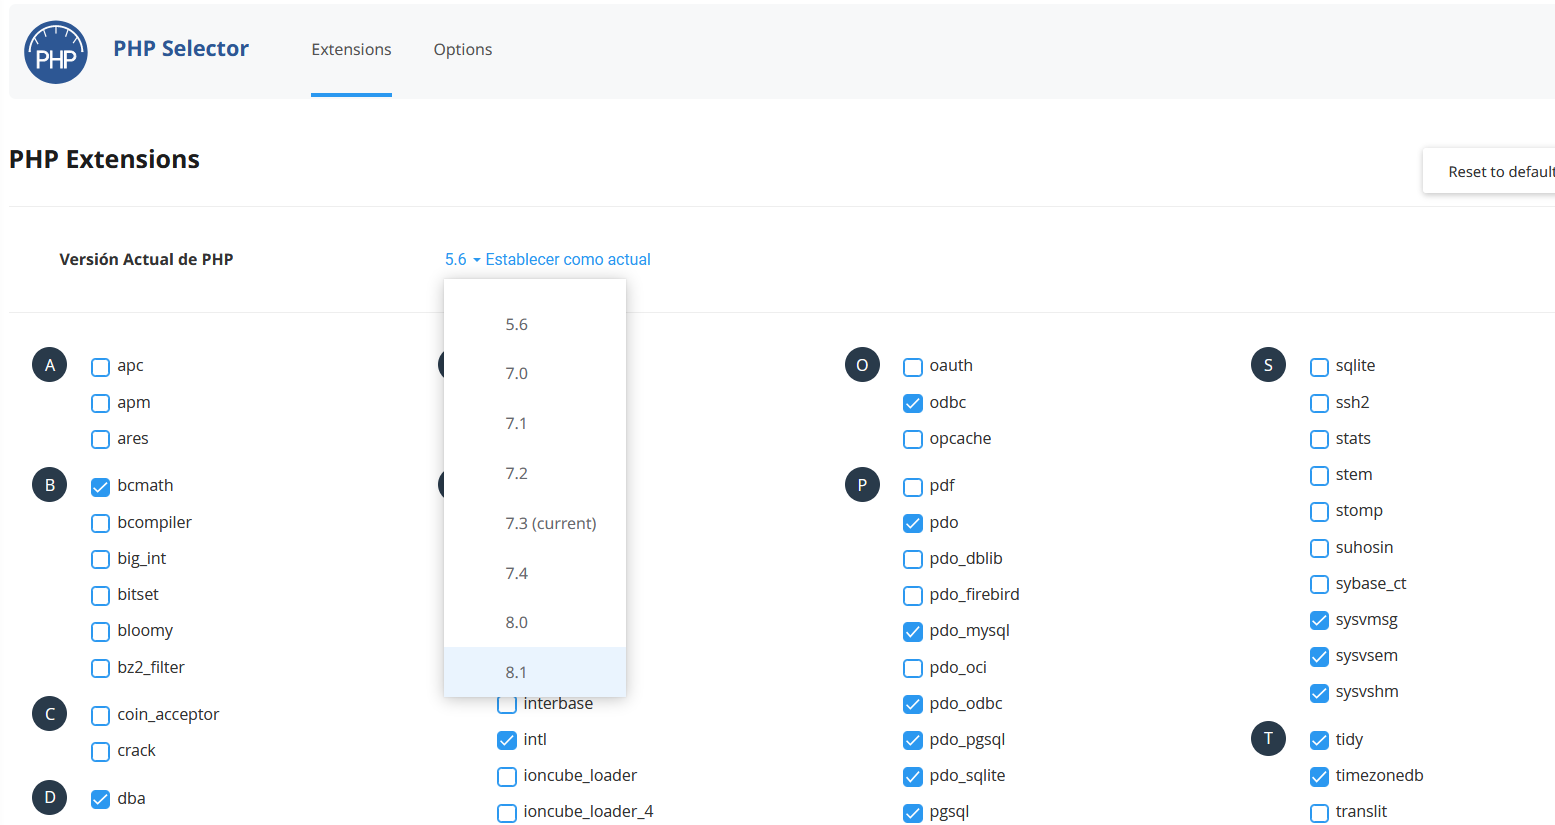
- Log in to cPanel and go to the “Software” section. Once there, locate the “Select PHP version” option and click on it.
- Now a screen like this will open showing the PHP version used by your hosting plan. If you want the change to affect your entire hosting account, that is, all the applications you have installed, simply open the dropdown and select the version you want to use. To save the changes, click on “Set as current”.

But what if I don’t want to update the PHP version of my entire hosting account? Don’t worry, you can do it too.
Update PHP for a single WordPress website
If any of the applications or web pages that you have hosted in your hosting plan have some specific PHP requirements, you can change the version of this programming language by modifying the .htaccess file of your website.
To do this, follow the steps that I indicate below.
- Access the control panel of your hosting and open the cPanel file manager.
- Go to the .htaccess file of the WordPress in which you want to update PHP. If you can’t find it, click on the “Settings” button (top right) and make sure you have the “Show hidden files ( dotfiles )” option selected.
- Edit the file with the following lines of code. Be careful, modify the second line depending on the version you want to establish. In this example we will set PHP version 7.4:<FilesMatch “\.(php4|php5|php3|php2|php|phtml)$”>SetHandler application/x-lsphp74</FilesMatch>
If you have questions or want more information, I recommend you take a look at this article in our Help section: How to change the PHP version in cPanel.
Problems updating PHP in WordPress?
Although it is not the most common, it is possible that when updating PHP in WordPress there is a misunderstanding with a plugin or template that you have installed on your website. This usually happens especially if the PHP version is very new and there are still untested WordPress plugins.
If this is your case and after updating PHP you detect an error, the easiest thing is to revert the changes, that is, go back to the version you had installed and see which WordPress plugins are the ones that may be causing these errors.
And would restoring a backup fix the problem? Yes and no. Below I will explain why.
If you only restore a backup of your website or your application, the incompatibility problems will not be solved, since the backup would be restored on your cPanel account, which has a different version of PHP than the one you were using.
On the other hand, if you restore a complete copy of cPanel, all the data would return to its previous state, both those of cPanel and those of your website. However, if you have more pages hosted on your hosting, it is recommended to revert the PHP version from the control panel.
Remember that if you have a WordPress SSD Hosting, or any other web hosting plan with us, from your client area you have access to Premium Backup. A tool that makes backup daily of all your content and allows you to perform any restoration (full account, application, database, etc.) in just a few clicks.
Having staging in WordPress is also very useful for this type of case. So instead of executing the change in a live environment, you can do it on a test site and check that everything works like a charm before taking it to production.
In conclusion…
As we have seen in this article, updating PHP in WordPress is a very simple process and you should do it if you are using an outdated version of this programming language.
Of course, before making any changes, the idea is that you have a test site in which to test that this update is not going to affect the operation of your site. However, if you have already made the change in a live environment, you can always go back by reverting the PHP version or even restoring a backup of your hosting.
Now tell me, have you ever screwed up your website by making a change like this? How did you fix it?




Pingback: SEO for WordPress: How to configure your website to receive Google traffic | Harmon Web Blog
Pingback: How to Fix 503 Service Unavailable Error in WordPress | Harmon Web Blog