Data that exists only in one location is almost non-existent. It’s only a hardware failure or a mistyped command away from being lost forever. That’s a terrifying thought, given that data is one of a company’s most valuable assets. Imagine having to rebuild your entire database from scratch!
Regular database backups are critical because this is where your most important data is stored, whether it’s customer information, email addresses, product catalogs, content, or any of the hundreds of other types of information required by businesses. MySQL® is by far the most popular open-source database in the world, which is why cPanel & WHM make backing up and restoring MySQL so simple.
What is MySQL?
MySQL is an open-source relational database management system (RDBMS) that is used to efficiently store, organize, and retrieve data. MySQL is used by cPanel and WHM, as well as many of the most popular content management systems and eCommerce applications, such as WordPress, Joomla, Drupal, and Magento.
MySQL stores information in tables that are divided into columns of a specific data type. Individual records comprise the table’s rows, and they must adhere to the column types. For example, here is a section of the posts table from the database of a new WordPress site.
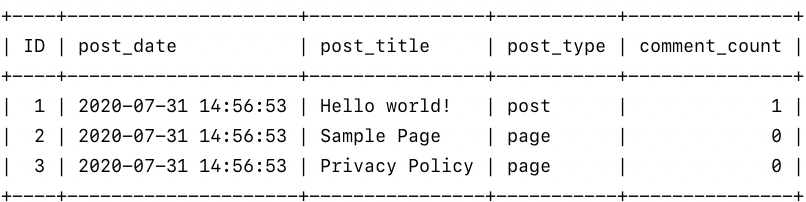
How do users enter and exit data from MySQL? Unlike a file system, we cannot simply edit a file and save it. We must communicate with the RDBMS using SQL, which is its own language. We used the following SQL statement to generate the table in the image:
SELECT ID,post_date,post_title,post_type,comment_count FROM wp_posts;
As a cPanel user, you won’t have to write SQL because cPanel handles it for you. However, understanding what it is is important because MySQL backups are simply a list of SQL statements.
When you run a backup, the software generates and saves the statements required to recreate the database. This is commonly referred to as “exporting” or “dumping” the database. When you restore, MySQL executes those statements to restore the database to its previous state.
How to Back Up a MySQL Database in cPanel
Our goal is to dump a database and save the resulting SQL file to our computer, which we can keep or move to a more secure location. Although the “MySQL” client can be used from the command line, the cPanel MySQL backup and restore provides an easy-to-use interface.
You can backup databases on your server using either of these methods. In this example, we’ll use a WordPress installation and a WordPress database. Before we begin, keep in mind that a WordPress site is made up of a database and files, and a complete WordPress backup must include both.

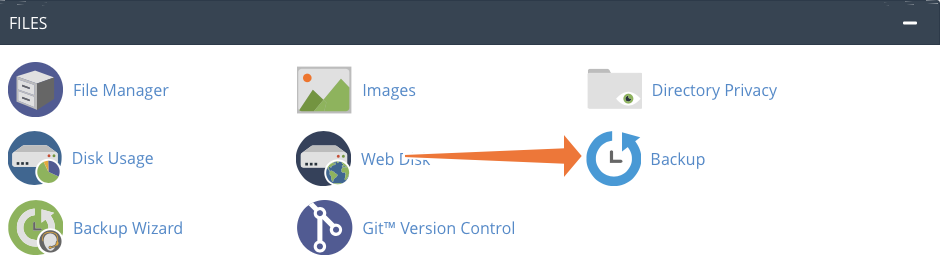
To begin, go to the Files section of the main page and select Backup. This page provides a convenient unified interface for backing up your cPanel account’s files and databases.
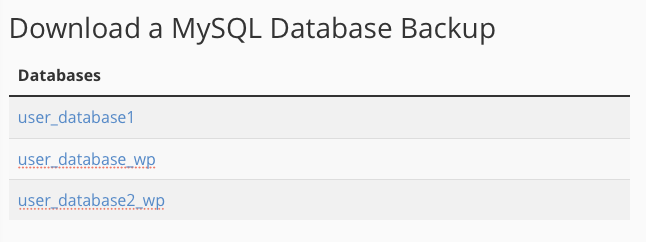
Next, navigate to the Download a MySQL Database Backup section to see a list of databases that you can download.
Finally, click on your preferred database to begin a backup, and cPanel will generate a SQL file and save it to your computer’s default download location.
This is the simplest method for backing up MySQL in cPanel, but you can also use the integrated phpMyAdmin administration tool to change export settings or back up multiple databases at once. Here’s how you do it:
Back-Up a Database in cPanel with phpMyAdmin
Select phpMyAdmin in the Databases section of the cPanel main page
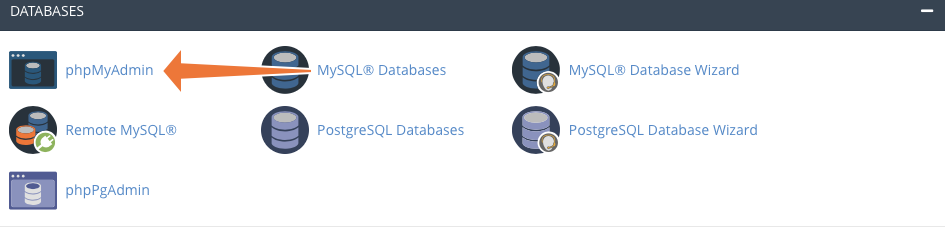
On the left is a list of databases associated with your cPanel account. Click on the one you would like to back up and then on the Export tab at the top of the page.
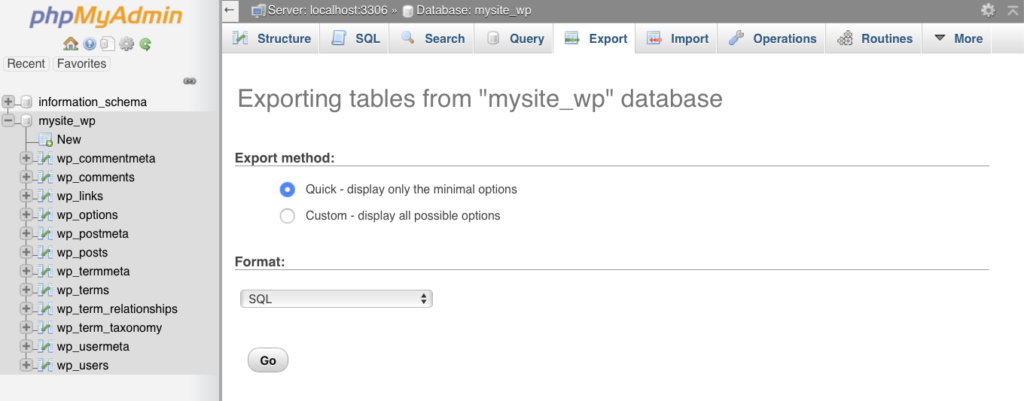
In most cases, the Quick setting provides the best export configuration for MySQL backups, but the Custom setting is useful for excluding tables, renaming the exported file, and performing the more advanced configurations. If you want to export multiple databases at the same time, open phpMyAdmin and, without selecting a database in the sidebar, click the Export tab. The Quick export method by default will export all available databases. Choose the Custom export method and select the databases you want to back up to customize which ones are exported.

Schedule MySQL Backups with Cron in cPanel
We’ve seen how simple it is to back up MySQL databases in cPanel, but what if you want to back up a database on a regular basis? It’s all too easy to forget, and scheduling ensures that your data’s safety isn’t dependent on your memory.
You can use the cron task scheduler and the command-line “mysqldump” tool to automate a MySQL backup. Navigate to the cPanel Cron Jobs page, which is located on the main page under Advanced.
Select a time interval, such as once per week, using the drop-down boxes.
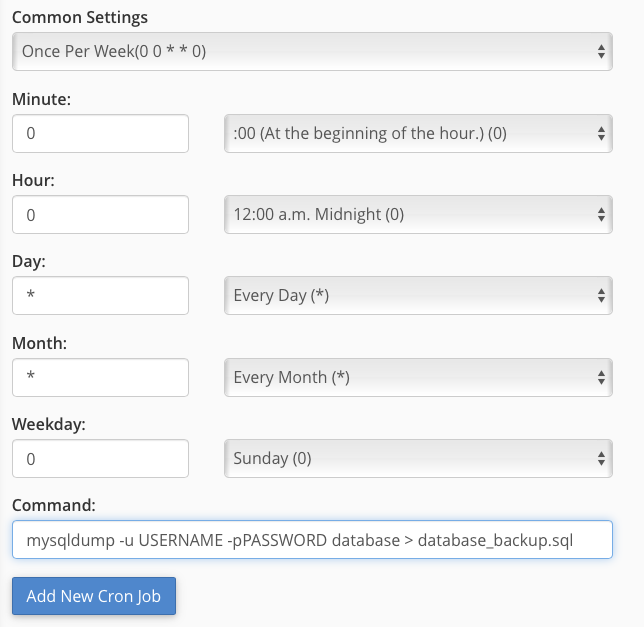
Enter the following in the command field, replacing the uppercase sections with the appropriate database details:
mysqldump -u USERNAME -p PASSWORD database > database_backup.sql
You’re done when you click the Add New Cron Job button. Cron will perform the backup at the specified time interval, saving the SQL file to the location specified at the end of the command (the section following the > symbol).
How to Restore a MySQL Database in cPanel
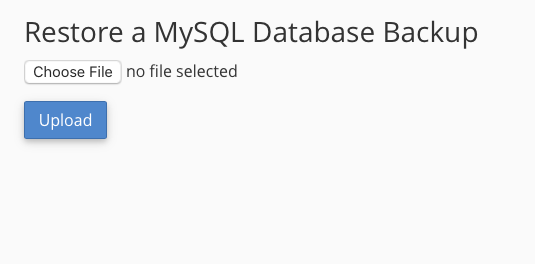
To restore a database, go to the Backup interface in the Files section of the cPanel main page.
When you restore a SQL file, you overwrite tables and delete data. If you, for example, published a blog post to your CMS after your last backup, it will be deleted irreversibly when you restore. Before restoring a backup, ensure that it will not delete data that you want to keep.
Select a SQL file from your local machine in the section titled Restore a MySQL Database Backup. When you click Upload, cPanel will import the file.
You can use the phpMyAdmin tool described in the previous section for more complex SQL imports or to replicate rather than replace a database. However, the Backup page is preferred for standard restores because cPanel handles database prefixes and SQL statement configuration.
The significance of regular MySQL backups cannot be overstated. Without a recent backup, your company and its websites are one hardware failure away from disaster. You and your users benefit from a simple two-click backup and restore process with cPanel and WHM.