Do you want to embed an iFrame code in a WordPress post or page?
IFrames provide an easy way to embed video or other content to your site without uploading it. Many third-party platforms like YouTube allow users to use iframe to embed content from their website.
In this article, we’ll show you how to easily embed iFrame code in WordPress using multiple methods.
What is iFrame?
An iFrame lets you embed videos or other content on your site. This means you can display a video on your site without actually hosting that video.
The iframe is like opening a window on your site to display external content. The actual content is still loaded from the source that you are embedding from.
To add an iframe, you need to add a special HTML code. Don’t worry if that sounds quite technical.
We’re going to show you the easiest way to embed an iFrame in your WordPress blog.
Why Use iFrames?
A key reason to use iFrames is to avoid having to host videos or other resources on your site, which will use up your bandwidth and storage space.
Also, iFrames let you avoid infringing on other people’s copyrighted content. Instead of downloading their video or other content then uploading it to your site, you simply add it to your page using an iFrame.
Another advantage is that if the original content is changed, it will automatically be updated in the iFrame too.

There are also some drawbacks to using iFrames. Not all websites let you put their content into an iFrame. Also, the iFrame may end up too big or small for your page, and you will need to manually adjust it.
Another issue is that HTTPS sites can only use iFrames for content from other HTTPS sites. Similarly, HTTP sites can only use iFrames for content from other HTTP sites.
This is why many platforms like WordPress prefers oEmbed. You can use oEmbed to embed videos as well as some other types of content by simply pasting a URL into your WordPress post. The content will automatically be resized to fit, and it will be the right size even on mobile devices.
Important: WordPress doesn’t support oEmbed for Facebook and Instagram posts. For more on this, check out our full guide on the Facebook / Instagram oEmbed issue and how to fix it.
Another great alternative to iFrames is to use a social feeds plugin. We recommend using Smash Balloon‘s plugins. These let you display content from Facebook, Instagram, Twitter, and YouTube.
Having said that, let’s take a look at three different ways to add iFrames to your site.
1. Use the Source’s Embed Code to Add iFrame in WordPress
Many large sites have an Embed option for their content. This gives you the special iFrame code that you need to add to your site.
On YouTube, you can get this code by going to the video on YouTube, then clicking the Share button below it.
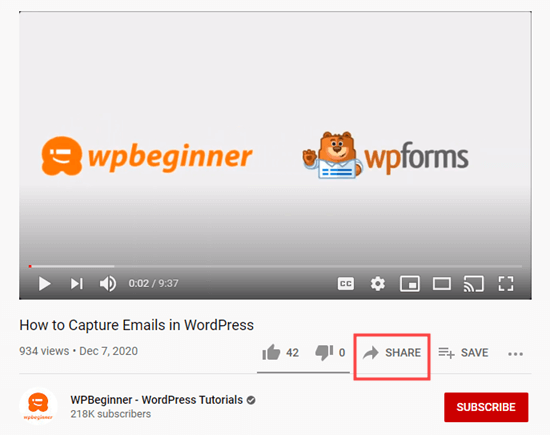
Next, you will see a popup with several share options. Simply click on the Embed button.

Now, YouTube will show you the iFrame code. By default, YouTube will include the player controls. We also recommend that you enable the privacy-enhanced mode.
After that, go ahead and click the Copy button to copy the code.
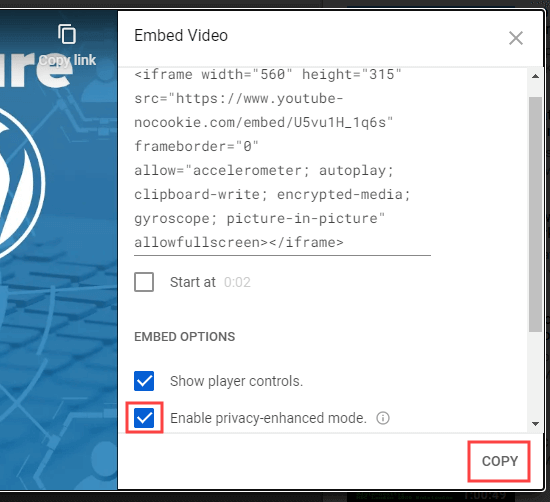
Now, you can paste that code into any post or page on your site. We’re going to add it to a new page in the block editor.
To create a new page, go to Pages » Add New in your WordPress dashboard.
Then, add an HTML block to your page.
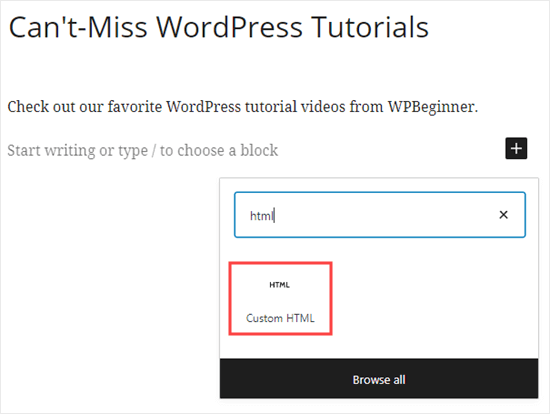
Now, you need to paste the YouTube iFrame code into this block.
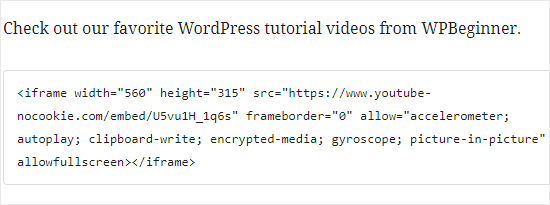
You can then preview or publish your page to see the YouTube video embedded there.

Tip: If you’re using the old classic editor, you can still add iFrame code. You need to do so in the Text view.
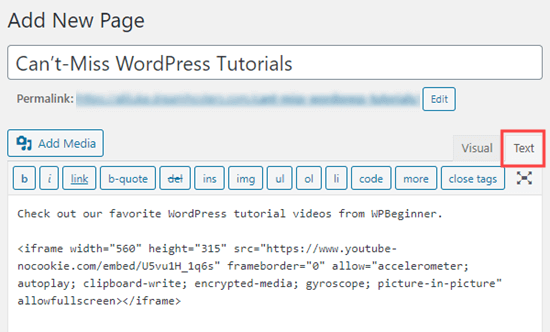
Switching between the visual and text view on the Classic Editor can cause issues with the iFrame code.
2. Using the iFrame WordPress Plugin to Embed an iFrame
This method is useful as it allows you to create an iframe to embed content from any source, even if that source doesn’t provide an embed code.
First, you need to install and activate the iFrame plugin. For more details, see our step by step guide on how to install a WordPress plugin.
Upon activation, the plugin will start working straight away with no setup needed. Go ahead and edit or create a post or page. Then, add a shortcode block.
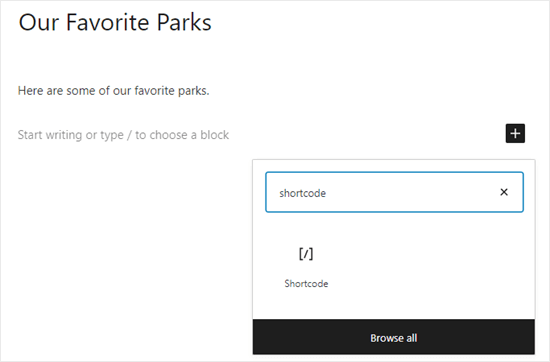
After that, you can use this shortcode to enter your iFrame code.
| 1 | [iframe src="URL goes here"] |
Simply replace URL goes here with the URL of the content you want to embed on your site. We are embedding a Google map.
Tip: You may need to use the Embed option to get the direct URL of the content. You need to use just the URL, not the rest of the embed code.
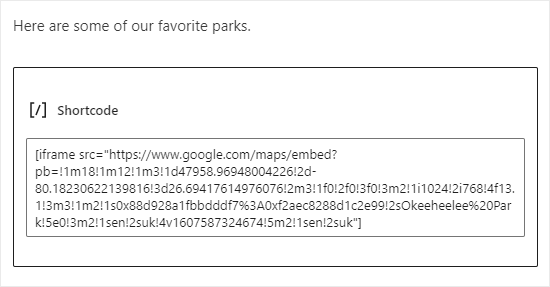
Next, preview or publish your post. You should see the Google map embedded on your site.

You can optionally add parameters to the iFrame shortcode to change how the embedded content displays. For instance, you could set the width and height, and add or remove a scrollbar or border. You can find details on the iFrame plugin’s page.
Tip: If you’re using the Classic editor, you can simply paste the shortcode into your post or page. You don’t need to switch to the Text view.
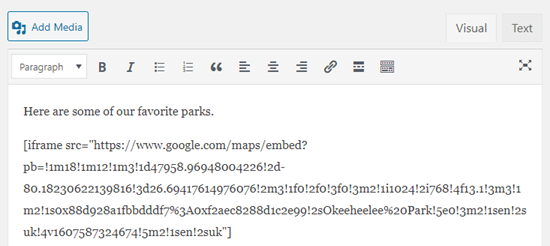
3. Manually Creating the iFrame Code and Embedding in WordPress
If you prefer not to use an iFrame plugin, then you can create the iFrame code manually. To do this, you need to add an HTML block in the WordPress content editor.
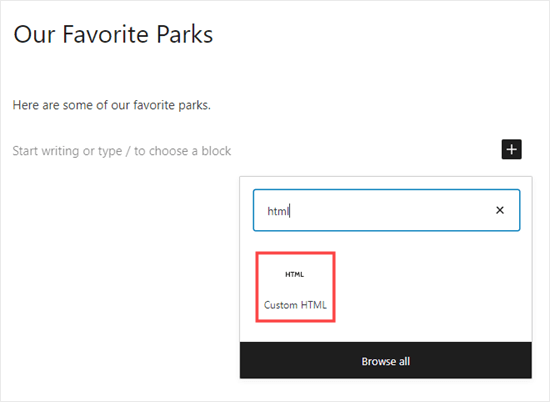
First, you need to paste this code into your HTML block.
| 1 | <iframe src="URL goes here"></iframe> |
Simply replace “URL goes here” with the direct URL for the content that you want to embed. You only need the URL itself.
Here, we’re embedding a map from Google.
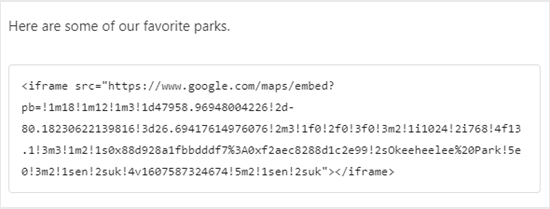
You can add extra parameters to the HTML tag. For instance, you could set the width and height of your iFrame. The code below means your embedded content will display 600 pixels wide and 300 pixels high.
| 1 | <iframe src="URL goes here" width="600" height="300"></iframe> |
This is useful if you need to restrict the embedded content to a smaller space.

CREDIT: WPBeginner


