Harmonweb WordPress VPS gives your website its own private server, with the HestiaCP control panel installed, 1-click WordPress and free server management. This guide walks you through ordering one, from choosing a plan to seeing your server go live in the client area. It takes about five minutes.
Table of Contents
Before you start
- A Harmonweb account is helpful but not required. If you’re new, you’ll create one during checkout.
- A domain name for your website. You can use one you already own, register one with Harmonweb, or add it after ordering.
- A payment method: card, bank transfer, mobile money, USSD, QR code or crypto.
Step 1: Open the WordPress VPS page
Go to harmonweb.com, hover over Hosting in the top menu and click WordPress VPS.
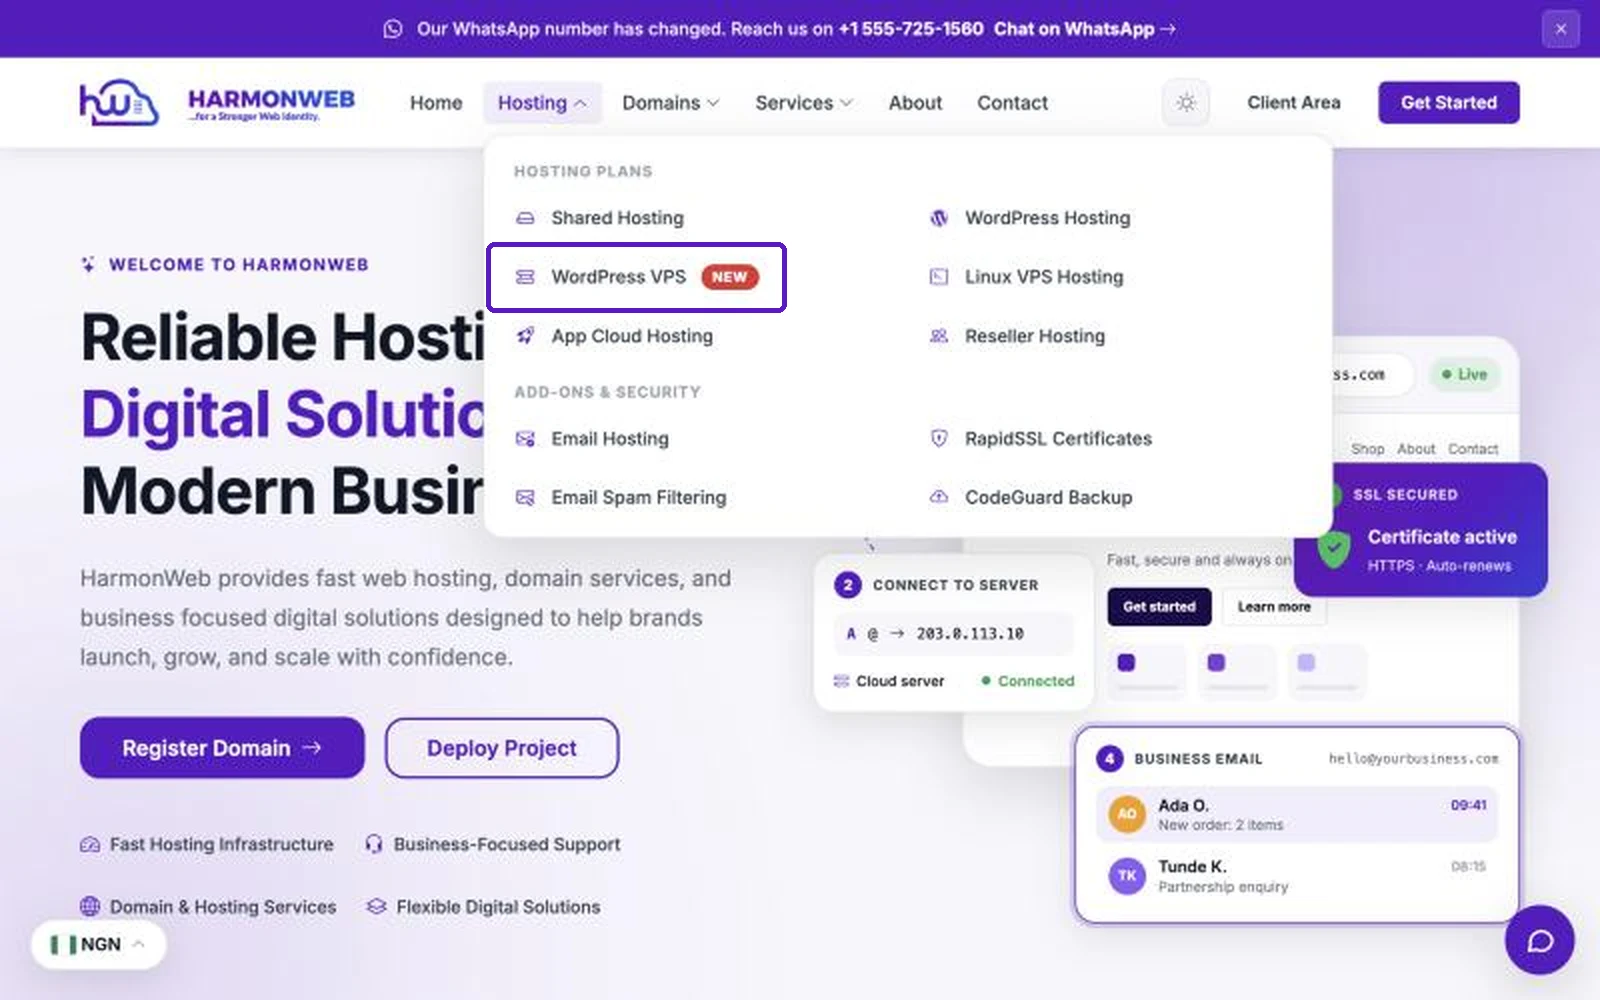
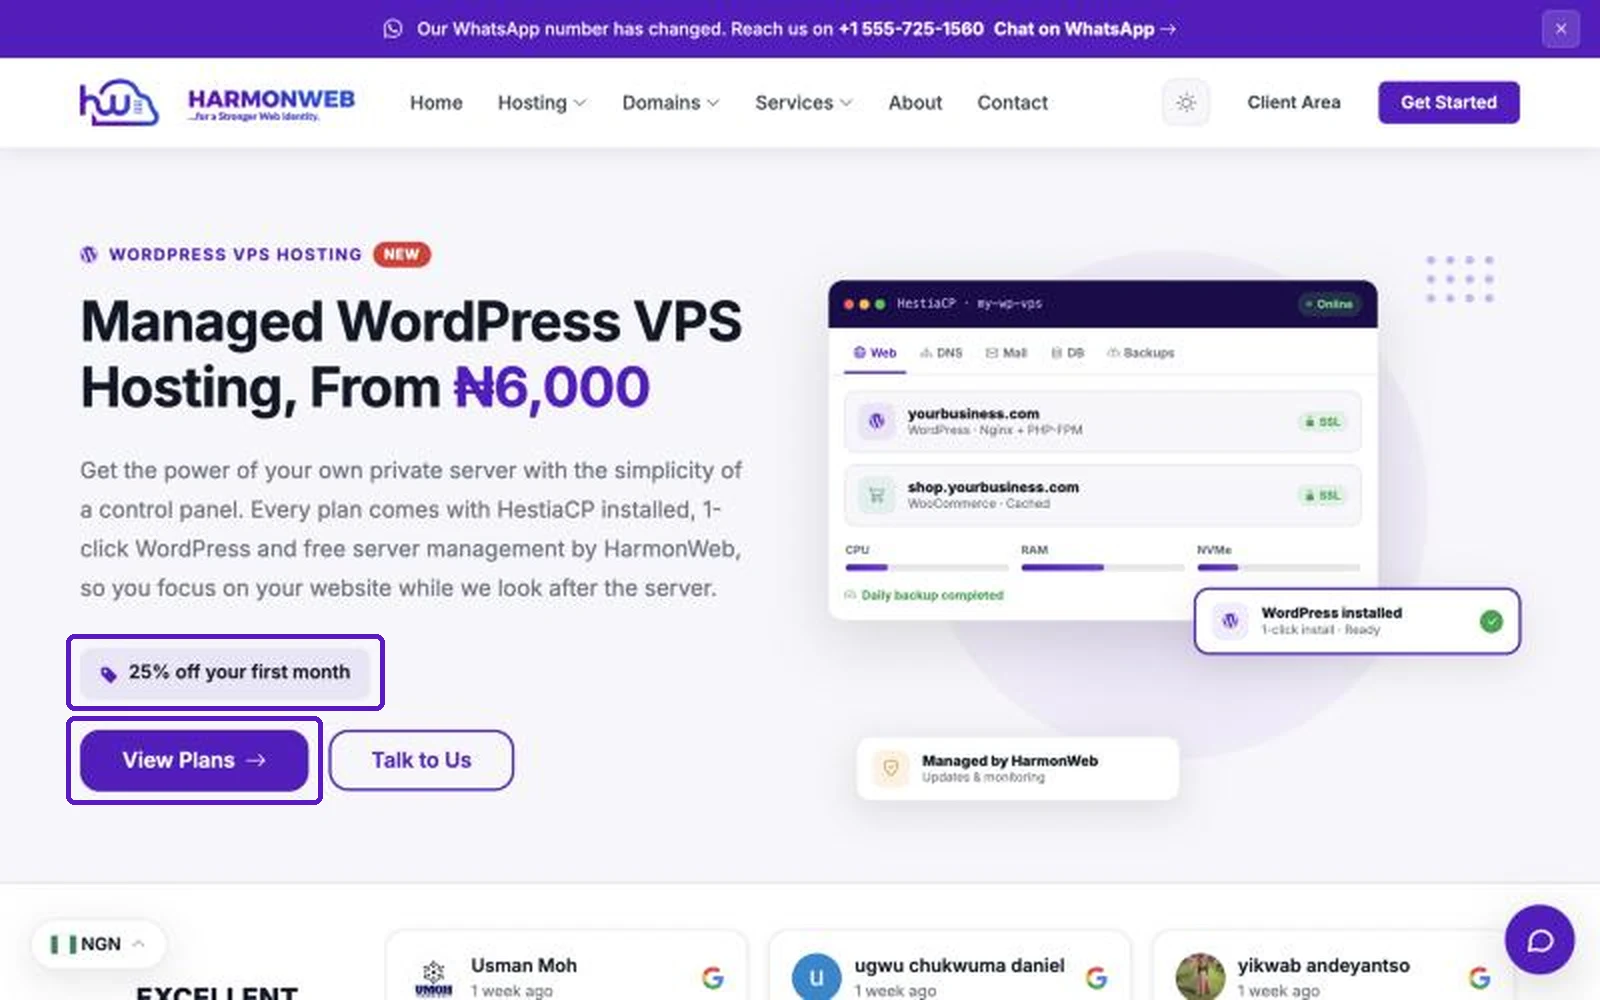
The page explains what’s included in every plan. Click View Plans to jump to the pricing. Note the 25% off your first month offer: it’s applied automatically, so you don’t need a coupon code.
Step 2: Choose your plan
There are three plans. Every one includes a private server, HestiaCP, free SSL, free daily backups, full root access and free server management.
- WP NANO (1 vCPU, 1 GB RAM, 20 GB NVMe): for a blog, portfolio or small business website. Email accounts are not included.
- WP STANDARD (2 vCPU, 2 GB RAM, 75 GB NVMe): our most popular plan, for busy business websites and online stores. Includes email accounts and webmail.
- WP PRO (2 vCPU, 4 GB RAM, 100 GB NVMe): for high-traffic sites, WooCommerce stores and agencies hosting client websites. Includes email accounts and webmail.
Click Get Started under the plan you want. In this guide we’re ordering WP STANDARD.
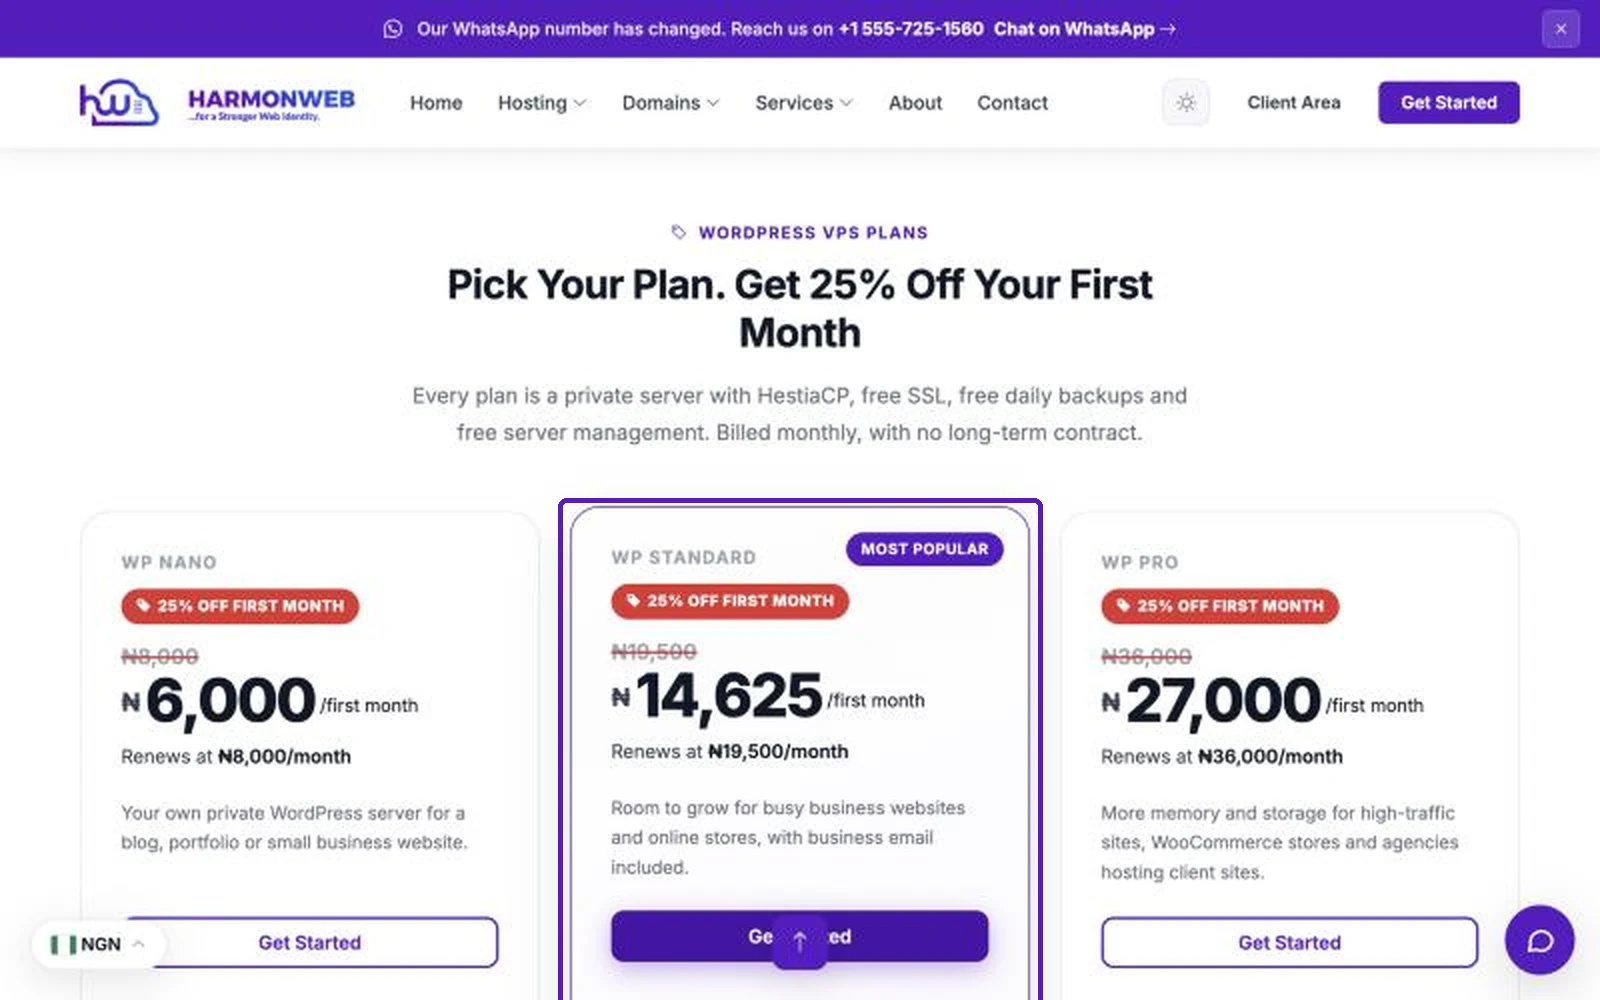
Not sure which to pick? Start with WP STANDARD if you need business email or run an online store. You can upgrade to a bigger plan later as your website grows.
Step 3: Choose a billing cycle and set up your server
You’re now on the Configure page in the Harmonweb client area.
- Choose Billing Cycle: pick how often you want to pay. Monthly is the default. Paying for 3, 6 or 12 months at a time lowers the monthly price.
- Hostname: your server’s name. Use a subdomain of your domain, for example server.yourdomain.com. Don’t use your main website address (yourdomain.com) here, because that name belongs to your website, not the server.
- Root Password: choose a strong password for your server’s root (administrator) account and save it somewhere safe, such as a password manager.
- NS1 Prefix and NS2 Prefix: leave these as they are (ns1 and ns2).
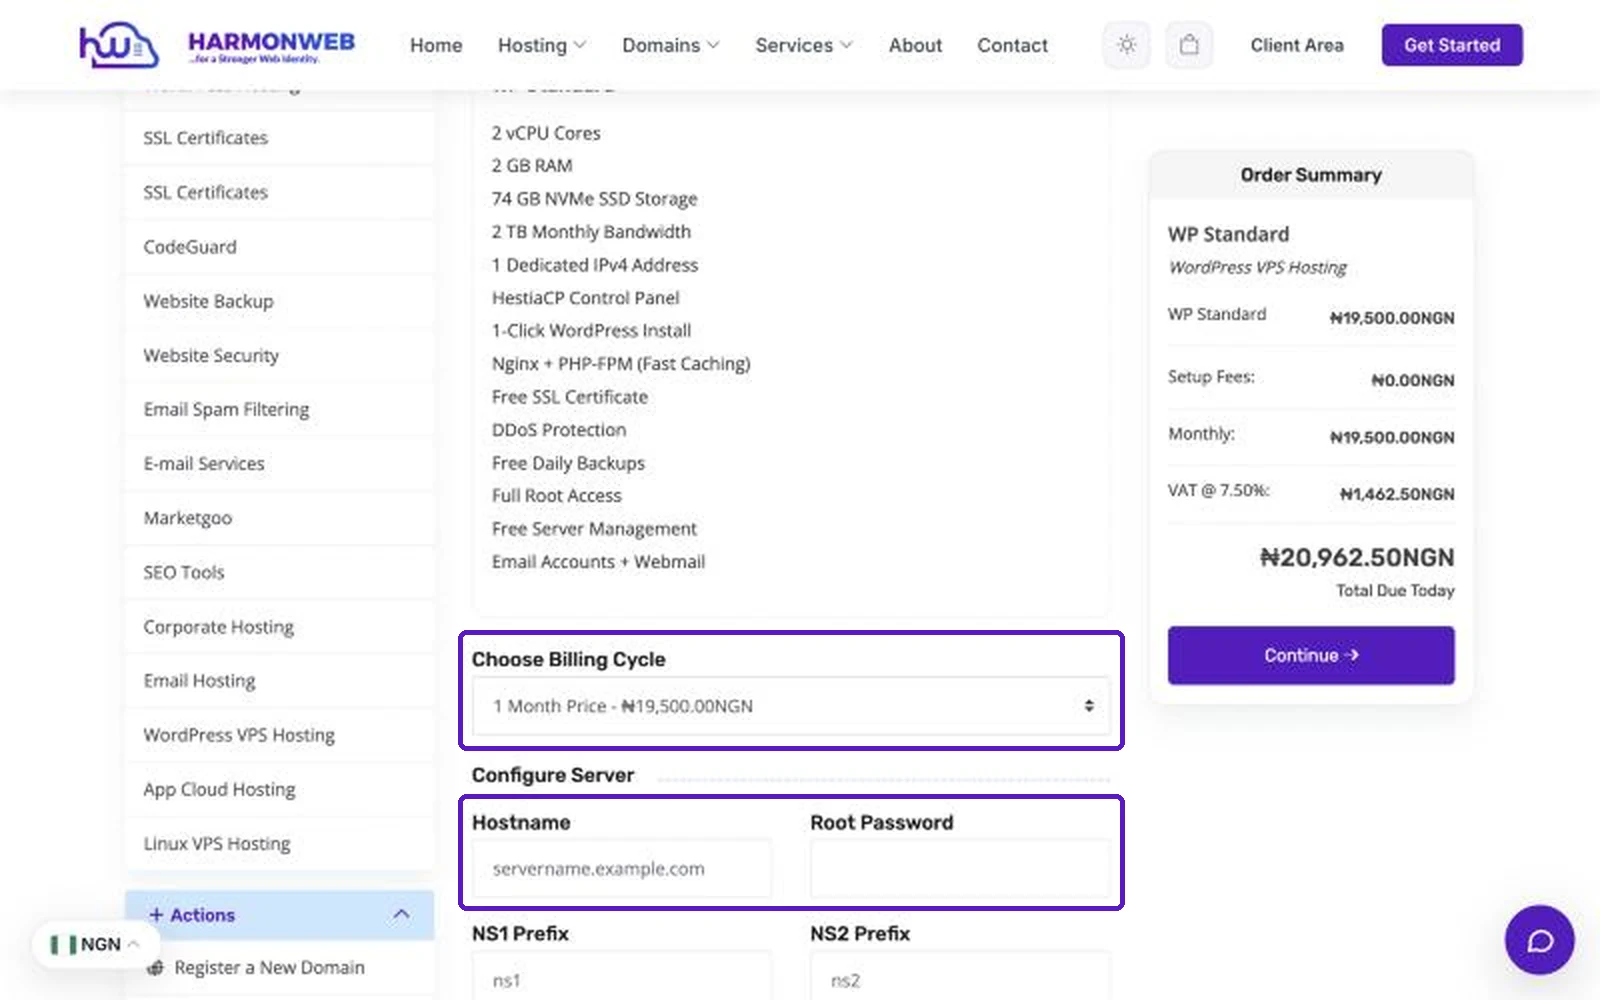
Tip: if the hostname you enter isn’t valid, we’ll give your server a working name automatically, so this won’t hold up your order.
Step 4: Skip the addons and continue
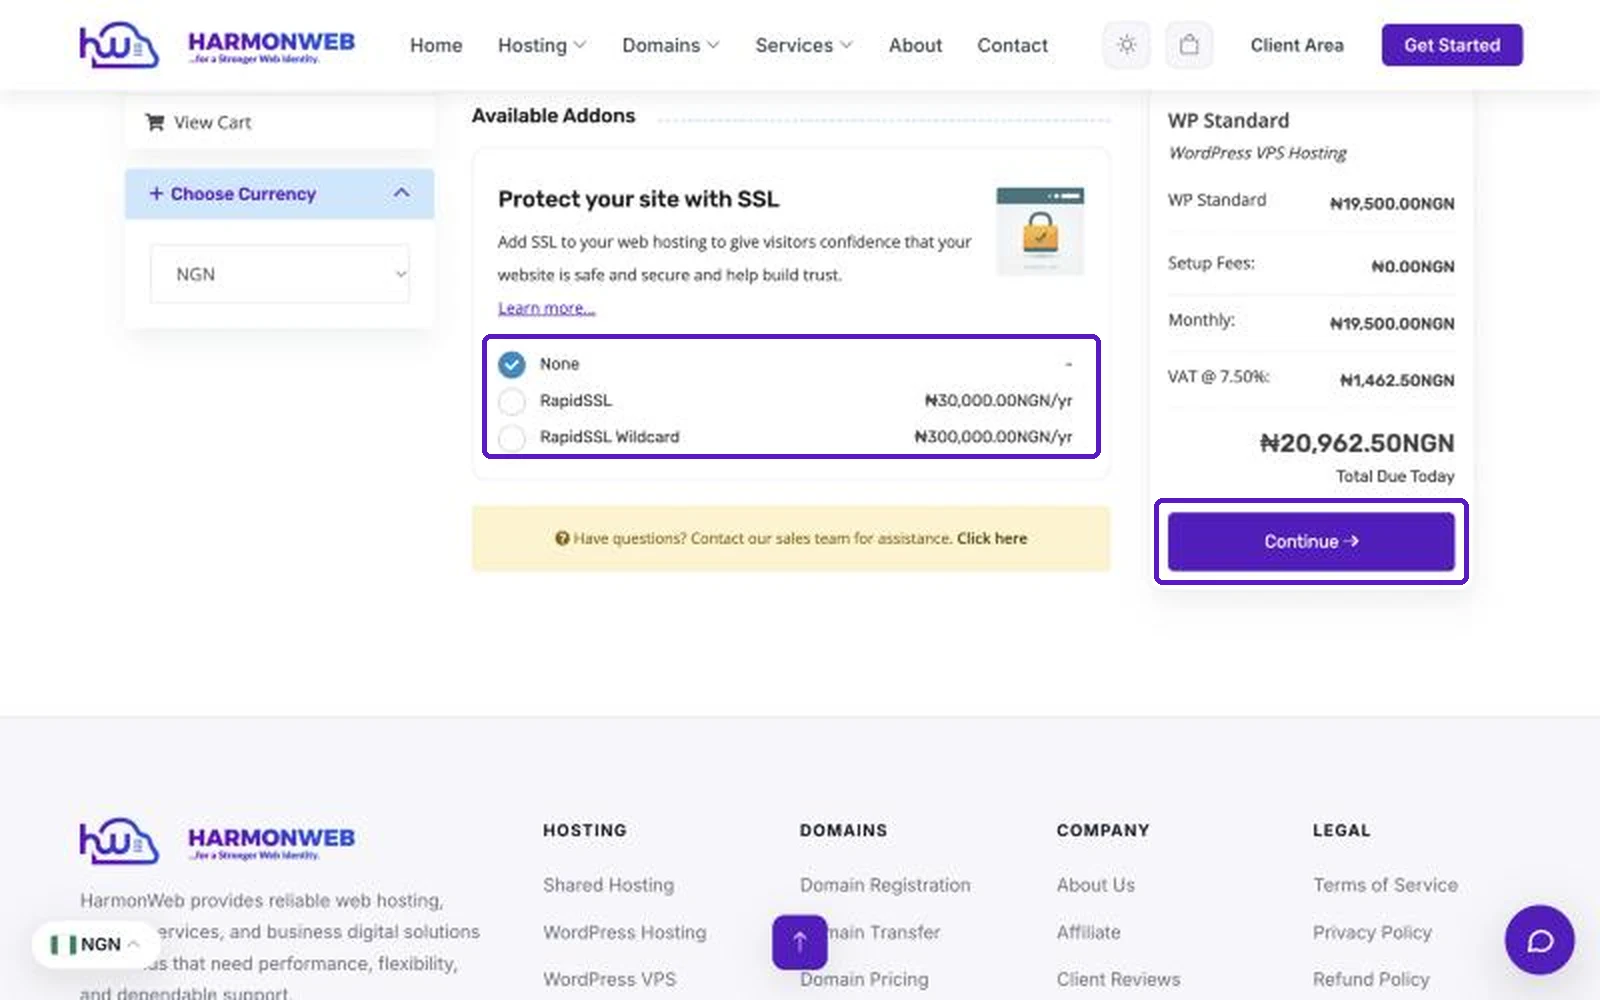
Scroll down to Available Addons. Every WordPress VPS already comes with a free SSL certificate, so you can leave this on None. A paid RapidSSL certificate is only worth adding if you specifically need one.
Click Continue.
Step 5: Check your cart and your discount
The Review & Checkout page shows your order. In the Order Summary on the right you’ll see:
- Subtotal: the regular monthly price.
- 25% One Time Discount: your first-month discount, already applied.
- VAT @ 7.5%: calculated on the discounted price.
- Total Due Today: what you’ll pay now. From your second month, you pay the regular price.
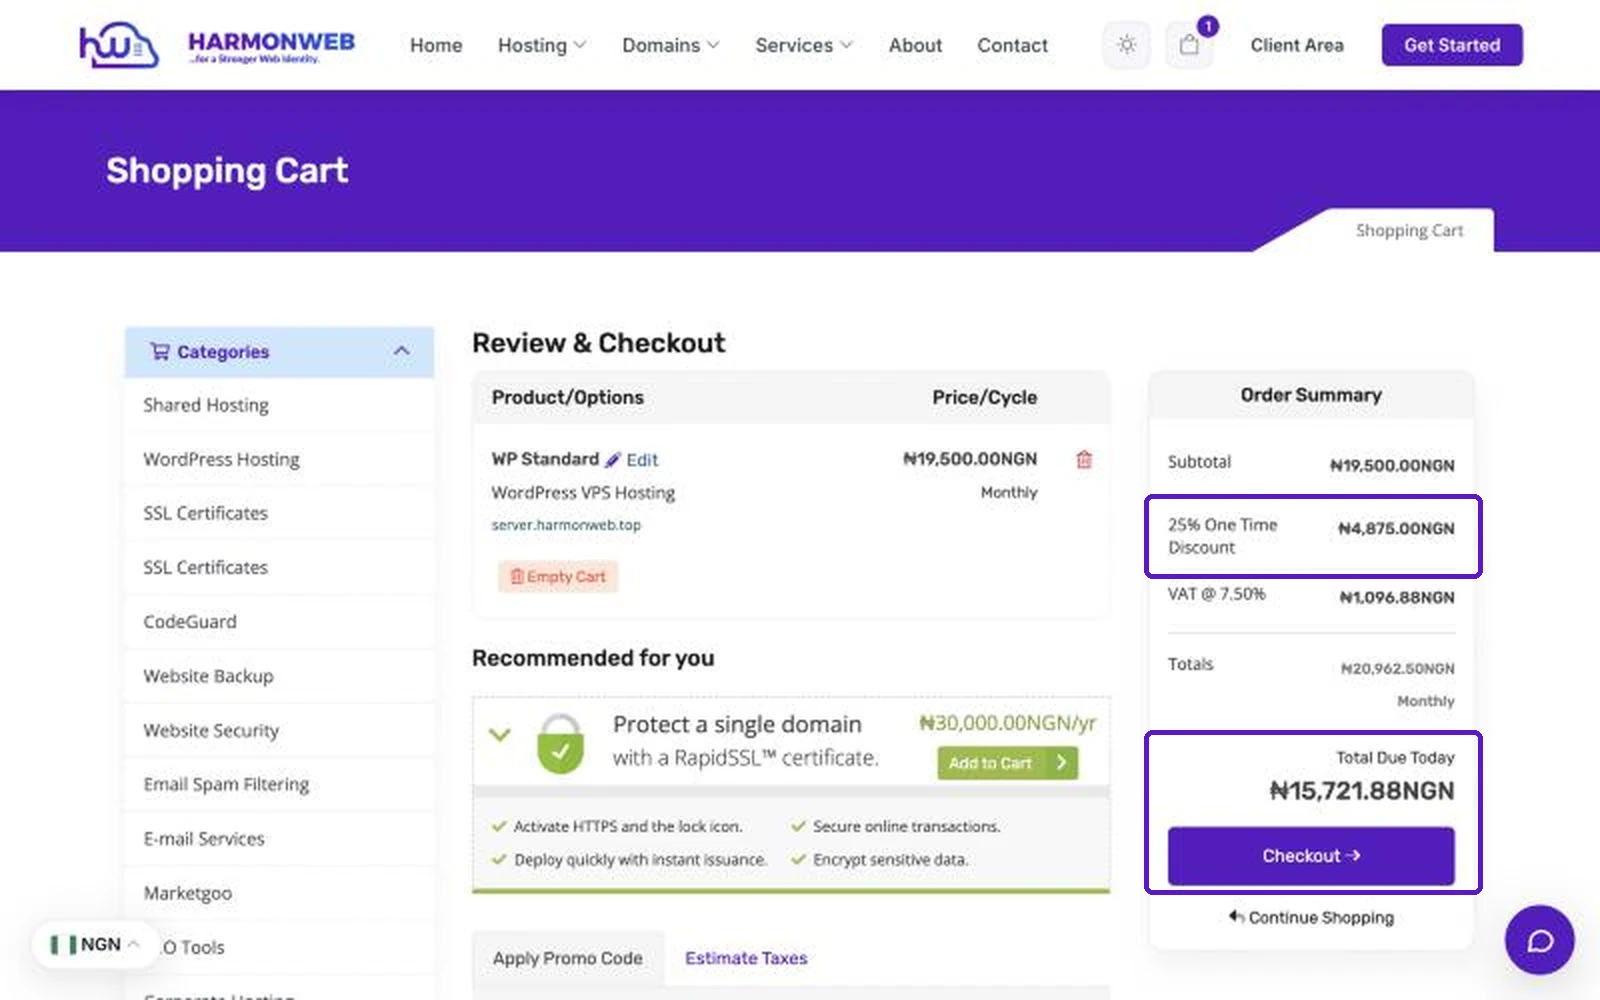
Click Checkout.
Step 6: Log in or create your account
Already a Harmonweb customer? Log in to your account first. Click Client Area in the top menu, enter your email address and password, and click Login. Your cart is saved, so click the cart icon and then Checkout again.
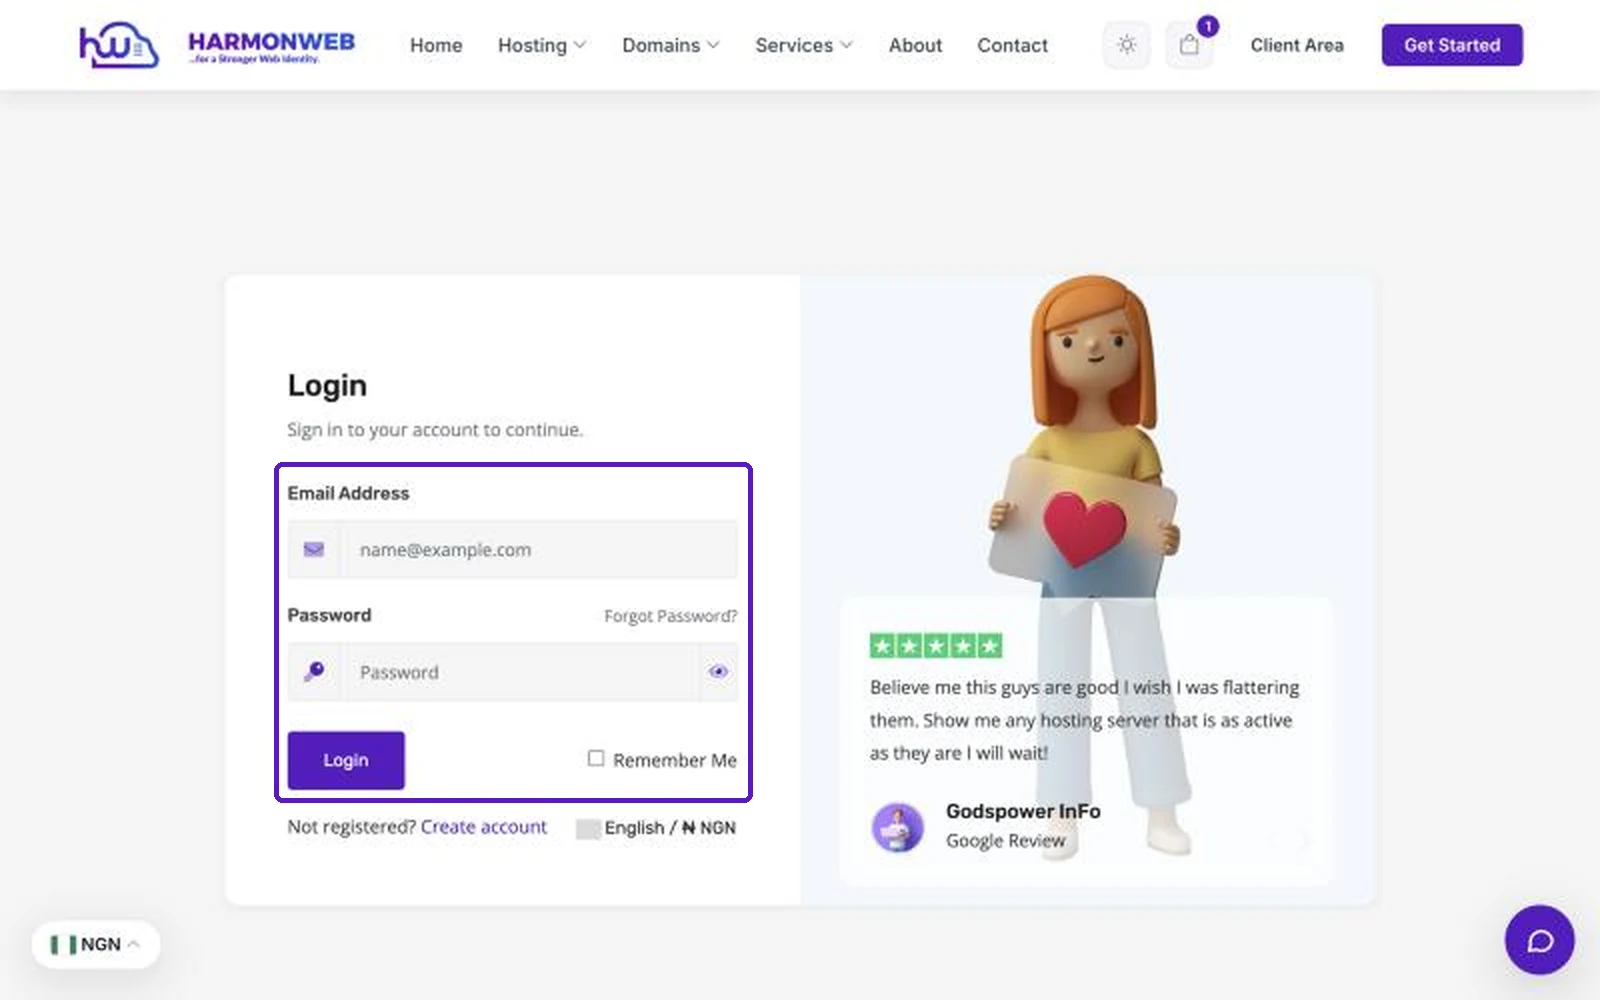
New to Harmonweb? Continue to checkout and choose Create a New Account, then fill in your details.
Step 7: Verify your email address
To protect your account, we ask you to confirm your email address before your first order.
- Check that your email address is correct and click Send Verification Code.
- Open the email from Harmonweb and copy the 6-digit code.
- Enter the code in the Verification Code box and click Verify Email.
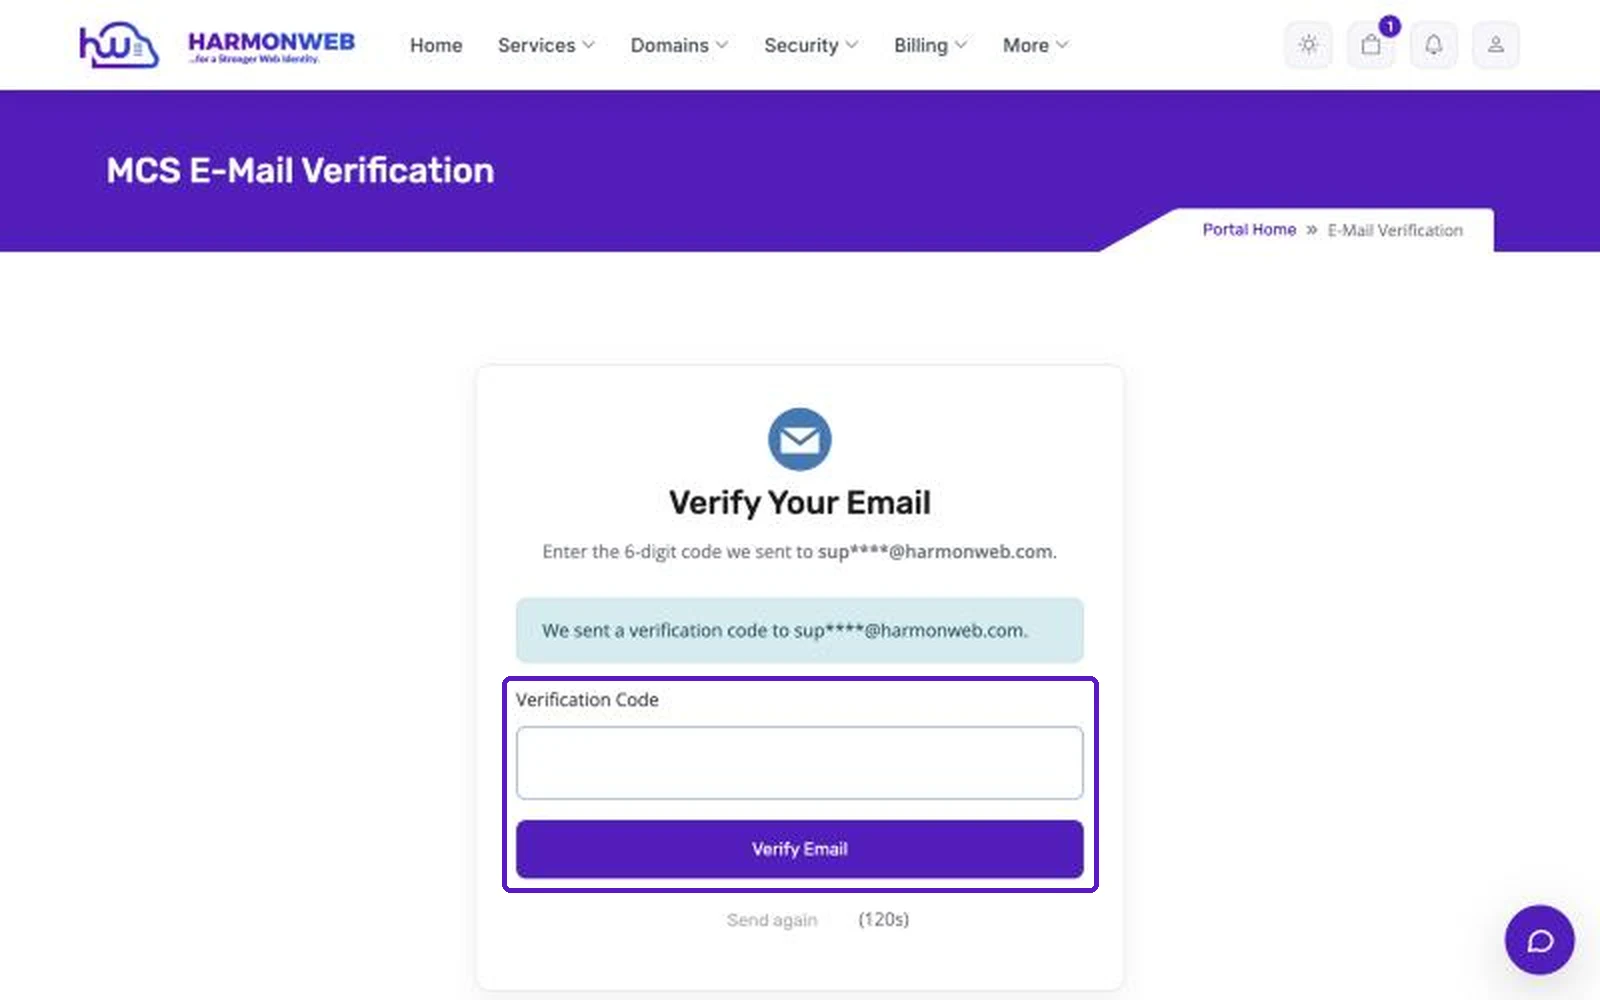
Can’t find the email? Check your spam or junk folder. After 120 seconds you can click Send again for a new code.
Step 8: Choose how to pay and complete your order
On the Checkout page:
- Check that your account (or your new account details) is selected under Choose Account.
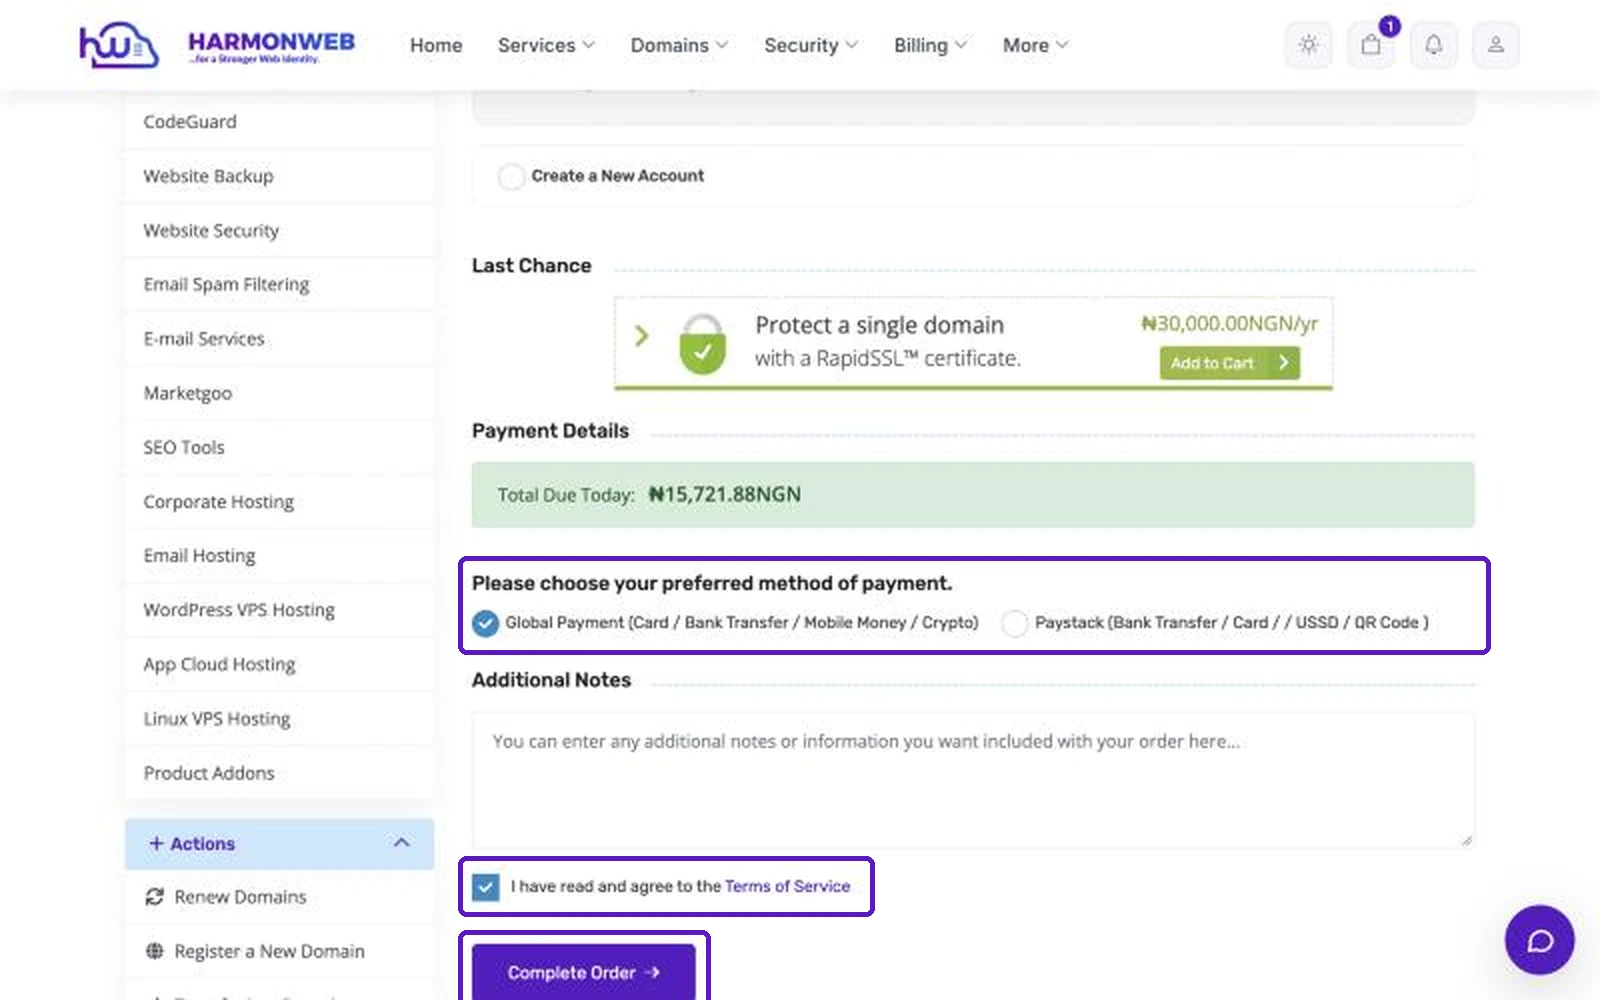
- Choose a payment method:
- Global Payment: card, bank transfer, mobile money or crypto.
- Paystack: bank transfer, card, USSD or QR code.
- Add anything we should know in Additional Notes (optional).
- Tick I have read and agree to the Terms of Service.
- Click Complete Order.
Step 9: Make your payment
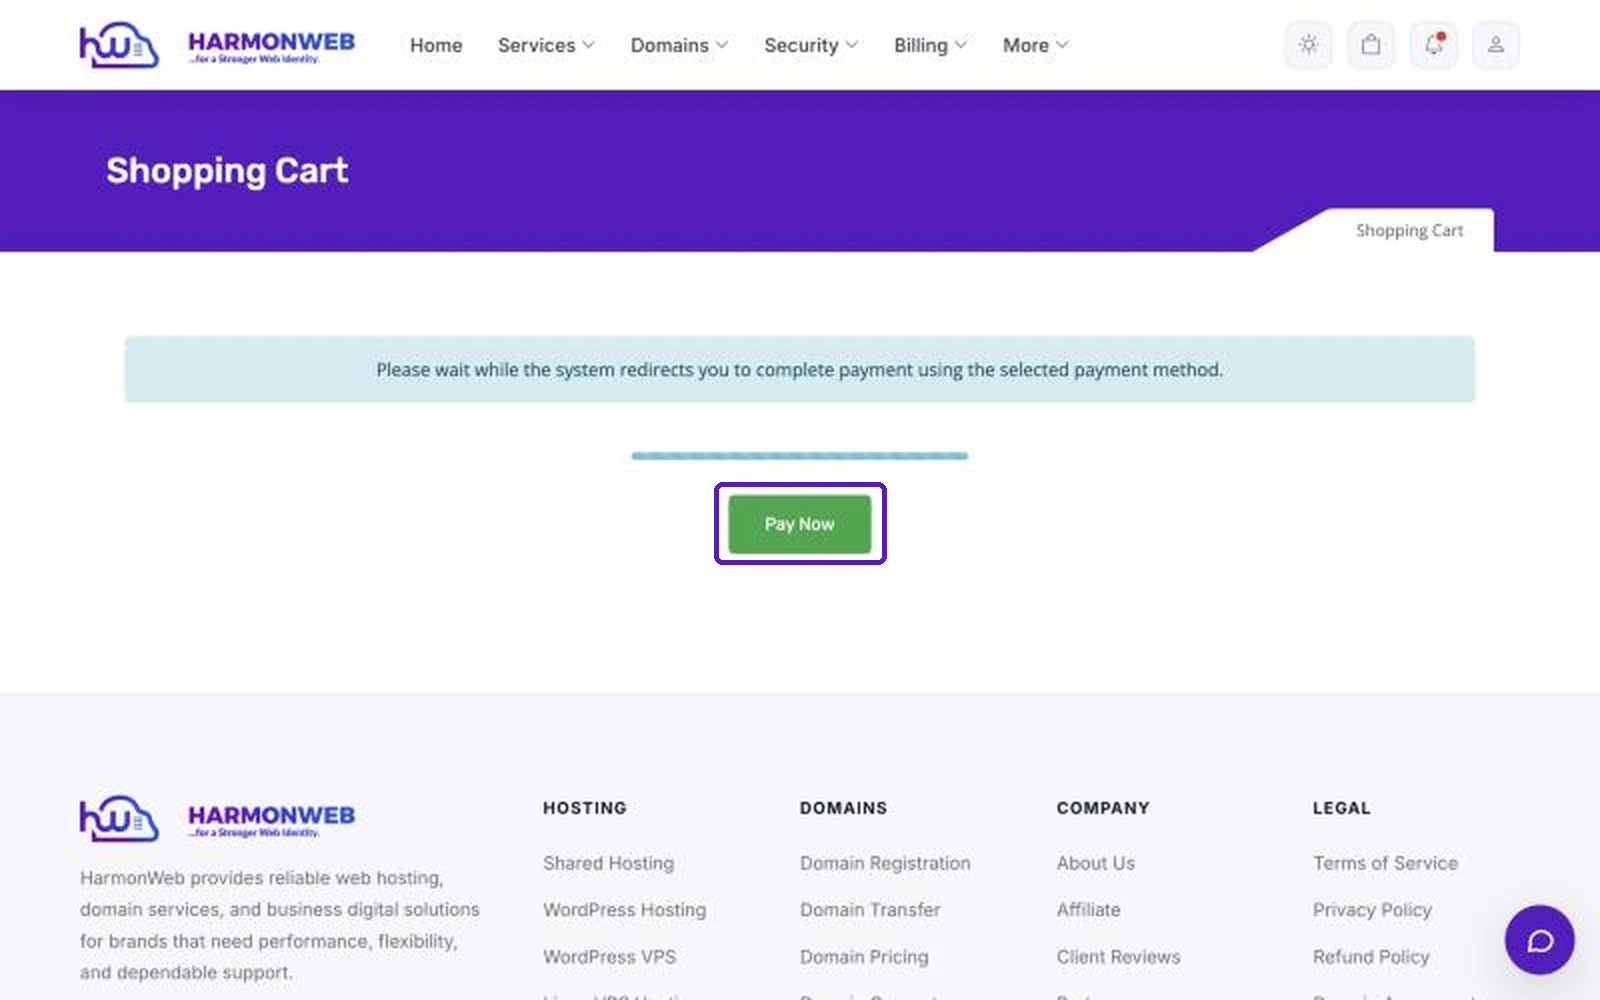
You’ll be taken to the secure payment page for the method you chose. If the redirect doesn’t start on its own, click Pay Now. Follow the steps on the payment page to pay your invoice.
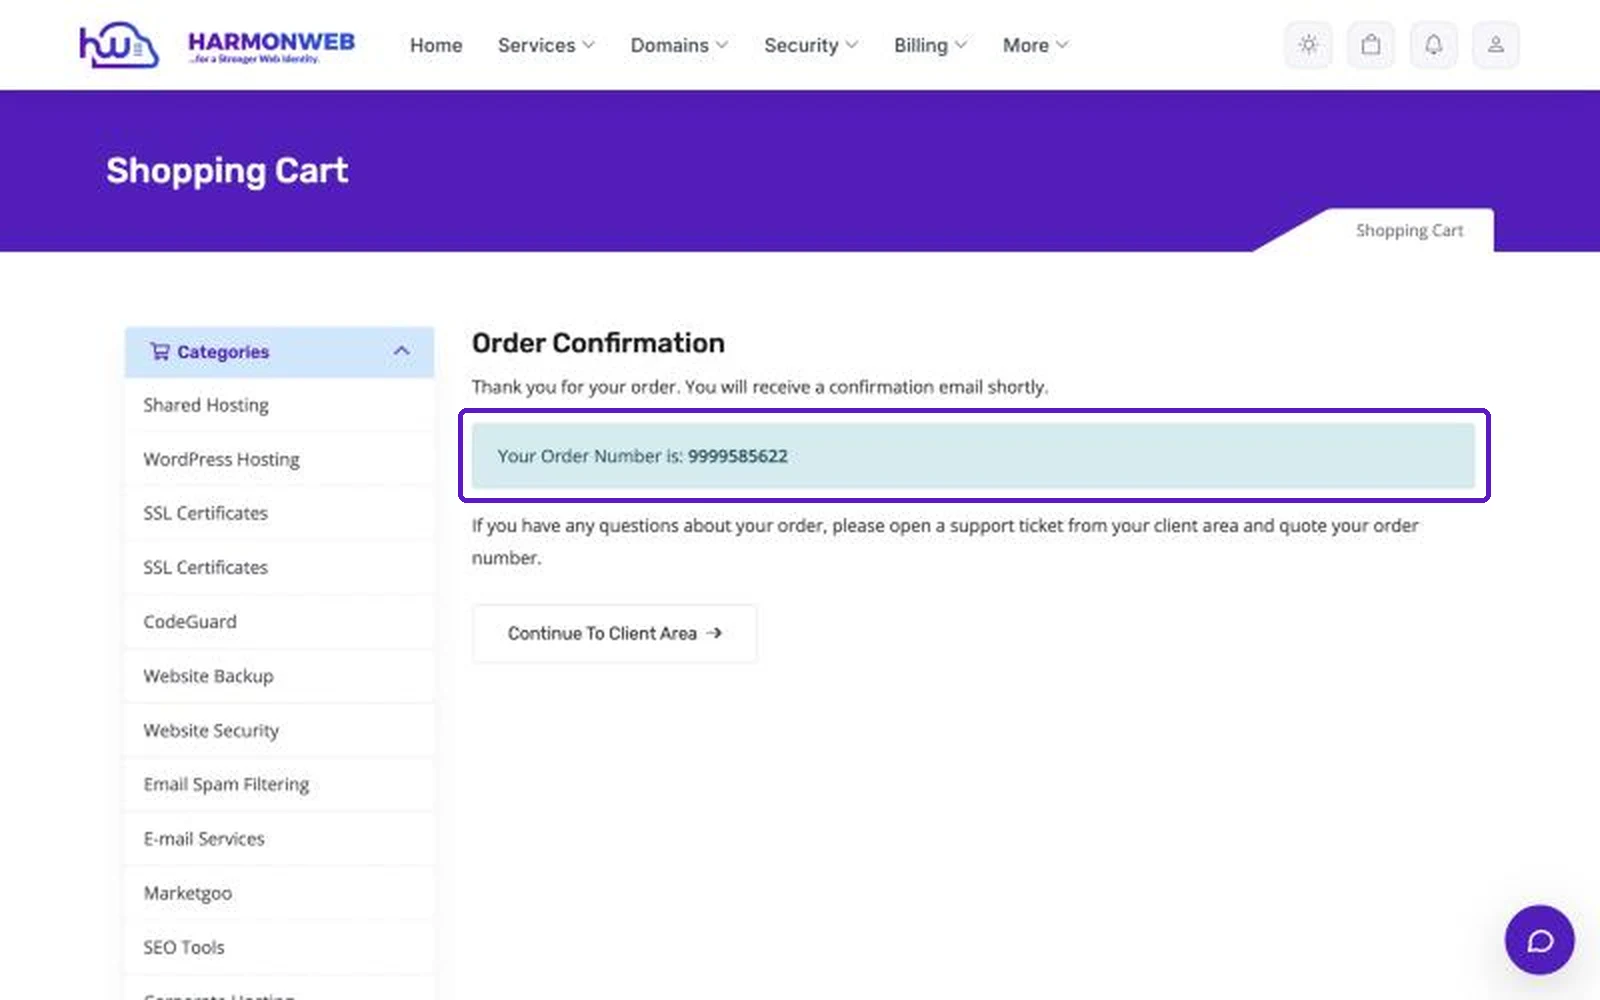
Once your payment is confirmed, you’ll see your Order Confirmation with your order number. Keep it handy in case you need to contact support about your order.
Step 10: Watch your server go live
Click Continue To Client Area. Your new WordPress VPS appears under Your Active Products/Services. Click View Details to see its status, your first payment, your recurring amount and your next due date.
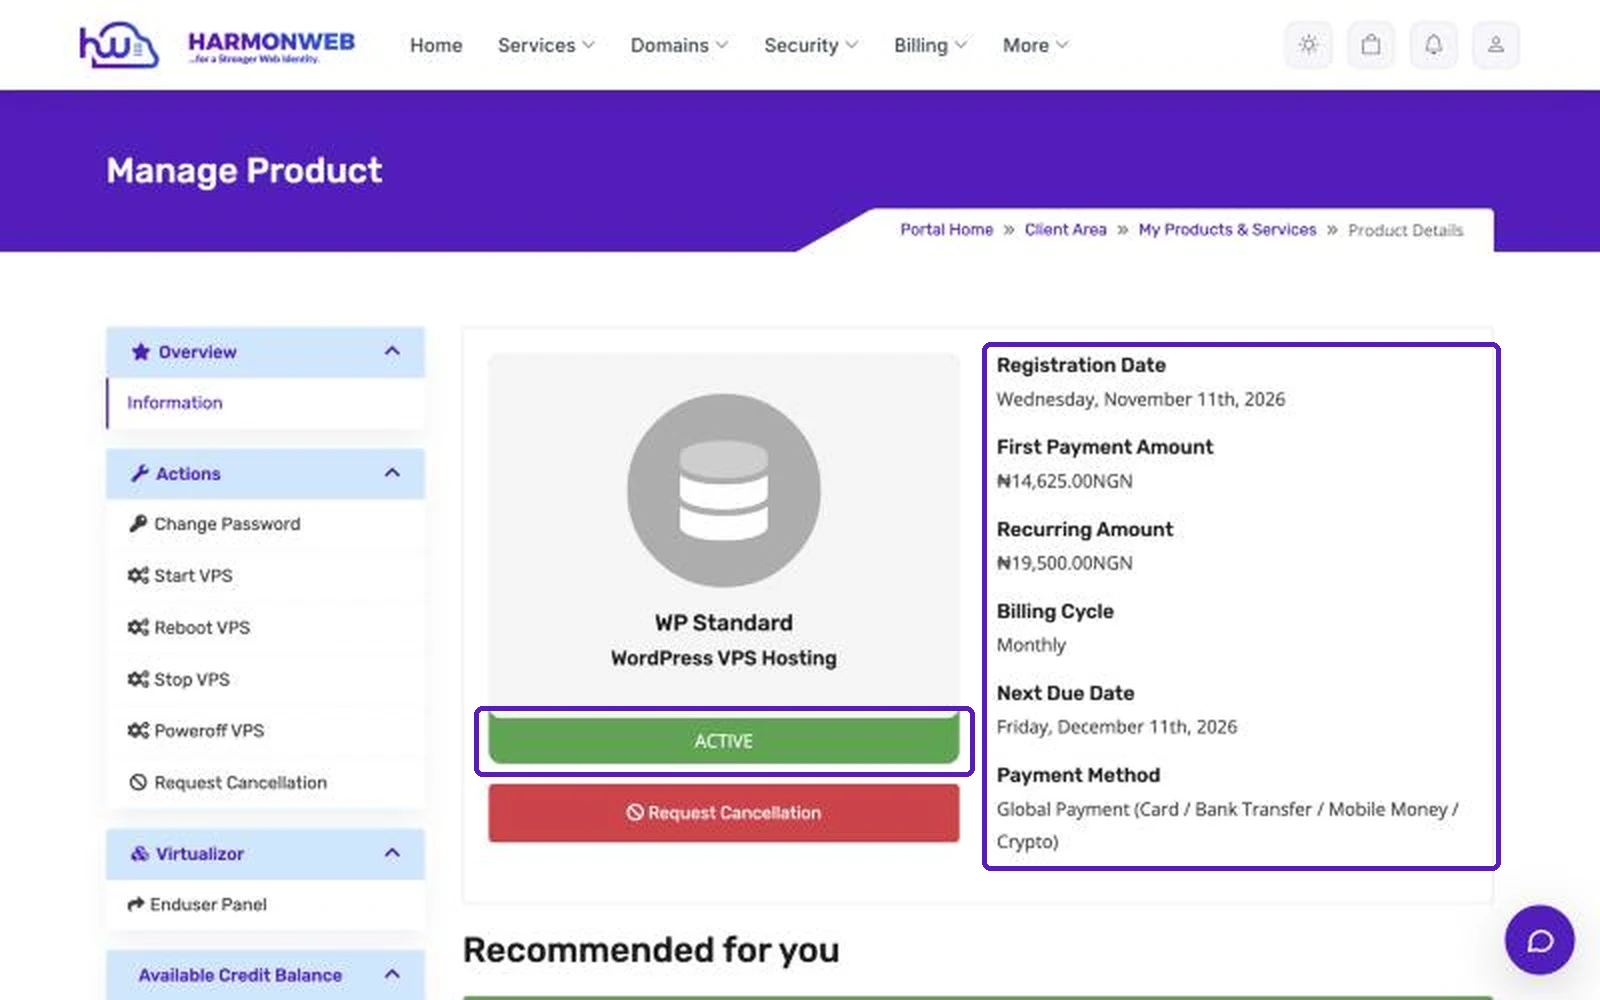
Setup starts automatically as soon as your invoice is paid. In about 15 to 25 minutes, your server is ready with HestiaCP installed, and we’ll send your HestiaCP login details to your account email.
Frequently asked questions
Do I need a coupon code for the 25% discount?
No. The discount is applied automatically in your cart on your first payment. Renewals are at the regular price.
How long does it take to set up my server?
Usually 15 to 25 minutes after your payment is confirmed. You’ll get an email with your HestiaCP login details when it’s ready.
Which hostname should I use?
A subdomain of your domain, such as server.yourdomain.com. It’s just your server’s name and doesn’t affect your website’s address.
Can I upgrade my plan later?
Yes. If your website outgrows your plan, you can move to a bigger one. Open a support ticket from the client area and our team will help.
Where is my server located?
WordPress VPS servers are currently hosted in the USA.
Do I need to manage the server myself?
No. Free server management is included with every WordPress VPS, so we look after the server while you focus on your website. You manage your websites, email and files from HestiaCP.
What to do next
When your welcome email arrives, you’re ready to log in to HestiaCP for the first time, change your password and take a quick tour of the dashboard. That’s the next guide in this series.