Switching from an individual Gmail account to a business email account is one of the key steps in the development of a business organization. A customized email account that employs your business domain is not only more credible, but also allows more control over employee email accounts.
However, changing email service providers is not an easy task if you have used Gmail for years and all your customers’ emails, invoices, attachments, and business communication are stored there. You may find it hard to lose all that correspondence.
You need not sacrifice all that you have written in order to change email providers. Provided that everything is done right, you will be able to transfer your emails from Gmail and save all your information to use it with a more professional email provider.
Table of Contents
8 Important Things That Should Be Considered Before Transitioning From Gmail to Professional Business Email
1. Knowing What Will Happen During the Process of Transitioning from Gmail to Business Email
Before starting the migration process, know the distinction between your current Gmail account and the new business email account.
Your regular Gmail account will have an @gmail.com address, while your business email address will be @yourcompany.com or @[email protected]. It makes your business have one identity, and enables you to have different addresses for different departments.
However, changing your email address doesn’t mean that you get all your messages transferred to the new email address. Your Gmail account and the new business email are two separate accounts.
The following are some of the details that one would wish to keep track of:
- Attachments and key discussions.
- Incoming and outgoing emails.
- Email labels and folders.
- Contacts and address books.
- Forwarded emails.
There are some elements that will not migrate to the new email program in the way they appear in Gmail. For instance, the Gmail labels could turn into folders in the new email program.
2. Moving Gmail Emails into Your New Business Account
Now that you have created your new mailbox, it is time to move the messages that you currently have into it.
The appropriate method will depend on the email service provider you are using, the size of your mailbox, and any migration tools that are available.
Using IMAP for Email Migration
IMAP provides compatibility among email software and enables synchronisation of messages saved on email servers. This way, you can use software that is compatible with Gmail and your new business email service to transfer emails.
Process:
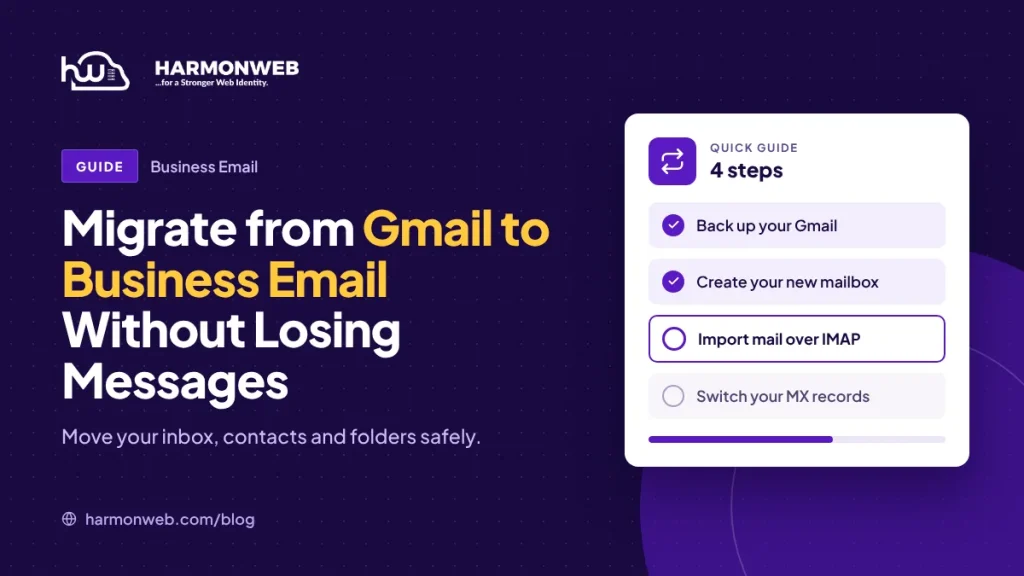
- Add your Gmail account to your email application supporting IMAP protocol.
- Logging in using the authentication method provided by Google.
- Adding your new business email address using the provided server information.
- Ensuring synchronization of both the emails.
- Copy all messages and folders to the new email box.
- Wait until the transfer is complete before disconnecting from either email box.
- Gmail users should utilize applications that support the Google sign-in procedure rather than revealing their passwords to applications that do not support it.
With Gmail, choose an application that will work with Google’s sign-in process rather than using your password with a non-compatible third party application.
Using Email Migration Software
Some web hosting companies have developed software to transfer messages from Gmail into your new mailbox account. Such tools may prove especially useful to firms that have many emails or multiple employees within the business.
Find out if the software is capable of transferring emails that are sent, archived, attachments and folders.
Emails Import from Gmail Backup
In case you have exported your Gmail account using Google Takeout service, then chances are high for importing this backup using some software supporting MBOX files format.
But note that not all email services will allow you to send an MBOX file directly into your account. The alternative would be to open the archive in software that supports this format and then copy your emails to the new account.
No matter which method you select, it is best to copy and not delete your original emails until you have confirmed that everything has been moved properly.
3. Select a Suitable Professional Business Email Service Provider
The service provider chosen will dictate how easy it is to migrate messages and manage communications after that.
An email service provider which will enable the creation of custom domain emails, good email delivery, good mailbox storage capacity, and secure account access must be selected. In addition to this, the ability of the host to provide migration services and/or use of IMAP to exchange emails should also be confirmed.
Look at these critical elements:
- Storage Space: It should be able to hold your current mail and any mail that you will receive in the future.
- Security: Check whether there is spam protection, secure connectivity, and multi-factor authentication.
- Technical Support: Select an organization that will be able to help you migrate and configure your account.
- Alternative backup methods: Backups can provide safety to your important business emails.
- Compatibility: Verify whether the service supports applications like Outlook and Thunderbird
If you already have a custom domain set up on your site, see if your web host offers professional email hosting services for the convenience of managing everything under one roof.
4. Setting Up a New Email Account for Your Business
Once the service provider is chosen, the next step involves setting up the new email account before transferring your Gmail emails. The first thing that you should do is to verify that you have full access to your business domain name.
Afterward, choose an email address that will suit your company or individual within the company.
Set up the mail box according to the configuration provided by your provider. It will be either creating a webmail account or configuring the email client software via IMAP/SMTP. Login to verify that the mailbox is working properly and check the storage available.
Avoid setting up the MX records for your domain at an earlier stage. Your MX records indicate where the emails are going to be delivered. Make all preparations for your mailbox before changing the DNS settings.
5. Configure Your Domain and Email Delivery Settings
Configure your domain to utilize your new email services after you have done everything else mentioned above.
Update MX Records for Your Domain
MX records specify to other mail servers where to deliver e-mails destined for your company’s domain.
Your service provider will give you the necessary MX records. You will simply add them to your domain through the DNS management interface.
Propagation for DNS updates could be a bit slow. Until that happens, keep an eye on the mailboxes wherever possible, to ensure you receive new emails.
SPF, DKIM, and DMARC Setup
These security protocols provide protection for your domain and increase the reliability of email sending.
SPF: Identifies the mail servers authorized to send emails on behalf of your domain name.
DKIM: Attaches a digital signature that enables verifying the authenticity of emails.
DMARC: Offers guidance on how to deal with unauthenticated emails.
Add these DNS records as per the directions given by your provider. In case your website or other applications using your domain are sending out emails, make sure to authorize them. Never create more than one SPF record for a single domain.
Forwarding Your Gmail Email to Your New Business
Forward your e-mails from your former Gmail account to your new business account. You will be able to get your e-mails from those people that still use your former account.
Although forwarding will not substitute for the message transfer, it will contribute to better continuity in the process of migration.
6. Testing the Business Email After Migration
Do not think that migration has been completed just because you have access to the new mailbox. You need to check its major functions to make sure that your emails are delivered successfully.
Begin by looking in your inbox, outgoing mail, stored emails and attachments to see if you can access the email content.
Afterwards, send a test mail from the new email address to another account. Answer the test mail and check if the answer is received properly. Likewise, send a message from an outside email address to check incoming delivery.
If your website includes any contact forms, sign up notifications, or auto-responders, be sure to check those also. The SMTP settings will have to be updated to connect your website with the new email server.
Finally, ensure that you have configured email authentication and changed the contact information on your website, bills, social media accounts, among other places, to reflect your business address.
7. Maintain Your Old Gmail Account during the Migration Process
Do not delete your old Gmail account right away after migration. Other customers or business acquaintances might still be mailing to your old address. There might be some instances where some documents or e-mails were not moved successfully.
Ensure that you can access the account and keep checking both mailboxes throughout the transfer process. Inform your customers, suppliers, and business associates about your new address. You can also configure an auto-reply on your Gmail to inform everyone about your new business email address.
Before making the decision of closing the account, ensure that your messages and contacts are safe and that there is nothing that is linked to the old email address and is important. Don’t forget about changing recovery emails for Gmail accounts.
8. Backup your Gmail Mailbox Before Migration
It is essential that you always backup your mailbox before performing any email migration because even though the migration tool tries to transfer all emails, some emails can be lost.
How To Export Your Gmail Messages
With Google Takeout, you will be able to download an archive of your Gmail data.
- Sign in to your Google account.
- Navigate to Google Takeout.
- Choose Gmail among the available services.
- Select the data from your Gmail account that you wish to back up.
- Select the format in which you would like to receive your exported mail data.
- Create and download the archive.
Gmail emails may be exported in the MBOX format, which is readable by email applications that are compatible.
How to Backup Your Contacts and Attachments
Export your contacts individually from Google Contacts in a format compatible with your new email application.
Also, make sure to highlight the attachments and business communication which would require special consideration. Verify the access to your archived data, and then store it in an external location other than Gmail.
Keep in mind that Google Takeout provides you with a duplicate of your information. It doesn’t automatically import them to your new email and delete them from Gmail.
Conclusions
Changing from Gmail to a business email account does not imply that you lose all those years of valuable correspondence. If you have the right approach for backing up your emails and the appropriate way of transferring, then your correspondence will stay accessible to you.
The important thing is not to rush the whole thing. Get your new mail box ready, get your Gmail data secure, move your emails, set up your domain, and only then change completely.
Are you ready to add some professionalism to your business through email identity?
Through our website at HarmonWeb, we offer services for hosting that will ensure that your business has an identity in the online world and even take care of your domain. Select a suitable hosting plan and get a professional e-mail address which represents your brand name and provides your customers a standard means of contacting you.