In this tutorial, I will show you how to connect your custom domain to Blogger.
Google offers a free publishing platform that allows you to publish your blog called Blogger. With this platform, you can publish all blog content and posts. It is a great way to share your blogging passion. However, it does come with some downsides.
These blogs created on Blogger are usually hosted by Google as a subdomain of blogspot.com. If your blog name is myownblog, it will appear like myownblog.blogspot.com. But if your Blogger site is connected to your custom domain, you won’t be stuck with the .blogspot.com.
Before I get started, here are the things you need to run the process:
- A Blogger account
- A registered domain name
If you have all of them available, let’s get started, and I will guide you through the steps to connect your custom domain to Blogger.
How To Connect Your Custom Domain To Blogger
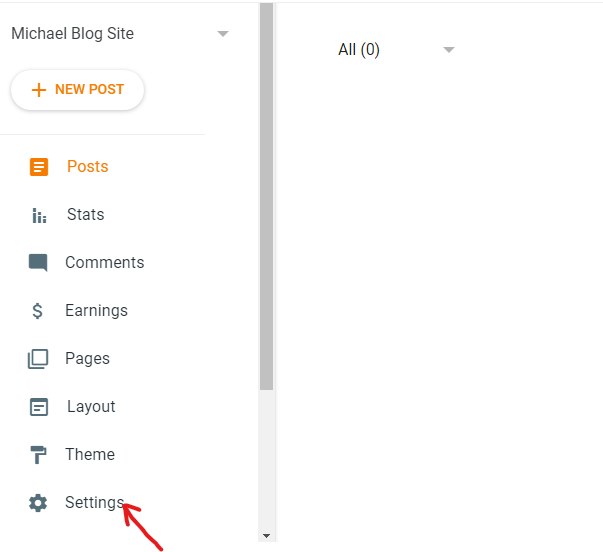
- Log into your Blogger account and click on Settings.
- In the Settings, go to the Publishing section and click Custom Domain.
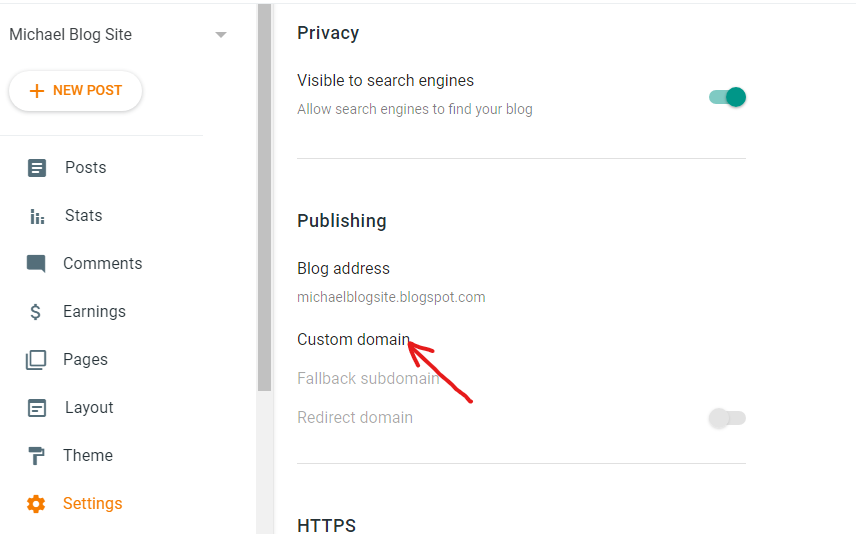
- In the provided pop-up text field, enter the custom domain name and click Save.
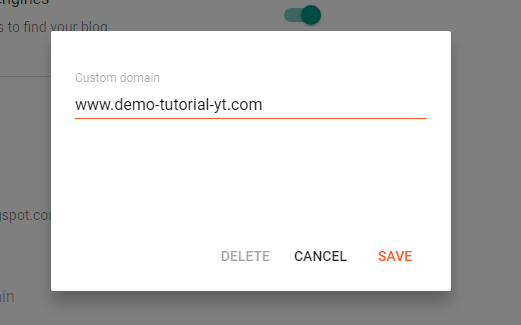
When entering the domain name, don’t forget to add www at the beginning.
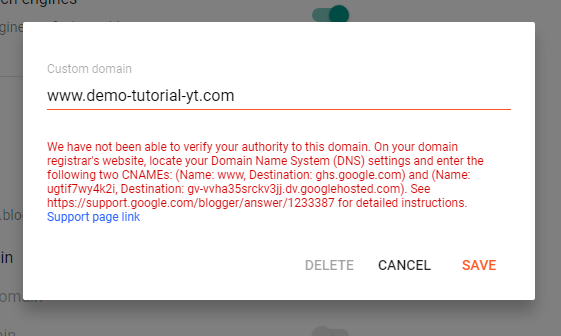
- When you click Save, an error will appear on the screen with the two required CNAME records.
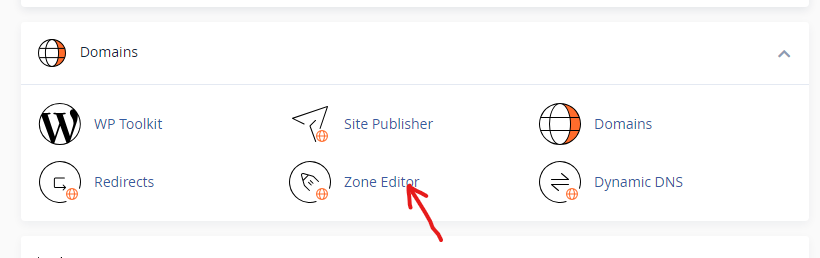
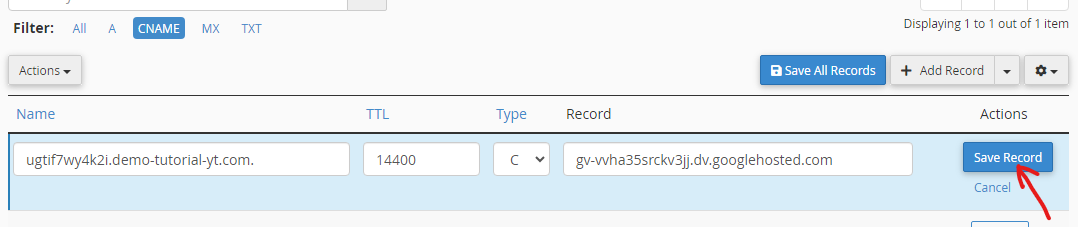
- Now, log into the cPanel of your custom domain. Go to the Domain section and select Zone Editor.
- Go to the custom domain and clear all CNAME records linked to the domain. Create a new CNAME record and add the first CNAME record obtained from the error message. Then click on Save Record.
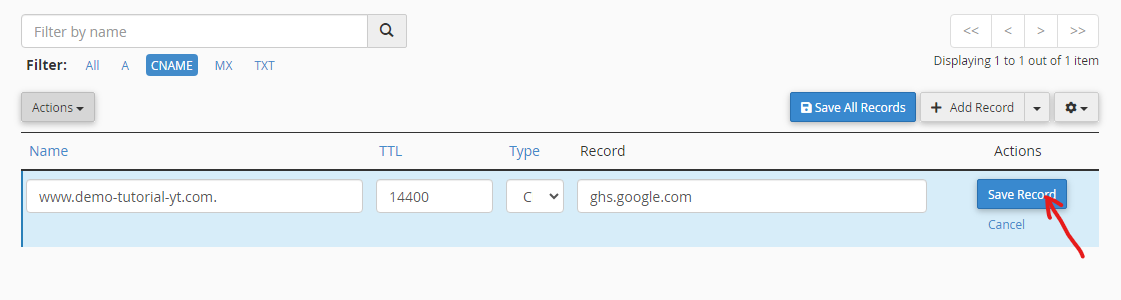
- Create another CNAME record and add the second CNAME record obtained from the error message. Then click on Save Record.
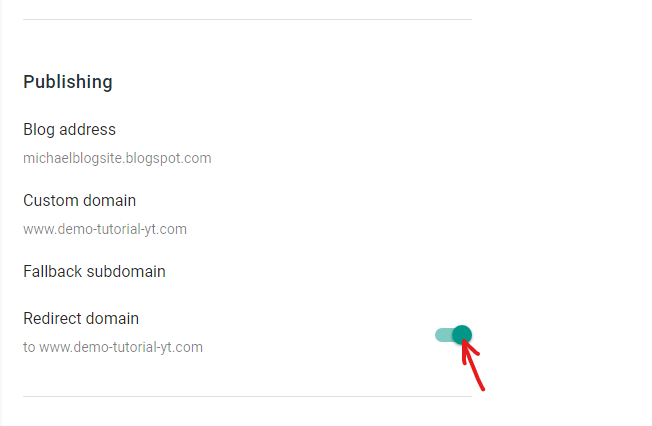
- After adding both CNAME records, return to your Blogger account and click Save. This is what will appear next.
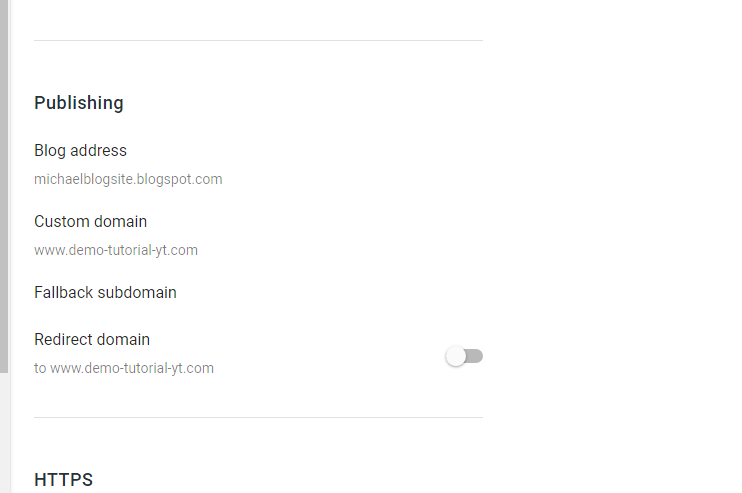
- You should now enable redirect so that each time someone clicks on your Blogger link, they will be redirected to your custom domain.
- Now, wait at least 24 hours after activating your DNS settings for it to fully propagate.
You have now successfully connect your custom domain to Blogger. If you have questions or run into issues during the process, you can leave your question in the comment section. I would love to hear from you.