Do you want to Learn how to create a sitemap in WordPress and submit it to Google search console?
Sitemap helps display all your pages so that Search Engines like Google, Bing or Yandex can index it. Each time you create new post or Update your WordPress website, search engines will be notified through your website sitemap.
In this article we will show you how to create and submit sitemap to Google search console in WordPress.
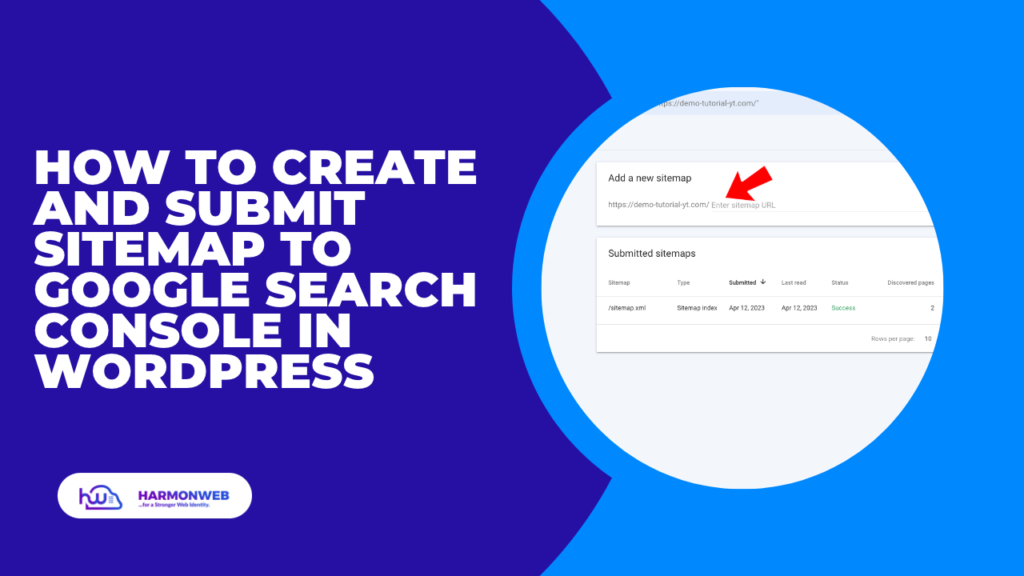
How to Create a Sitemap in WordPress
When you create a website with WordPress, a default sitemap will be created which you can access by adding /sitemap.xml to your domain. Mostly WordPress default sitemap is not SEO friendly. Therefore, in this article we will create a SEO friendly and optimised sitemap using AIOSEO plugin and XML Sitemap plugin.
Method 1: How to Create a Sitemap in WordPress Using AIOSEO Plugin
AIOSEO plugin is a WordPress plugin that helps guide you on simple steps you need to build up your website SEO performance. There are other plugins with the same functionalities like AIOSEO. For example there is Yoast SEO and Rank Math.
To get Started with AIOSEO you need to navigate to plugins>Add New. Using the search option, search for AIOSEO.
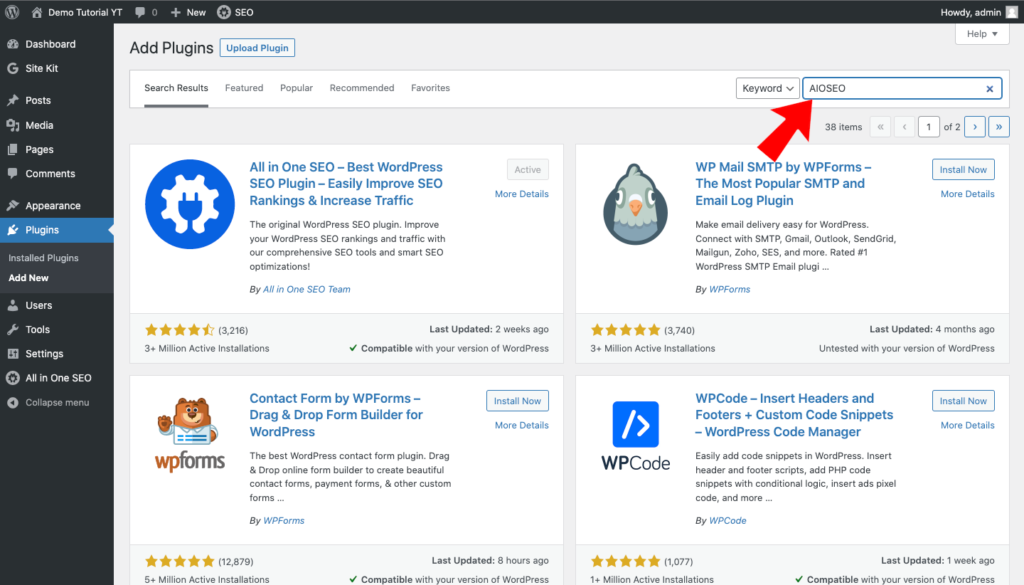
Click install and activate the plugin. Upon activation, hover on “All in One SEO” from your WordPress admin menu bar and click on sitemap.
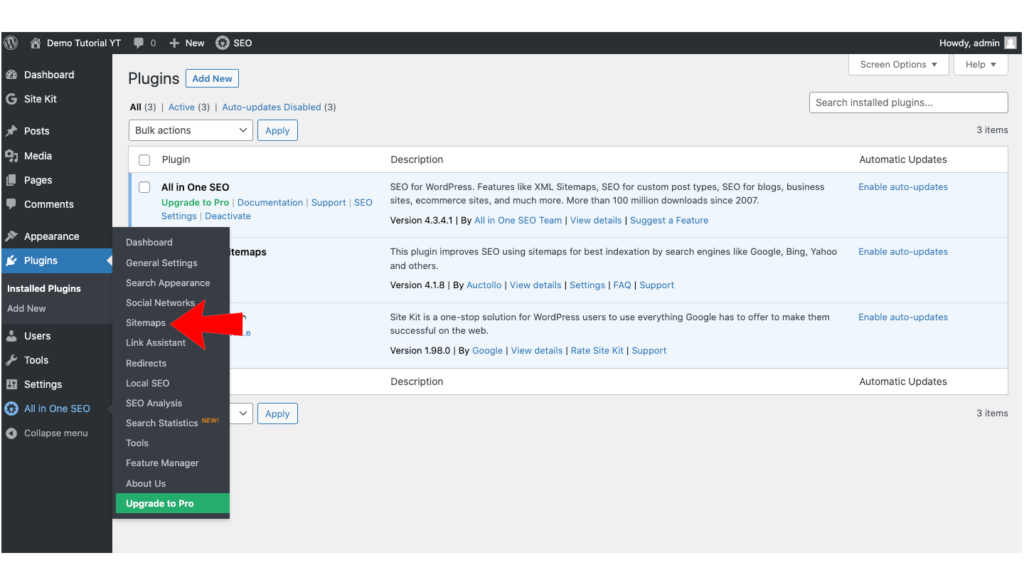
When you click on sitemap, you will see over five different types of sitemap. This is the major reason why AIOSEO plugin is choose over Yoast SEO and Rank Math. You can possible enable all the sitemap types and add the to your Google search console. But some of them are premium which you need to purchase the premium version of AIOSEO to have access to it.
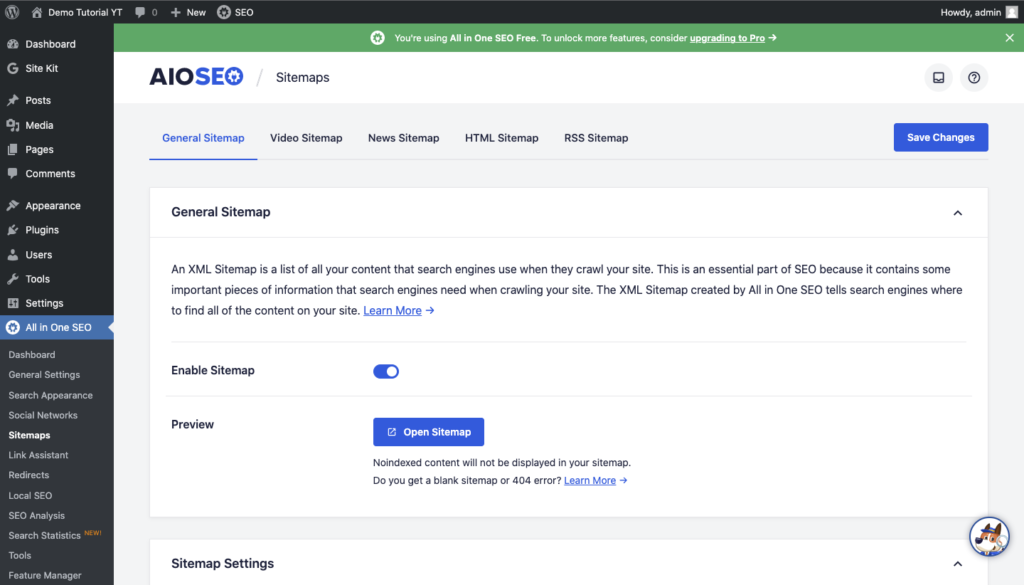
In this article, we will be using only the general sitemap. You can click on “open sitemap” to view the sitemap and copy the sitemap url, or right click to copy the url.
Method 2: How to Create a Sitemap in WordPress Using XML Sitemap Plugin
XML sitemap plugin comes with amazing functionalities which will help you create an SEO friendly sitemap for your WordPress site. It has the option where you can choose how frequently you want to update your sitemap including pages, post and categories you want to list or remove from your sitemap.
To get started with this plugin, you need to Install and activate it by navigating to plugins>add new from your WordPress admin menu bar.
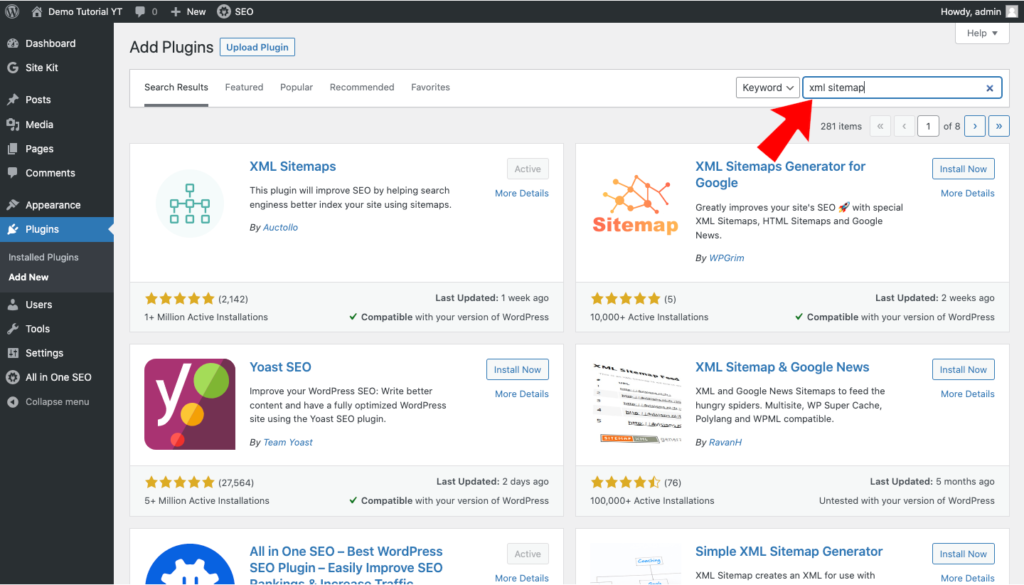
Upon activation, hover on settings from your WordPress admin menu and click on XML-sitemap. In this plugin you only need to make few changes. The first changes you can make is by scrolling down to “Sitemap Content”. In this settings, you can choose what you want to include in your sitemap. You can enable the ones displayed in the image below.
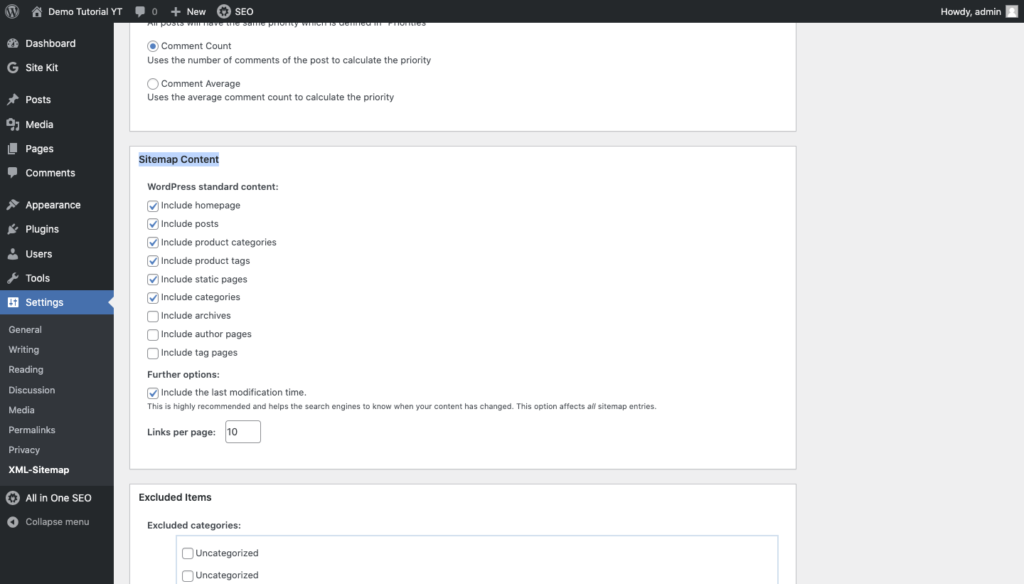
The second changes you can make is the “Change Frequencies”. In this option, you can choose if you want to be updating your sitemap pages hourly, daily, weekly or yearly.
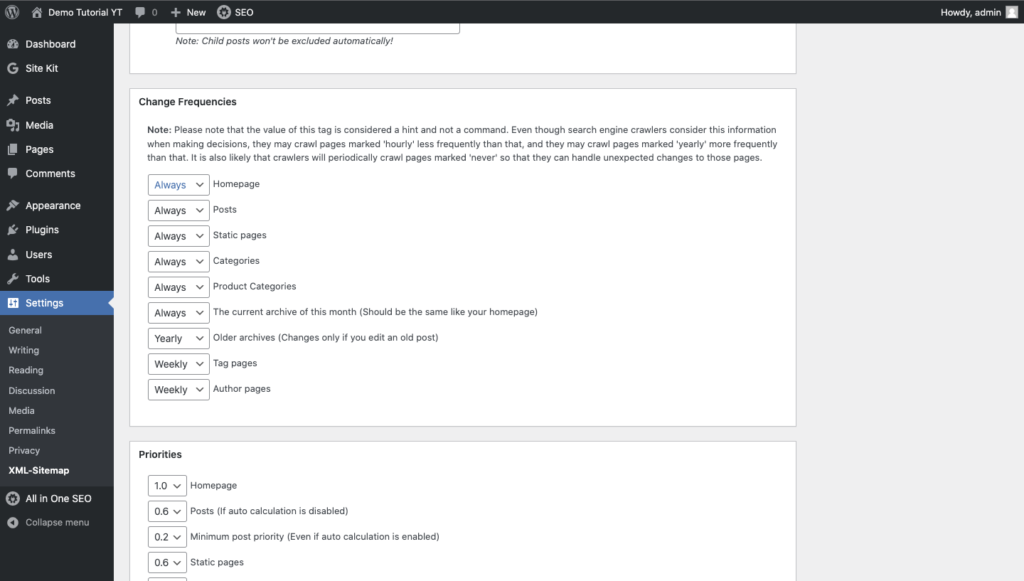
This doesn’t determine when google index or crawl your website.
How to Submit Sitemap to Google Search Console
Google search console is a free web service that help website owners monitor how their website is performing on Google search Engine. This includes tracking total pages indexed, page impressions and clicks.
Submitting your Sitemap to Google search console will help you notify Google algorithm each time you update your website. To add your sitemap to Google search console, Login to your Google search console dashboard.
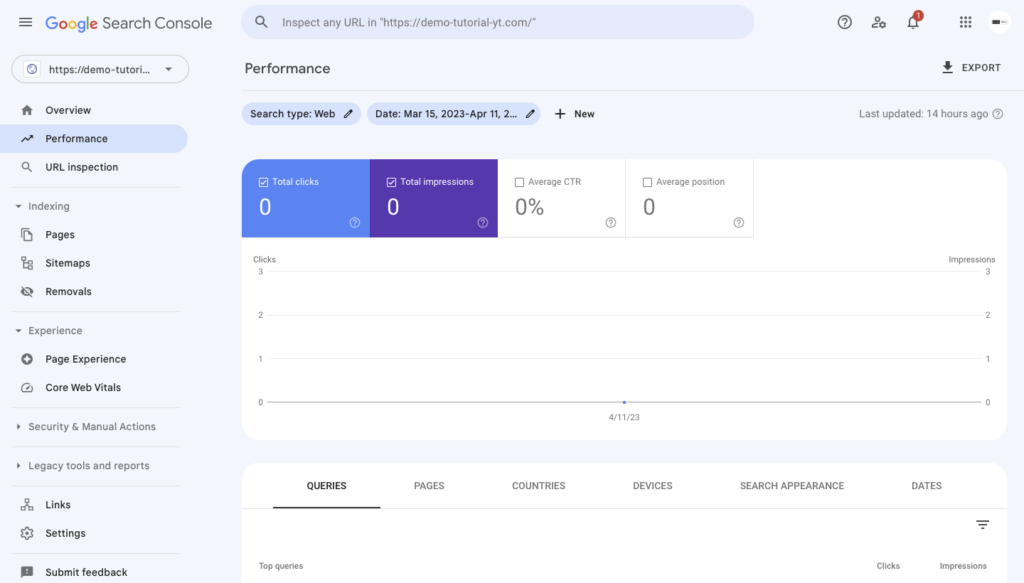
If you have not added your website to search console, you can use the Sitekit by Google Plugin to automate the process. You can learn how to connect your website to Google search console using Sitekit by Google plugin through the video below.
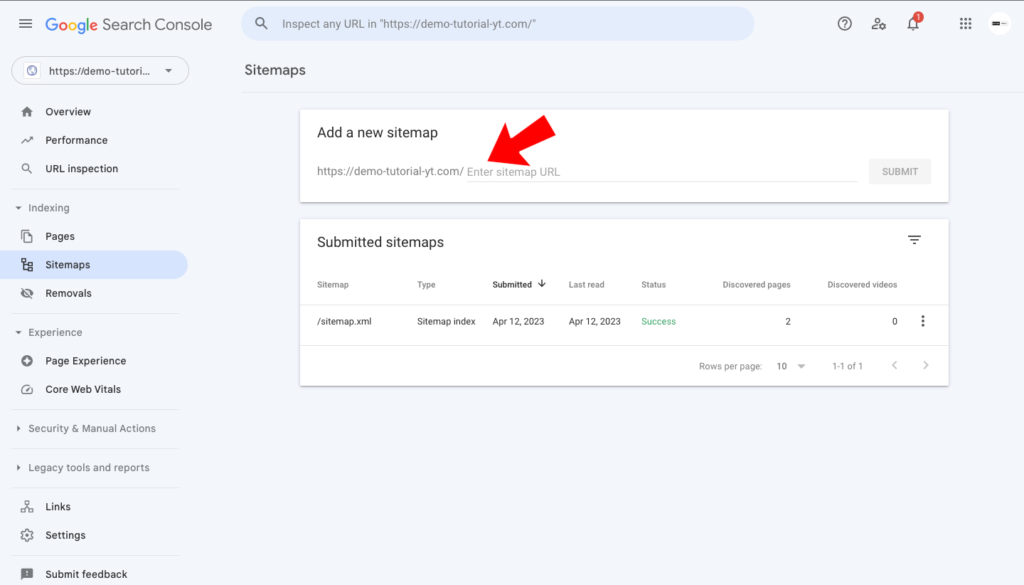
Click on sitemaps, and from the add a new sitemap option. Type “/sitemap.xml” and click submit. If it is showing ” couldn’t fetch” reload the page and it will switch to success.
We hoped this article helped you learn How to Create and Submit Sitemap to Google Search Console in WordPress.
If you liked this article, then please subscribe to our YouTube Channel for more WordPress video tutorials. You can also find us on Facebook.


