
In this tutorial, I will show you how you can create and update A and CNAME records in cPanel.
There are a lot of ways you can get a lot of value from your cPanel and your domains. A lot of people don’t know how powerful the Domain Name System (DNS) is, and this can really limit how you use it.
Before we get started on how to create and update A and CNAME records, let’s understand each one.
What is the A Record?
The A in A Record simply stands for Address and is an important DNS record that is used to map the domain or subdomain name to the IP address of your hosting domain/server.
What is the CNAME Record?
CNAME also referred to as “true name,” is short for canonical names that are often used in place of an A Record. This is the type of DNS record that is used to map the domain or subdomain name to the hosting domain/server.
However, though the CNAME Record can be used in place of the A Record, they are different from each other. CNAME shows the domain, while A Record shows the IP address of the domain.
Now that we have understood what the A Record and CNAME Record are, let’s get started.
How To Create and Update A and CNAME Records in cPanel
How to add an A Record in cPanel
- To get started, you log into your cPanel. You can log into your cPanel directly or through your client area.
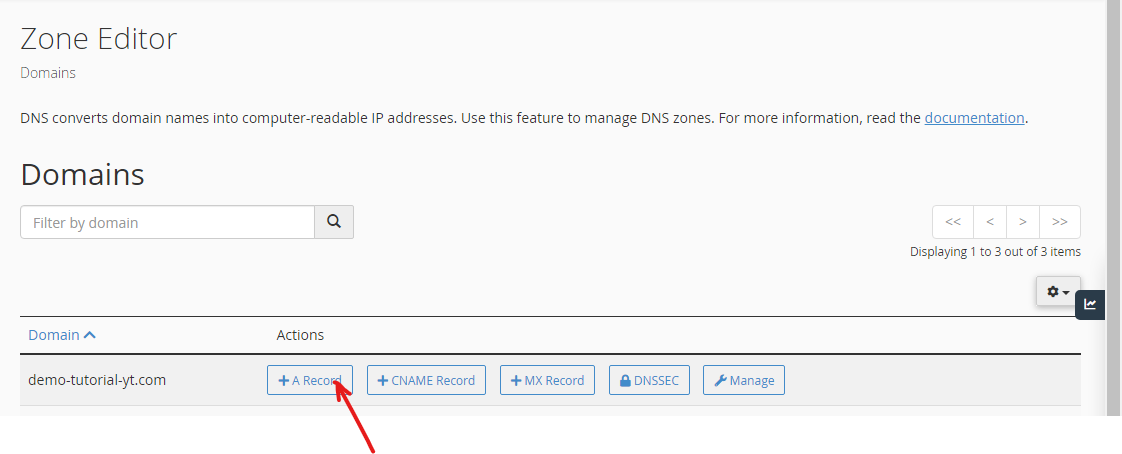
- Once you are logged in, go to the Domains section and select Zone Editor.

- In the Zone Editor, scroll down to the domain or subdomain that you want to create an A Record for and click on A Record.
- A pop-up text field will appear. Enter your domain or subdomain name and the IP address that you want to connect to in the provided text boxes.
- When you have completed these, you click on the Add An A Record button to set the A Record.
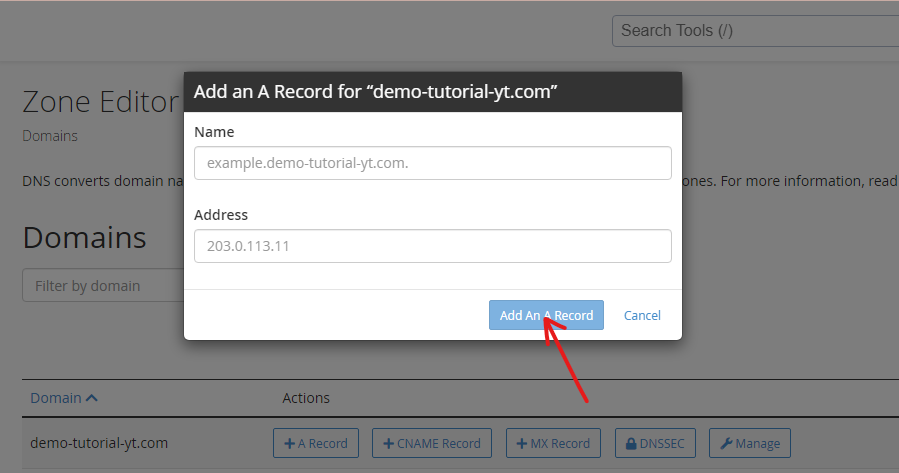
- Once you have completed this, you will get the message that you have successfully added the A record.
How to add a CNAME in cPanel
- For the CNAME, you log into your cPanel.
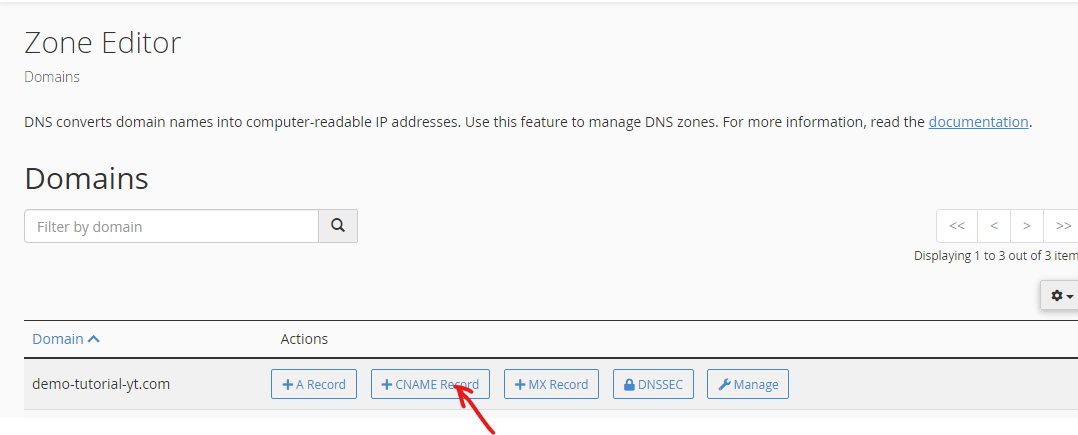
- Go to the Domains section and select Zone Editor.

- In the Zone Editor, go to the domain or subdomain that you want to create a CNAME Record for and click on CNAME Record.
- A pop-up text field will appear. Enter your domain name in the Name field and the name of the domain that you want to connect your domain to in the CNAME field.
- When you are done, click on the Add A CNAME Record button.
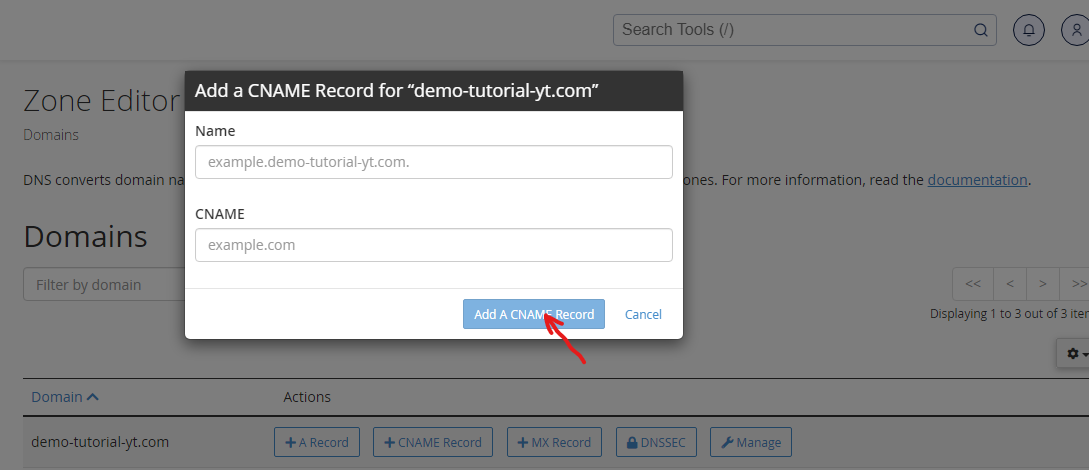
- You have now successfully created a CNAME Record for your domain.